Posts Tagged ‘novena’

Stretch Goals for Novena Campaign

Wednesday, April 23rd, 2014

First, a heartfelt “thank you” to all those who have backed our crowdfunding campaign to bring Novena-powered open computing devices to the world. xobs and I are very flattered to have reached almost 70% of our goal already.

One excellent outcome of the campaign is a lot of people have reached out to us to extend the Novena platform and make it even better, and so we’re offering a diverse range of stretch goals to provide an even better open laptop for all walks of users.

Stretch #1: Partnering with Jon Nettleton for Open 2D/3D Graphics Drivers on Novena: +$50k ($300k total)

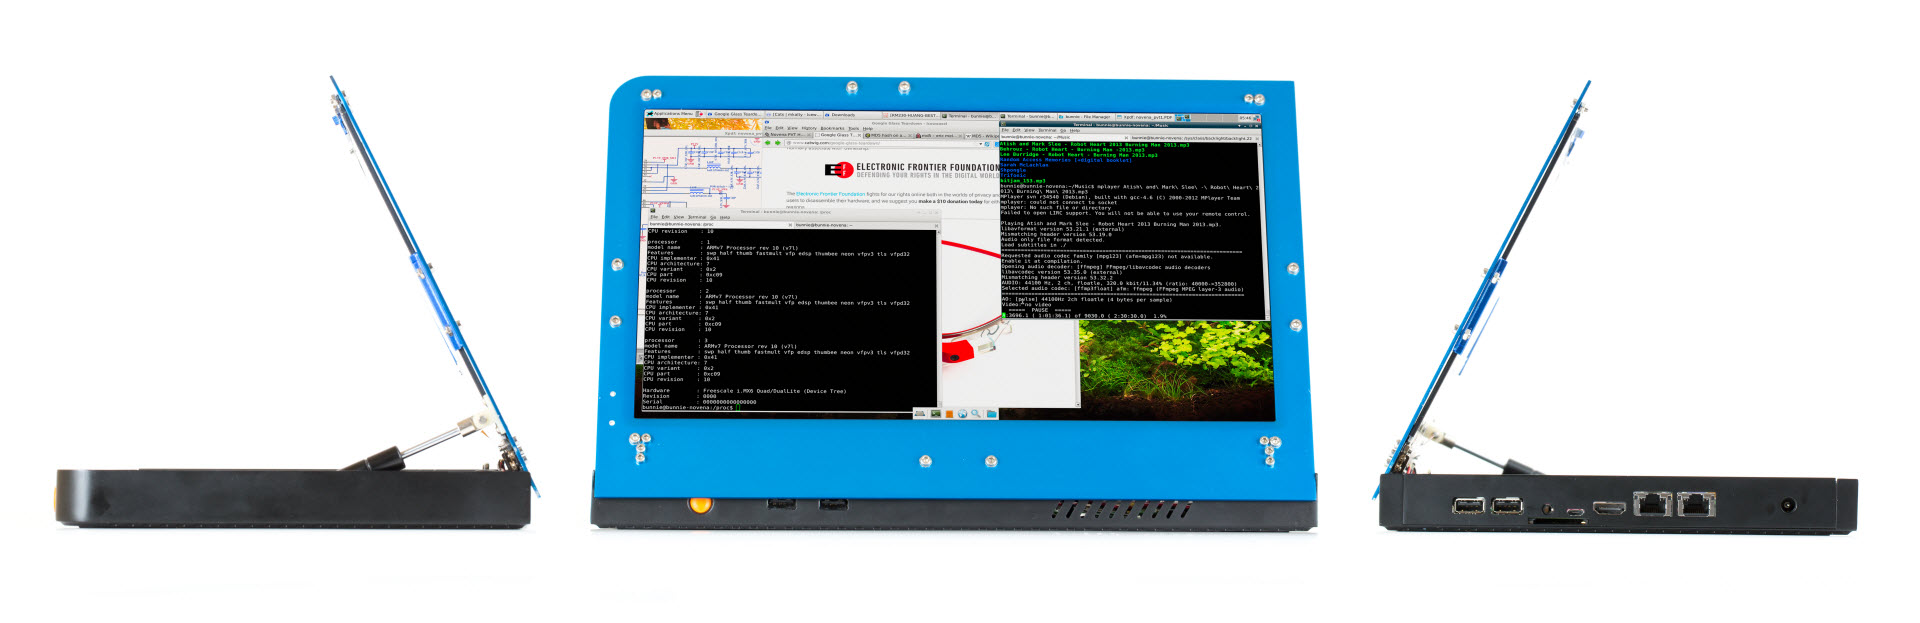
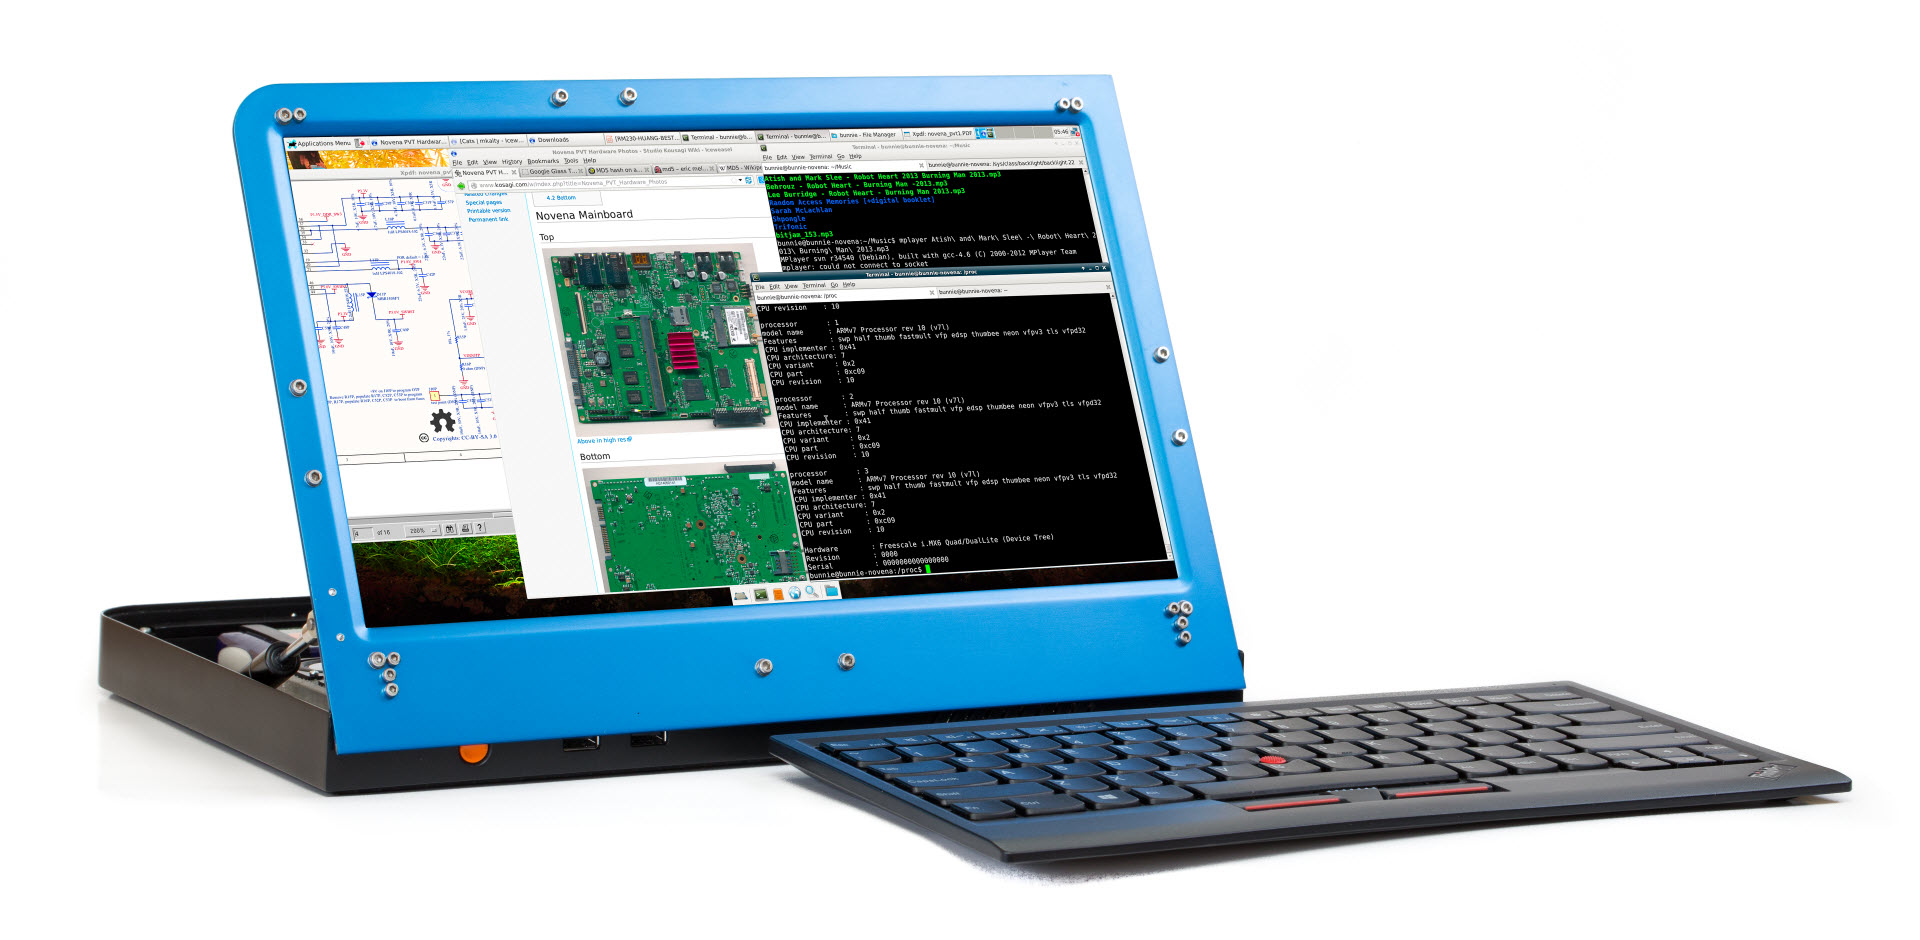
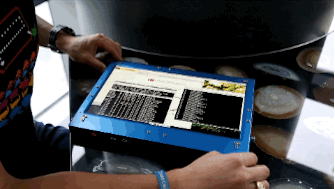
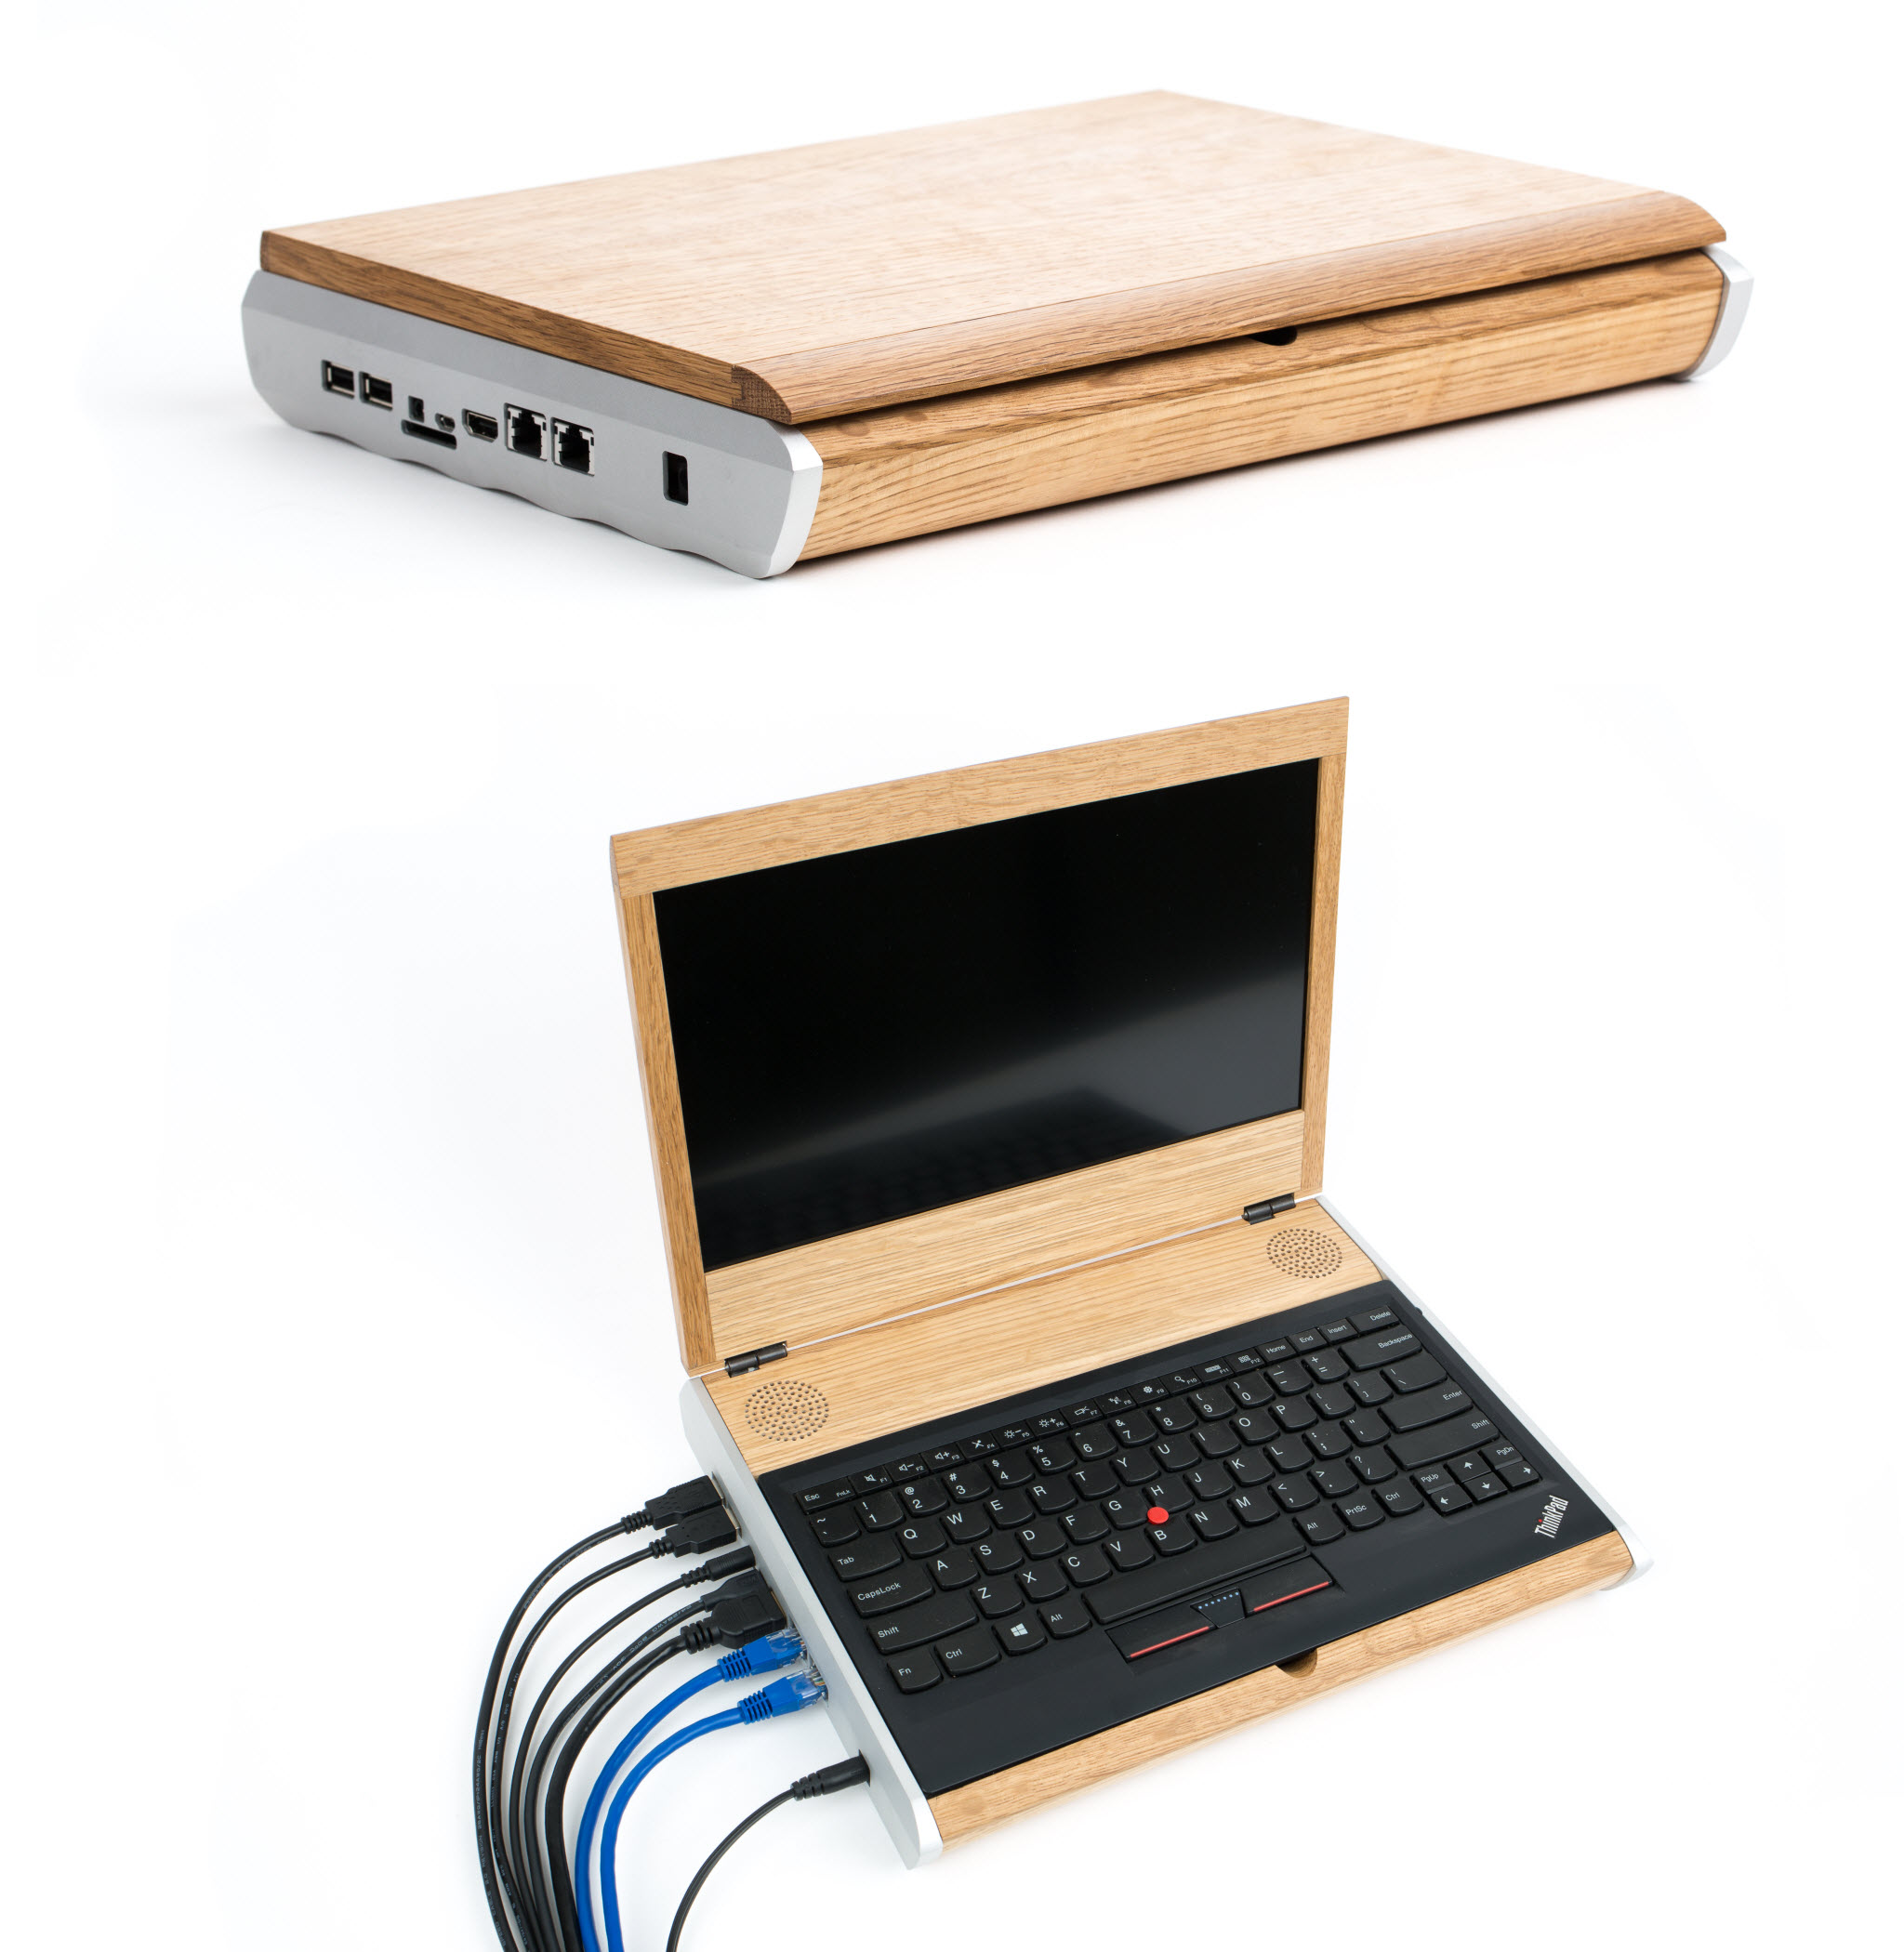
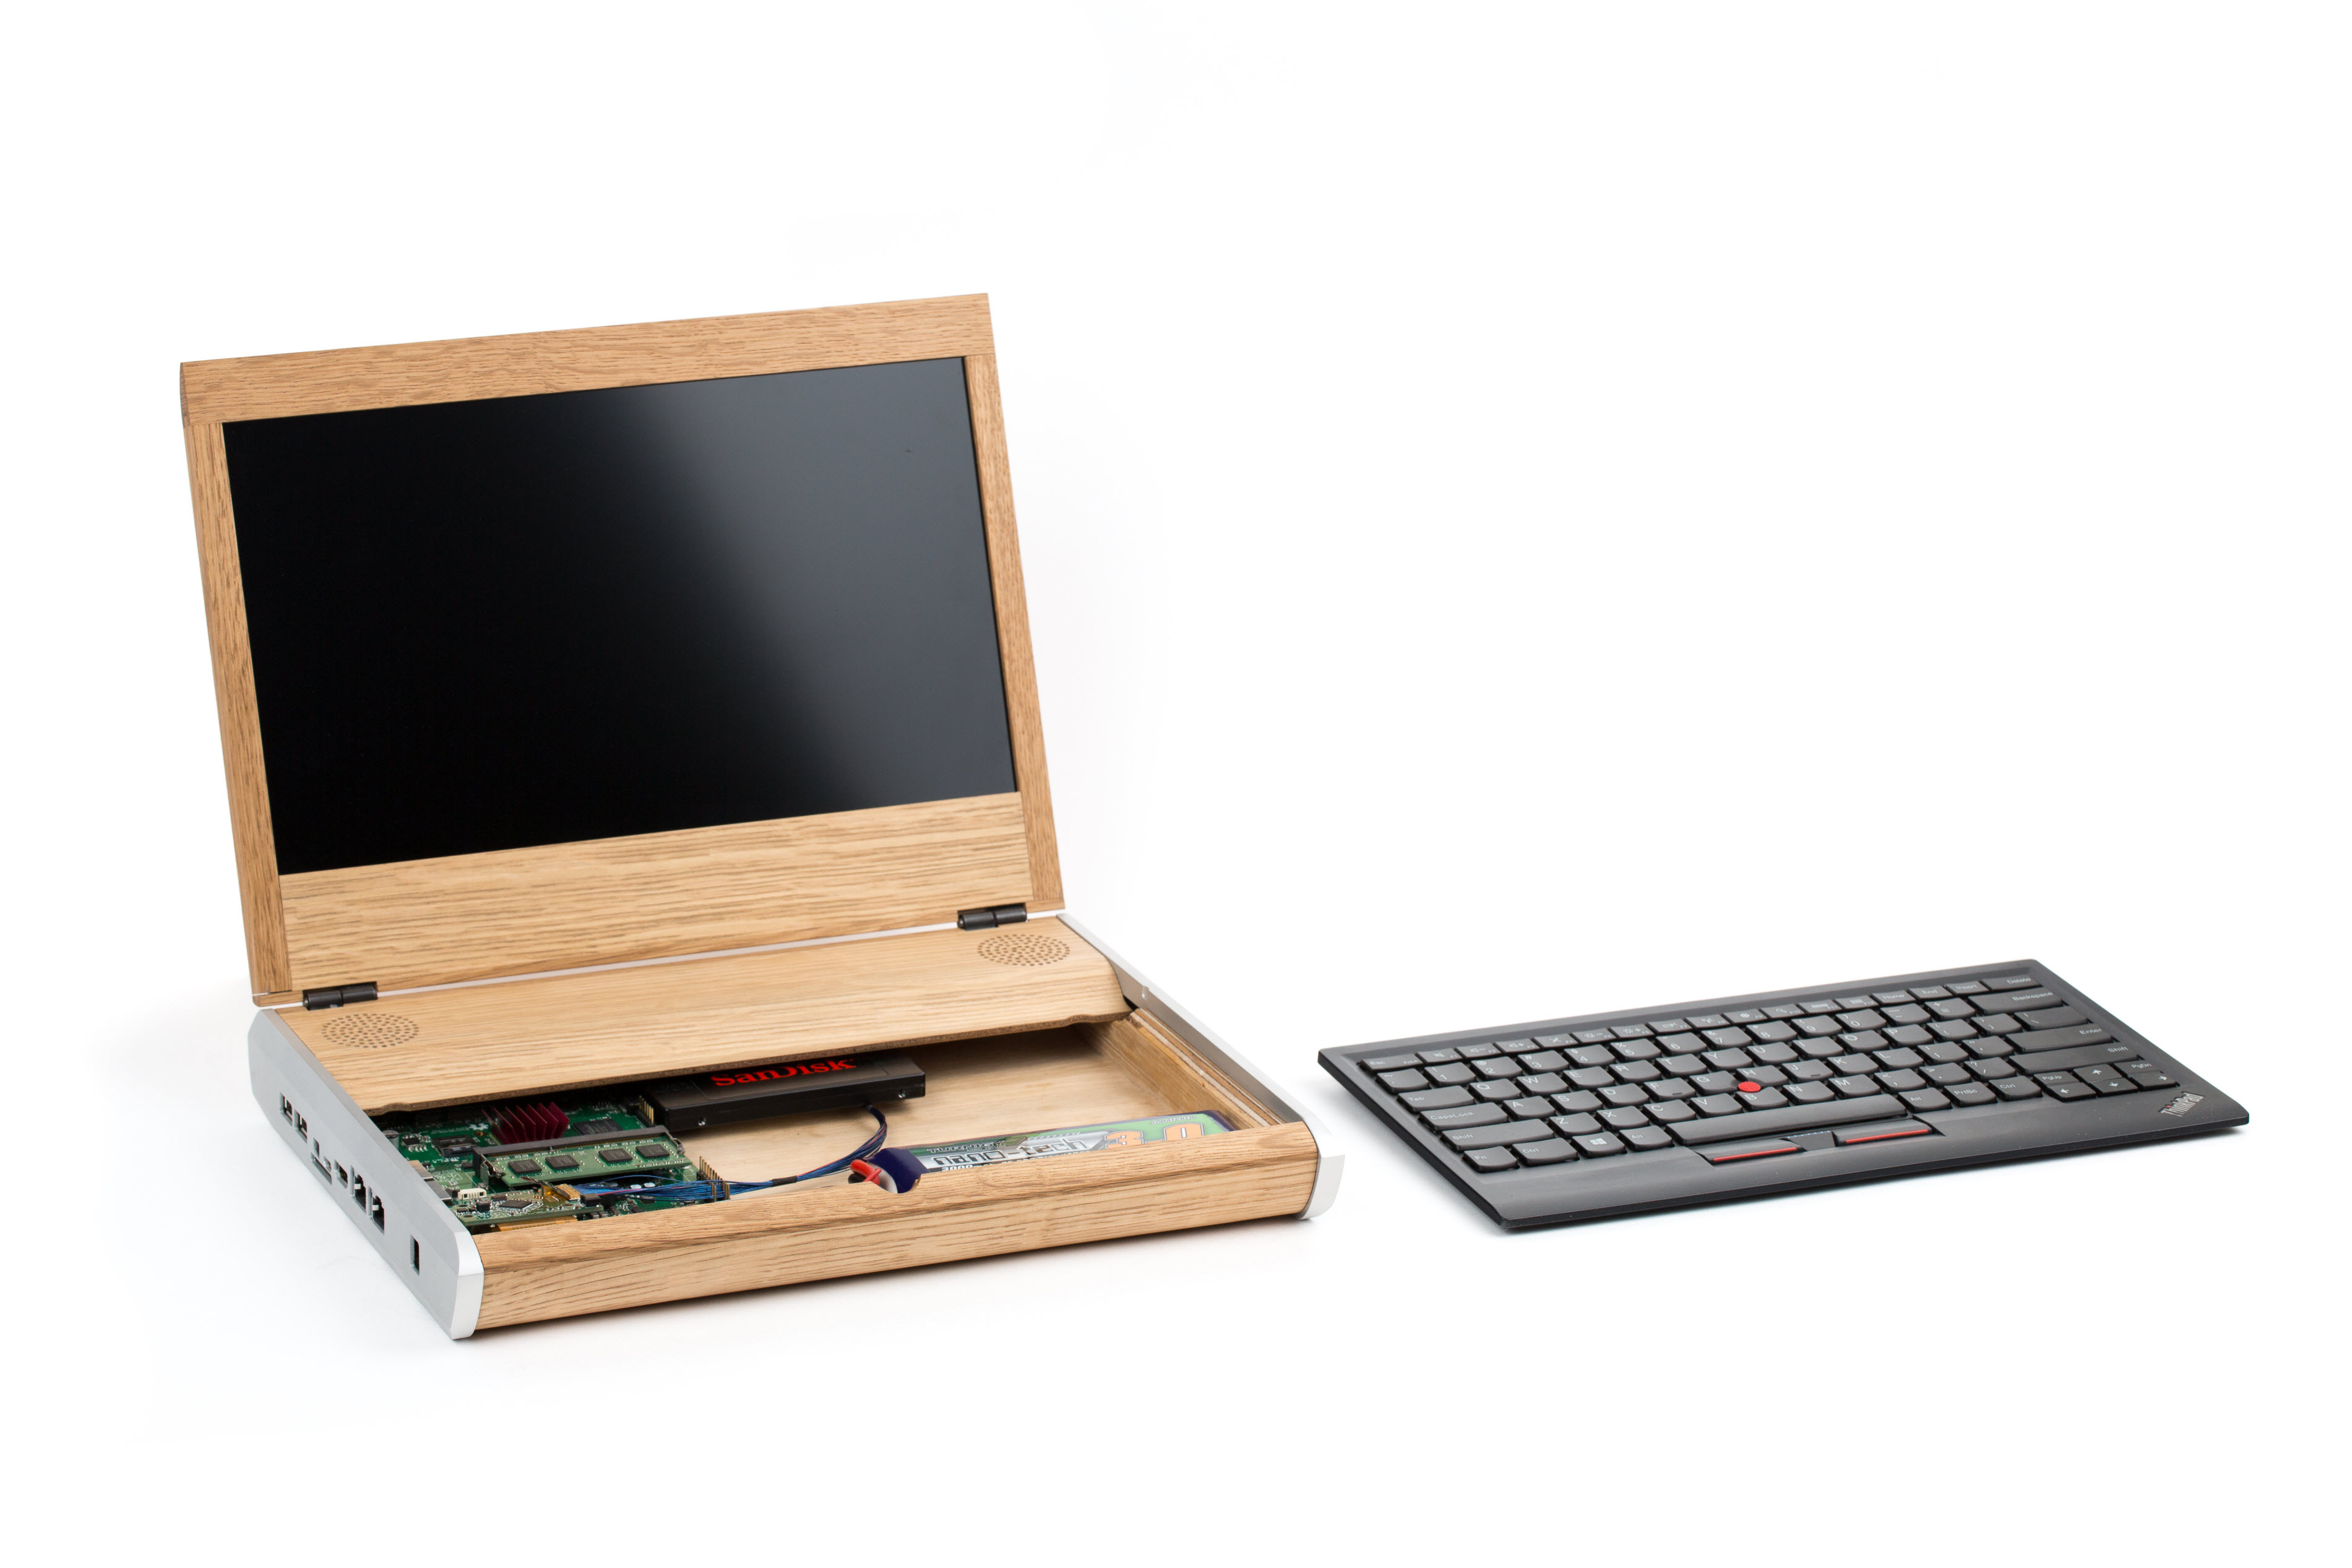
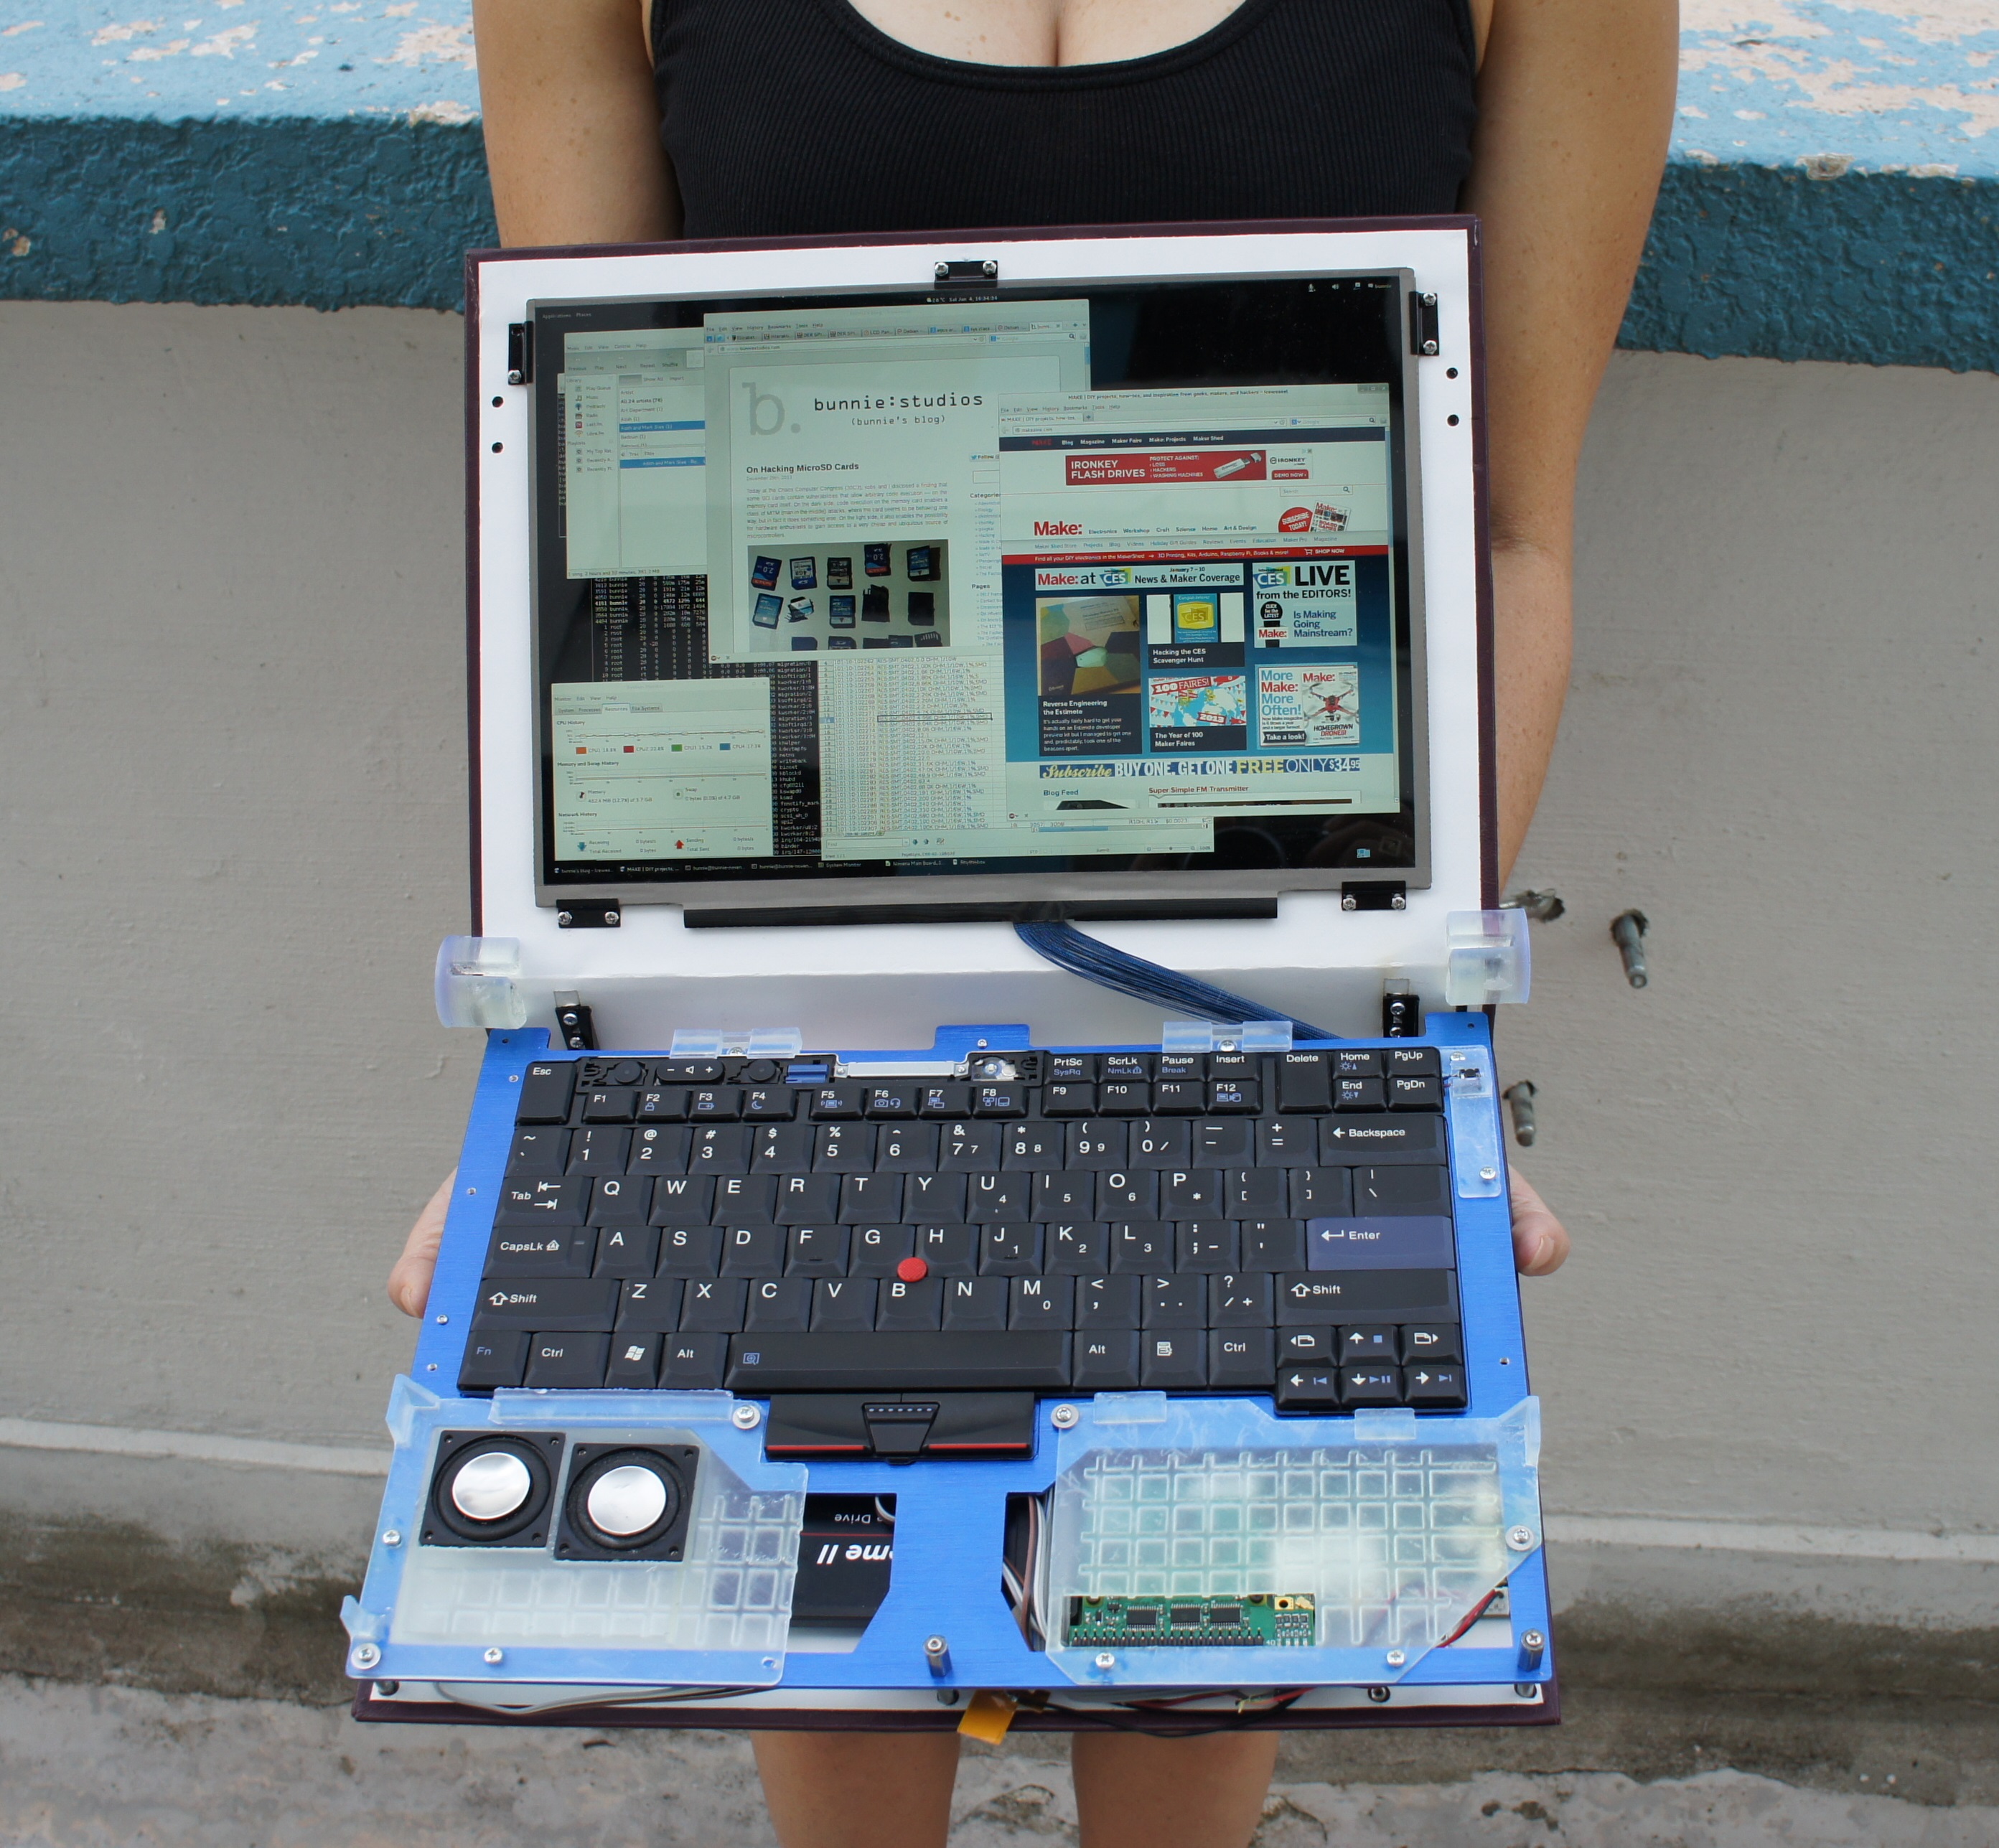
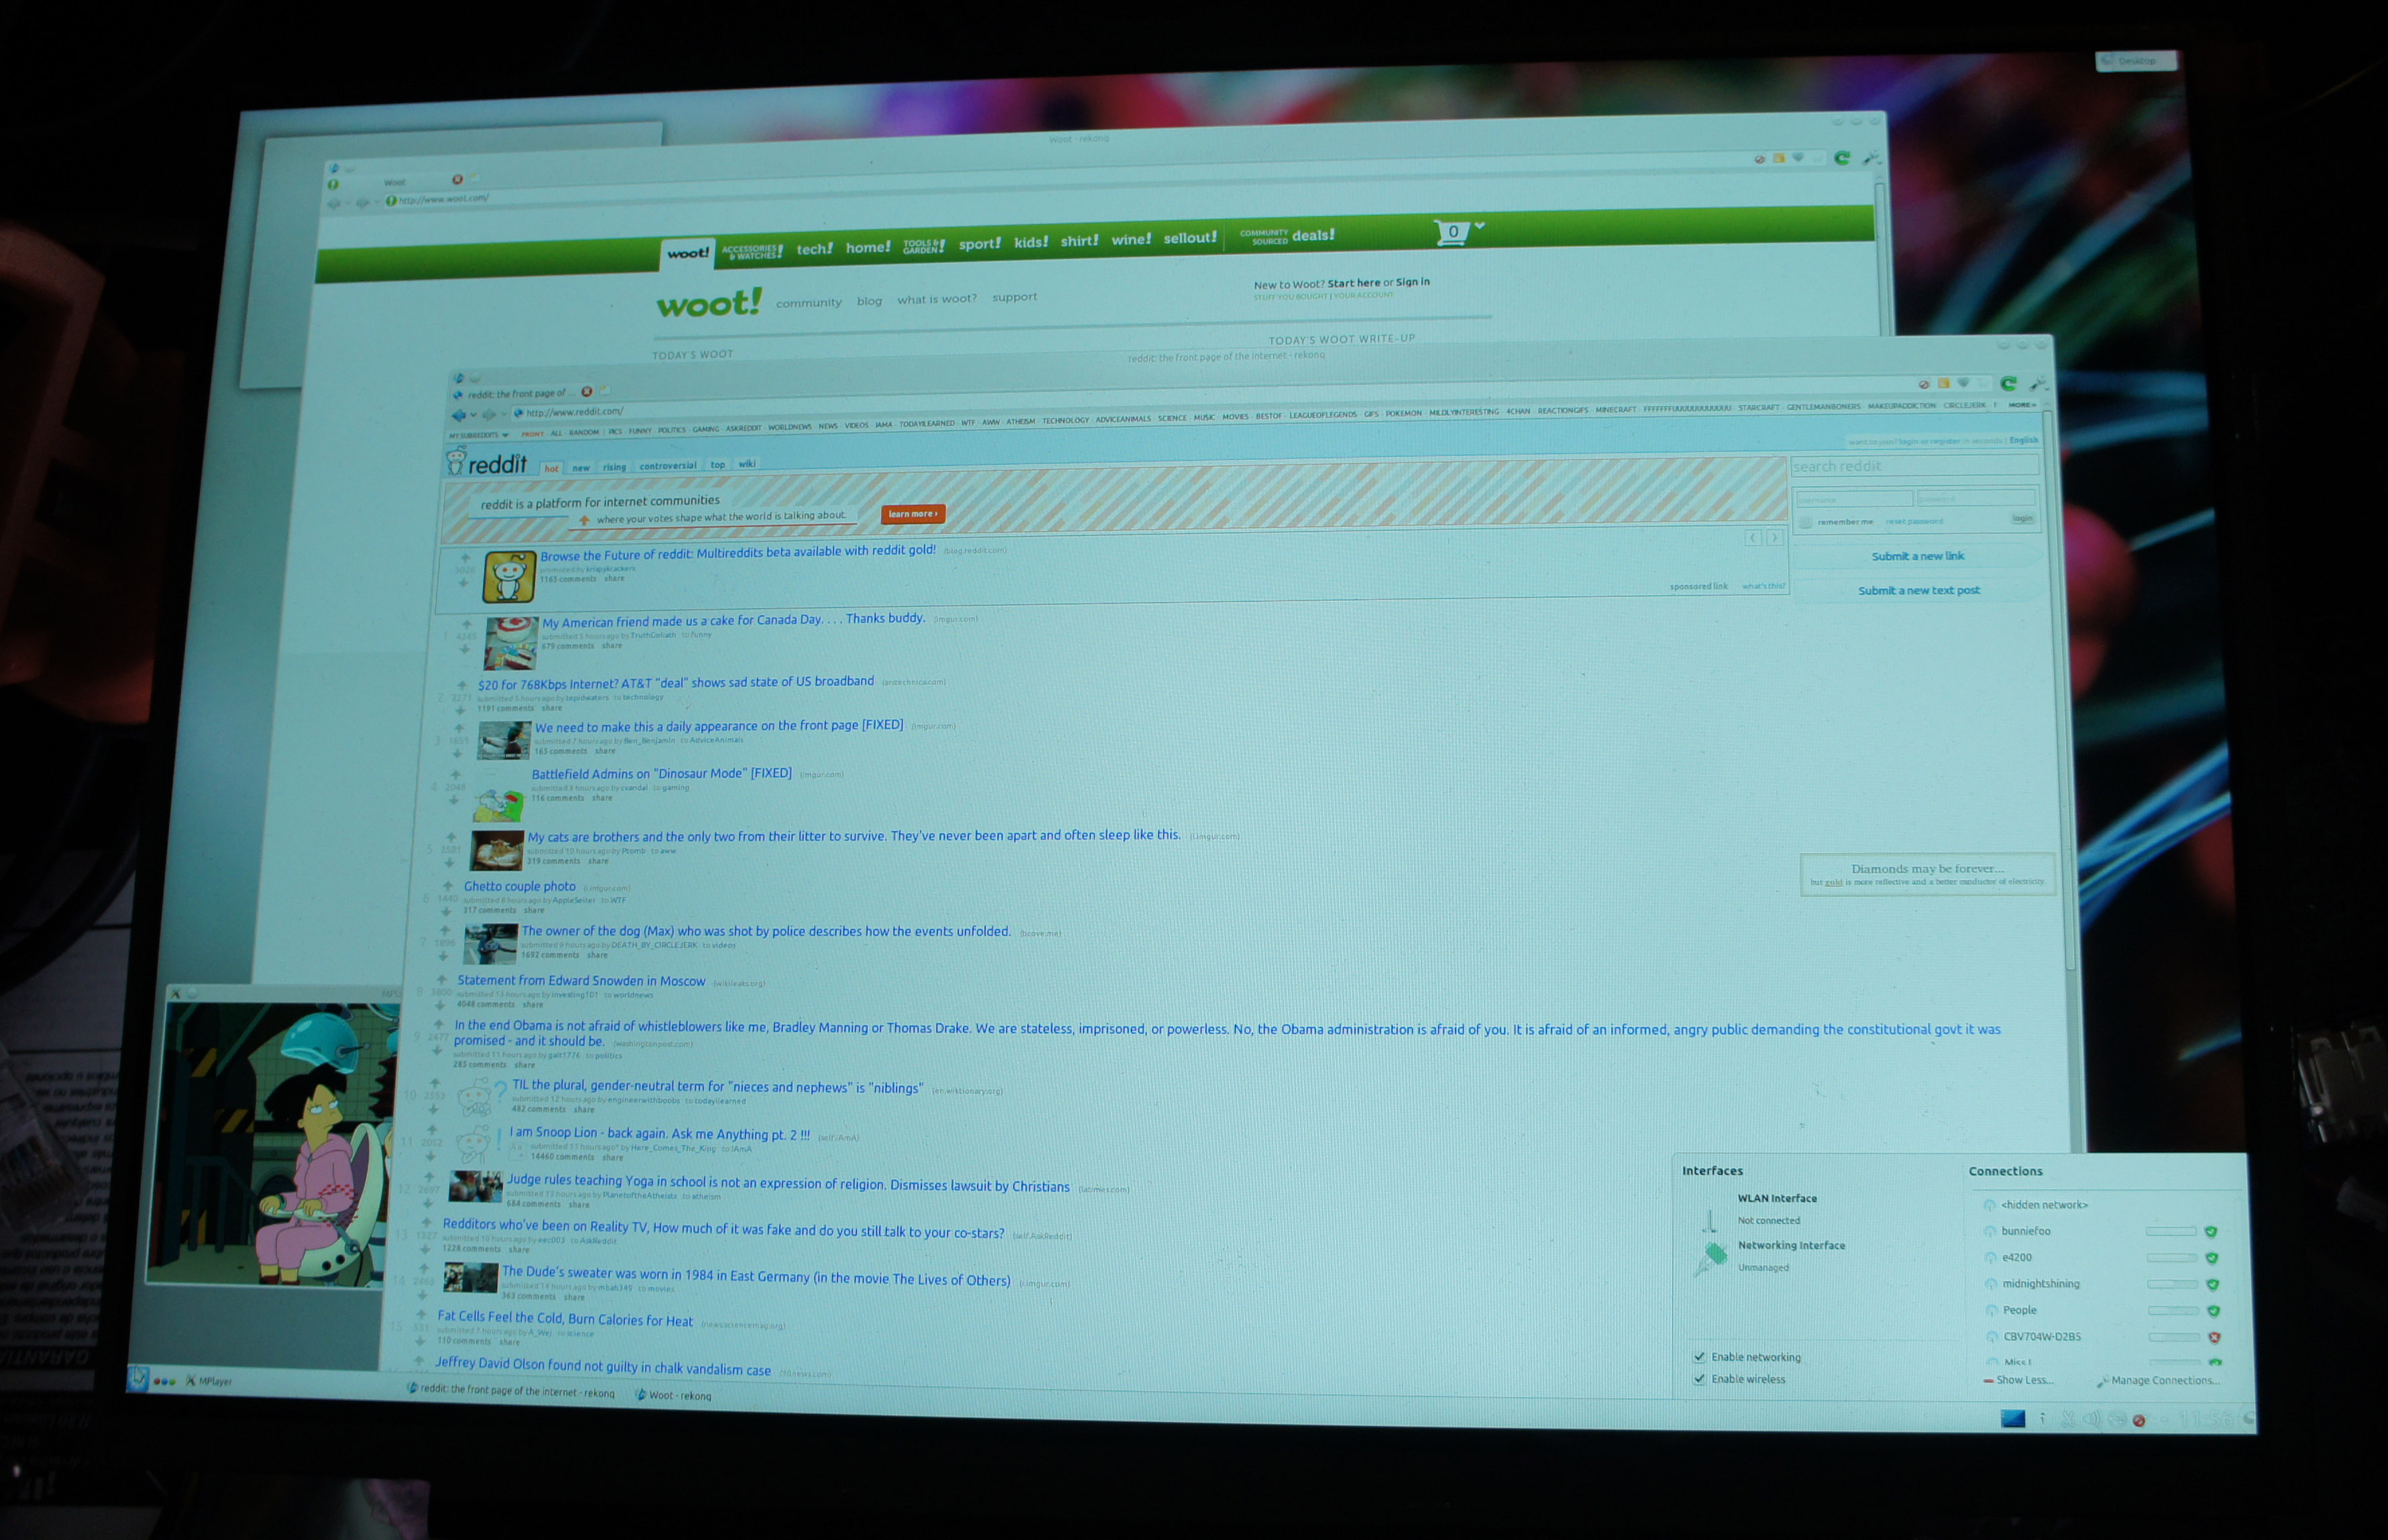
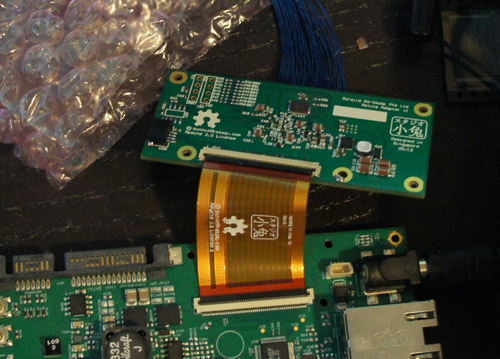
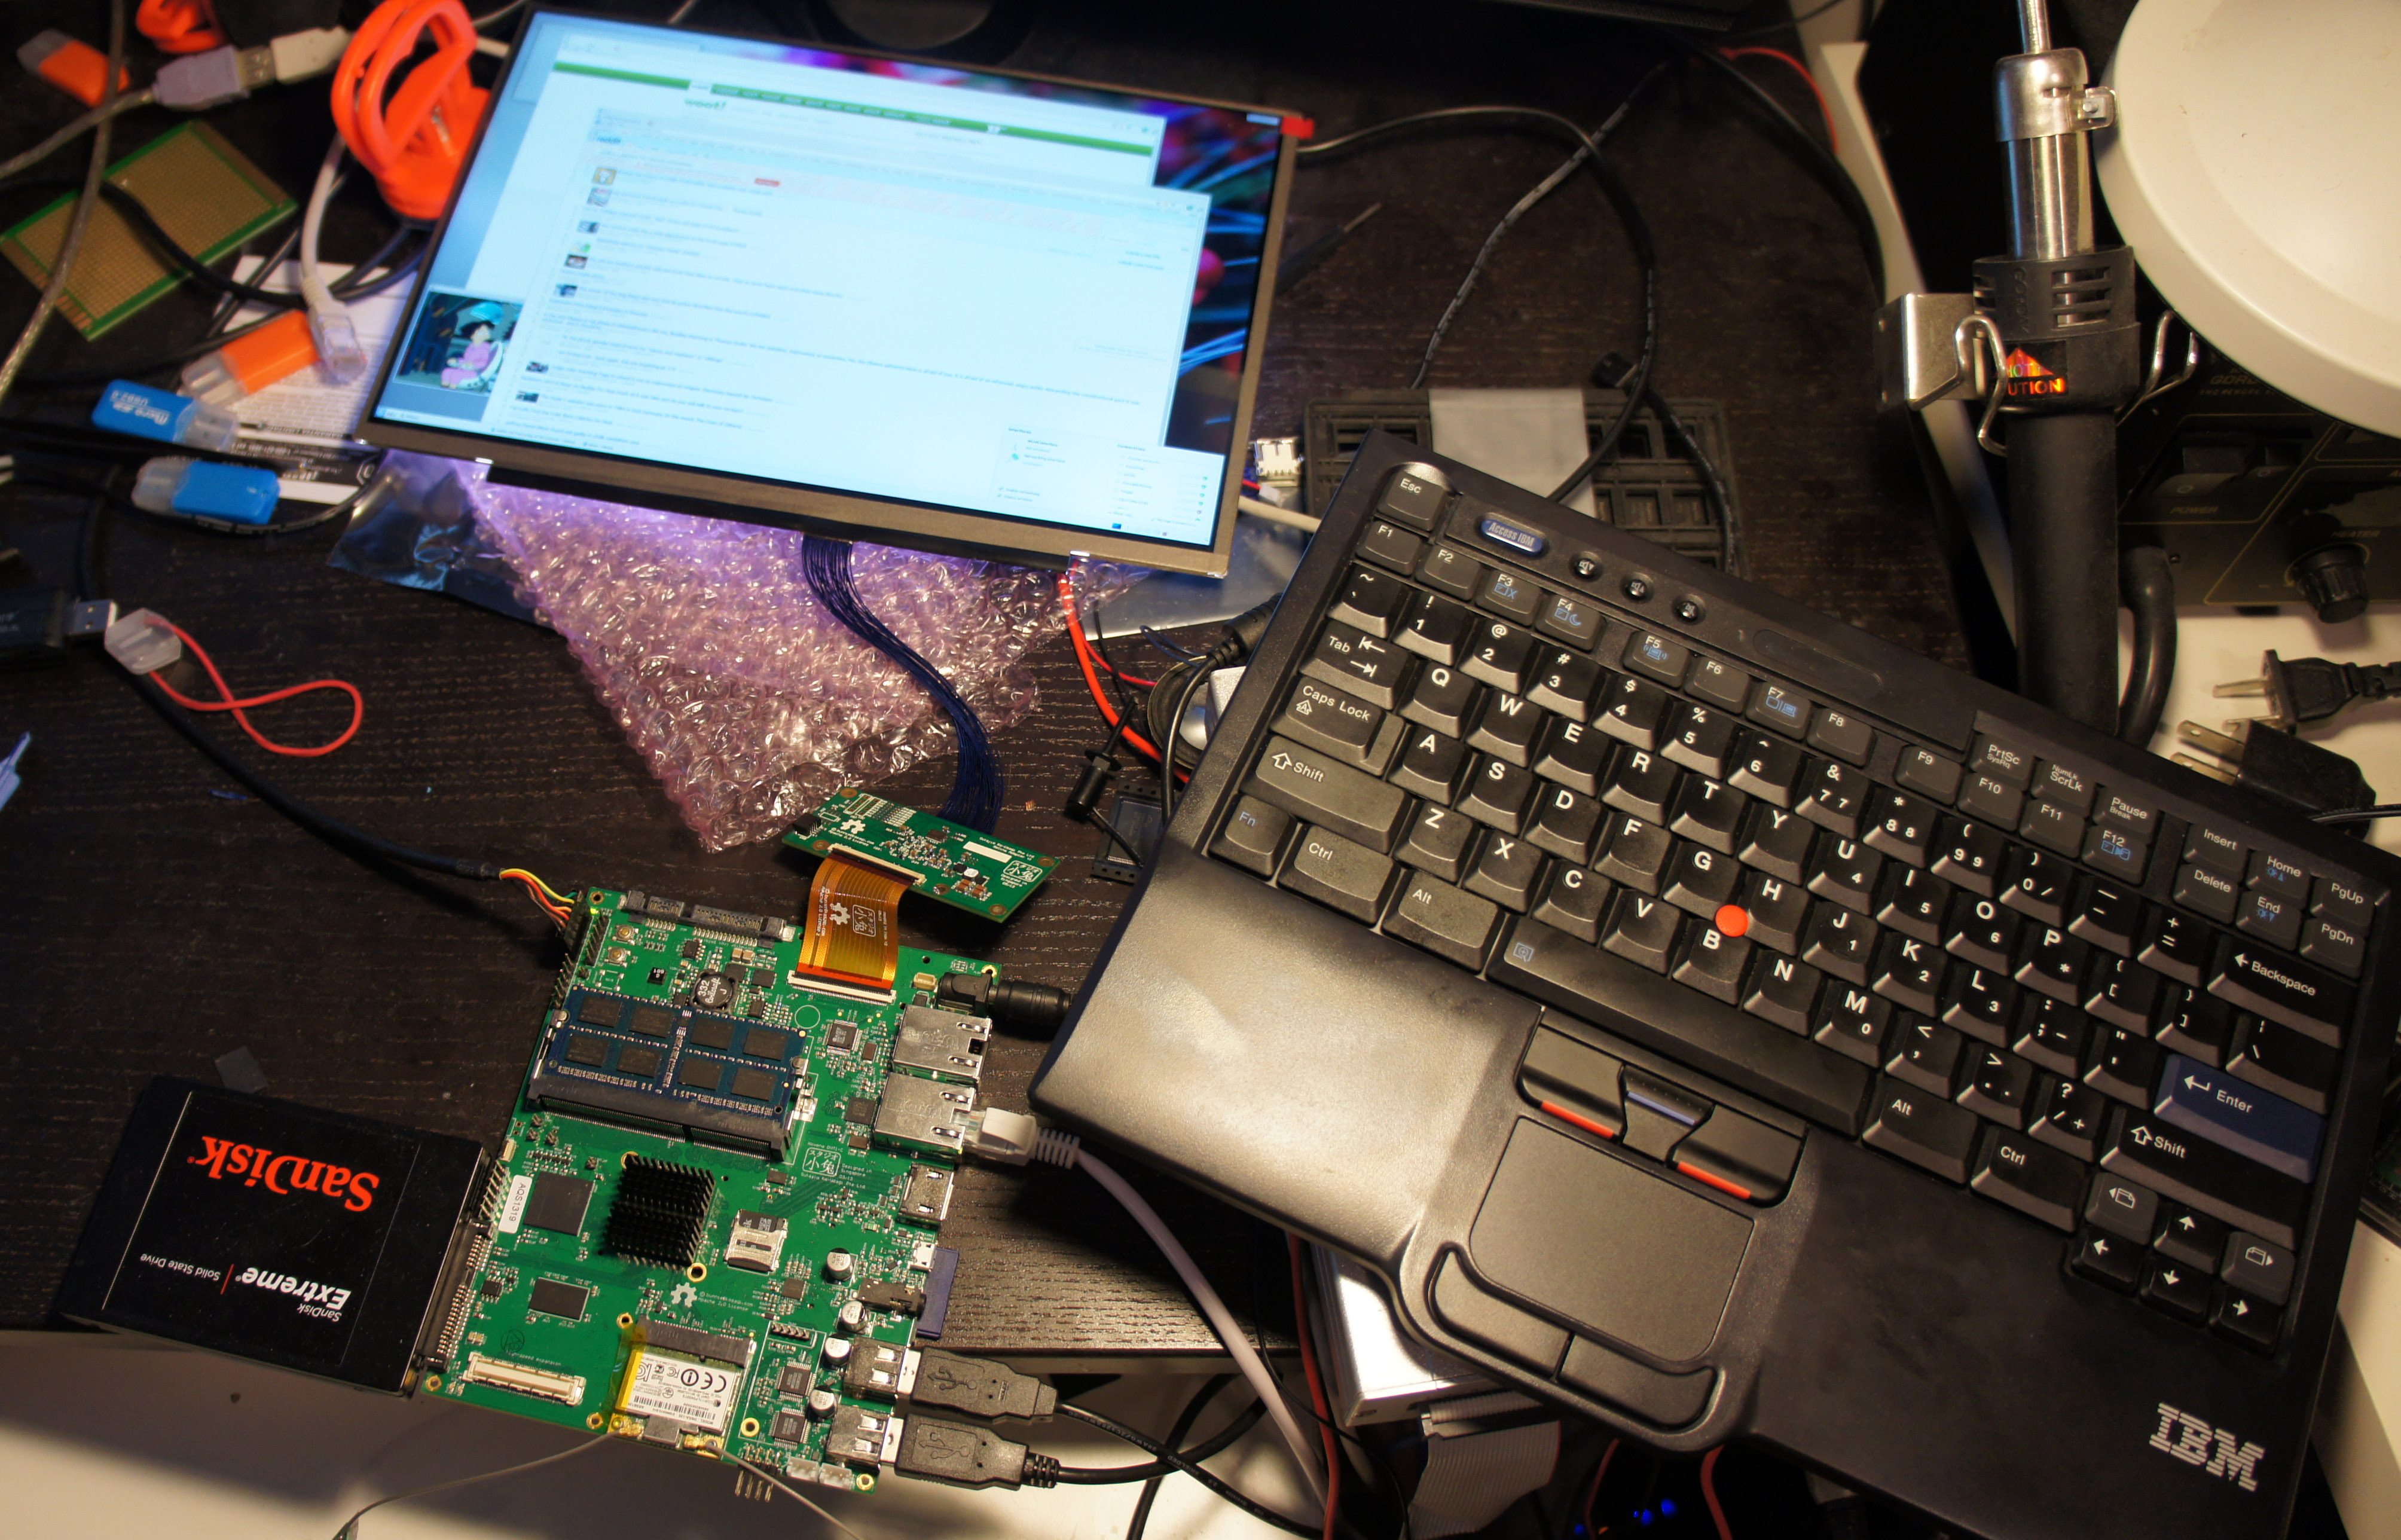
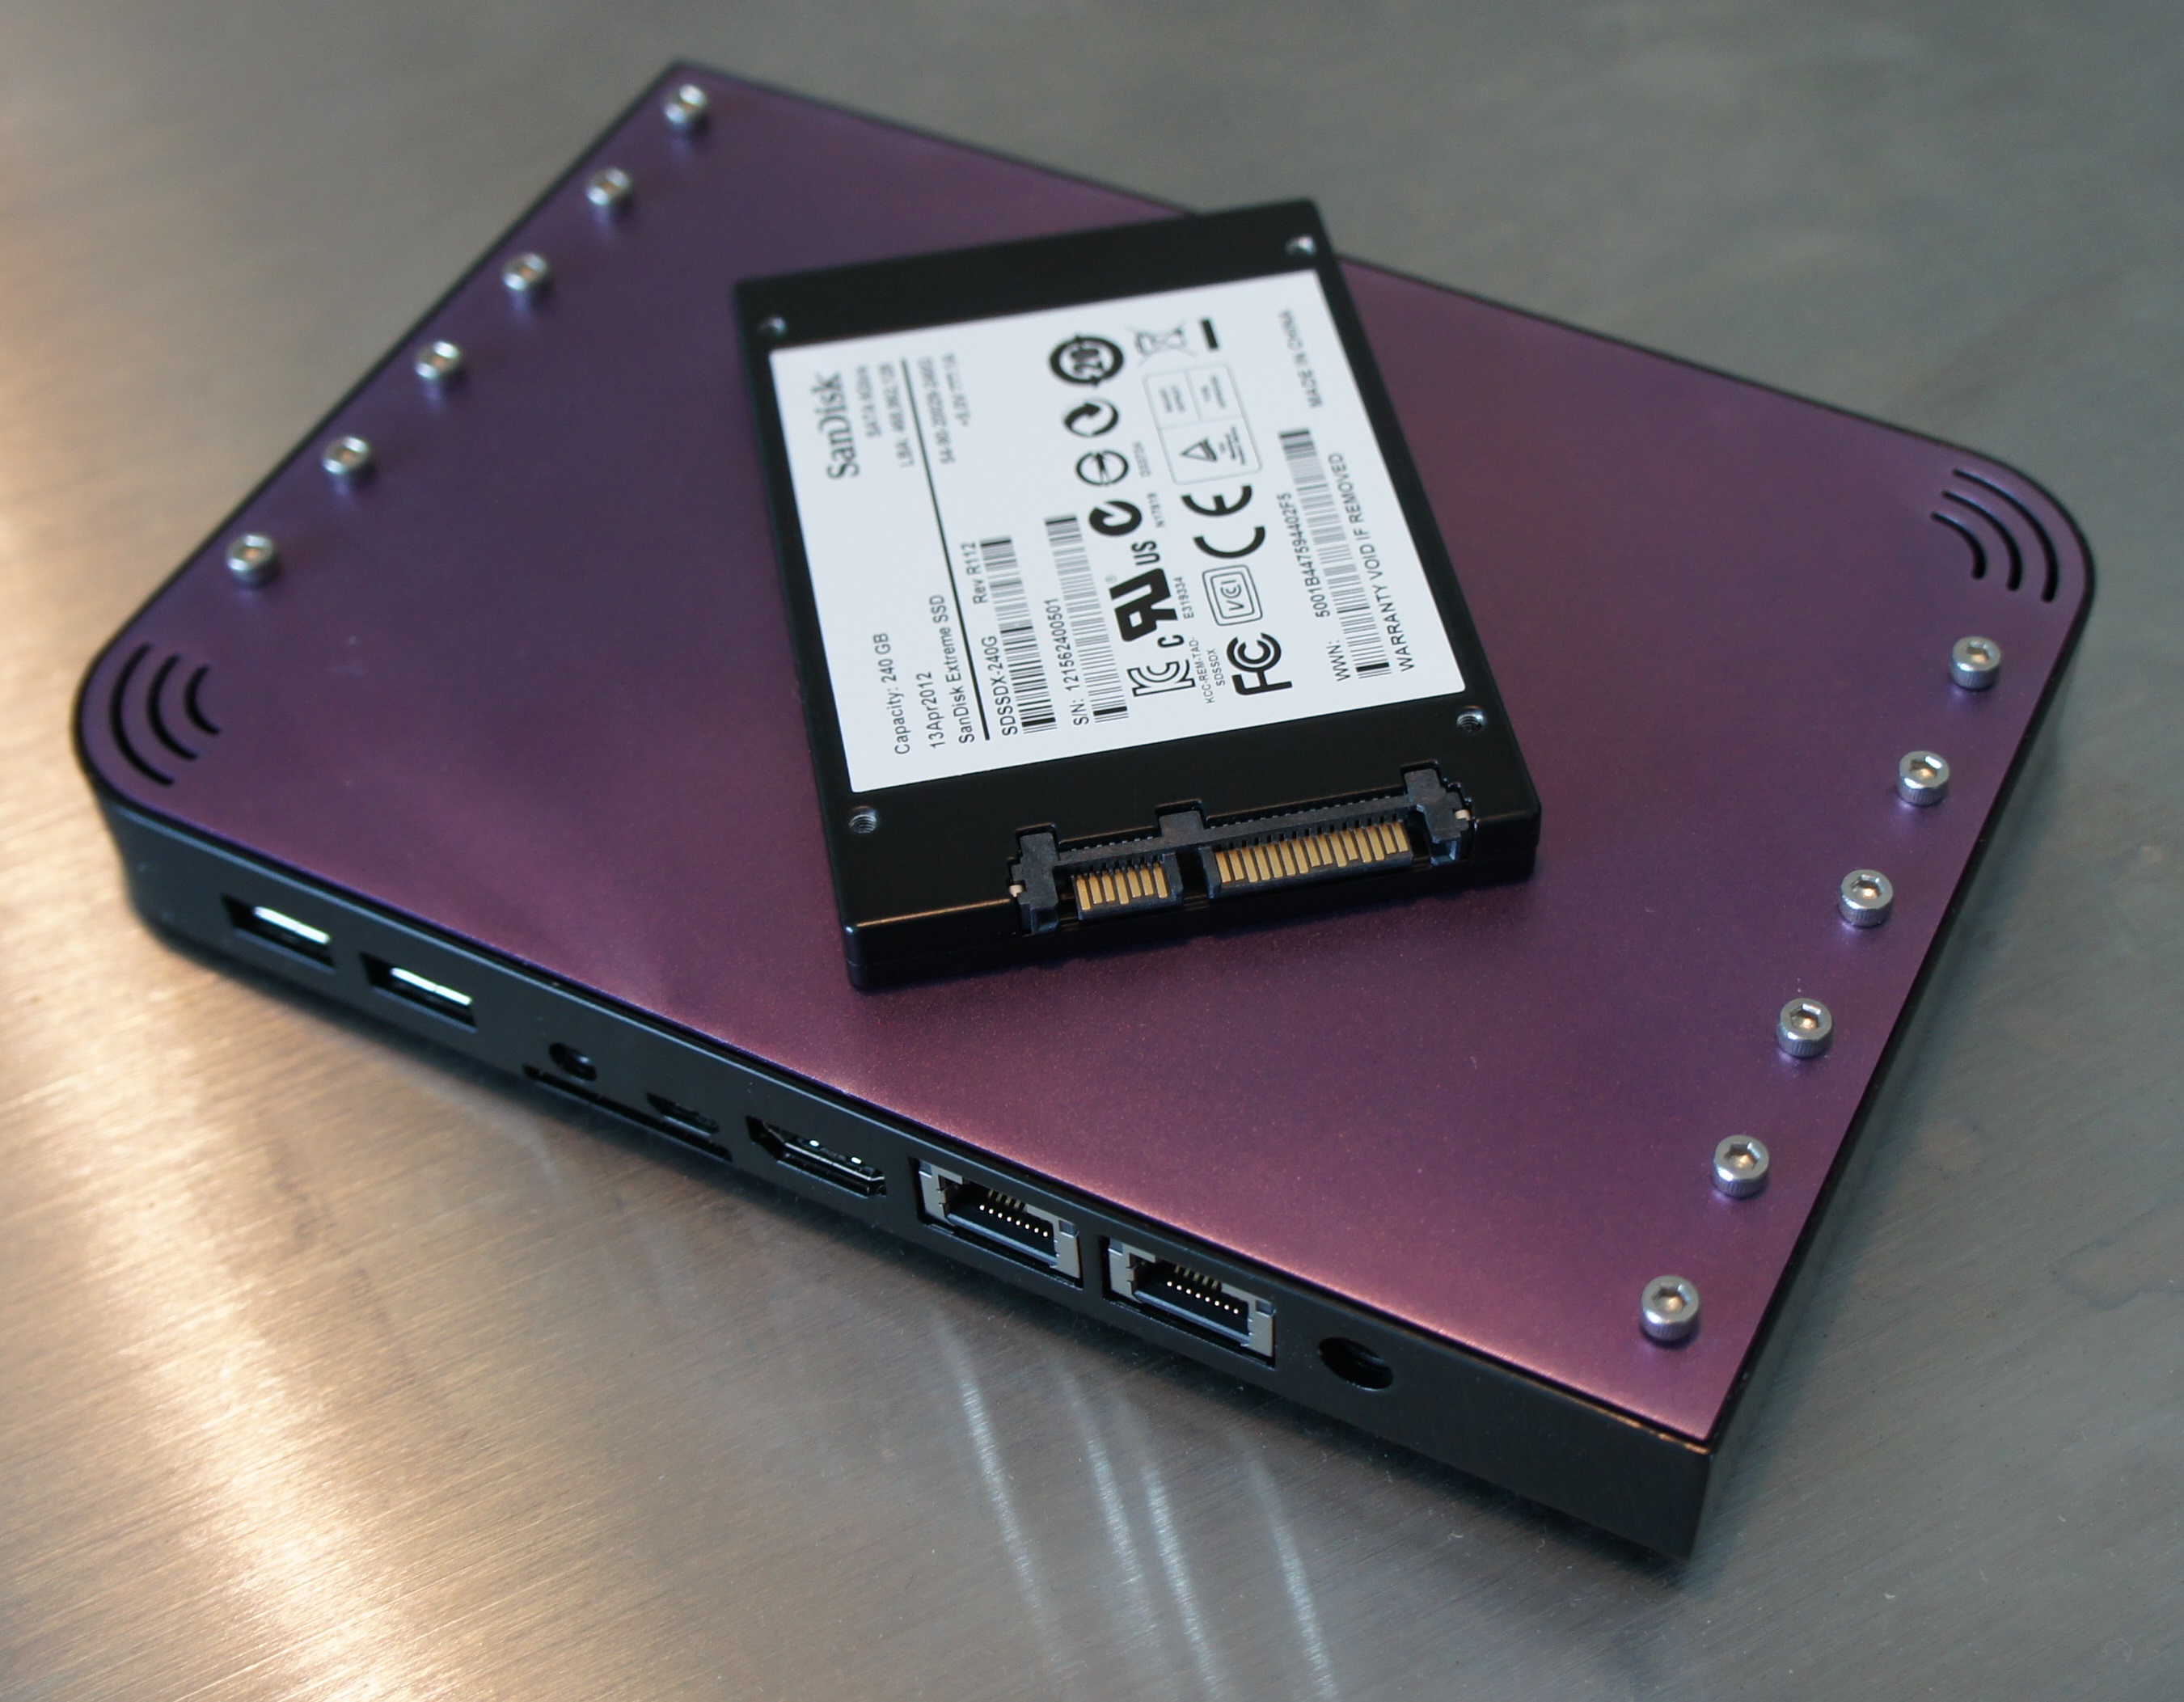
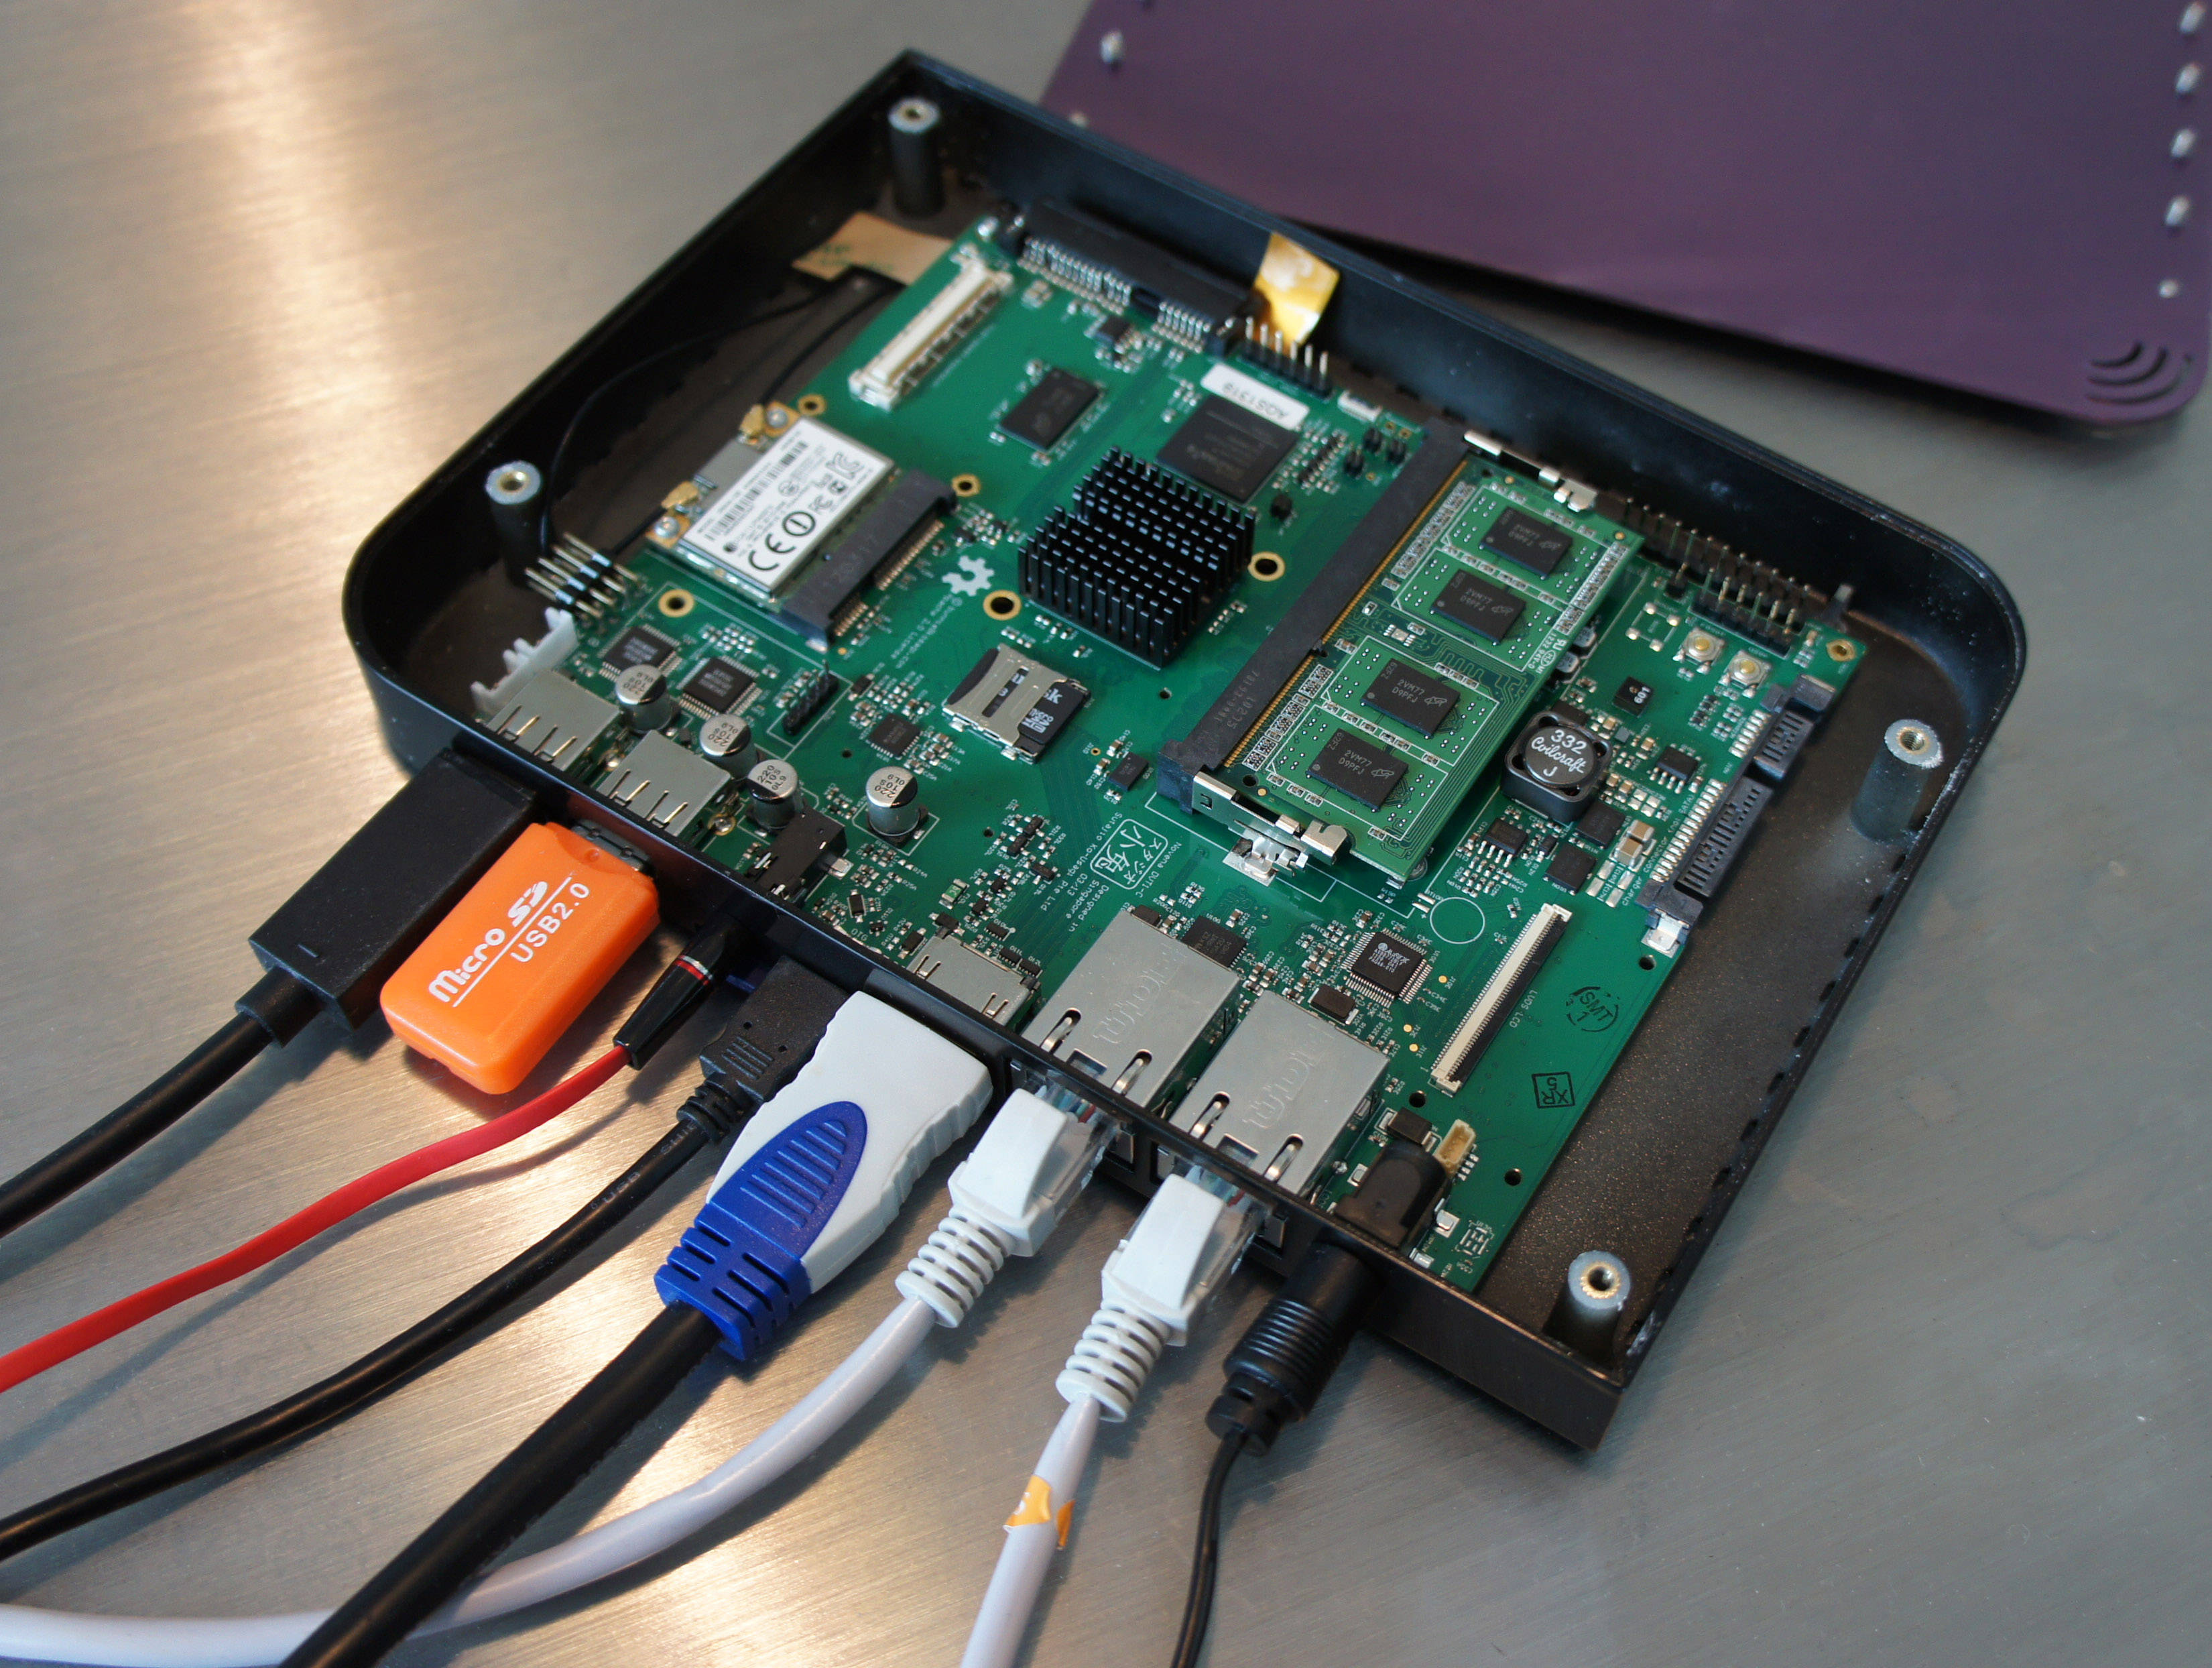
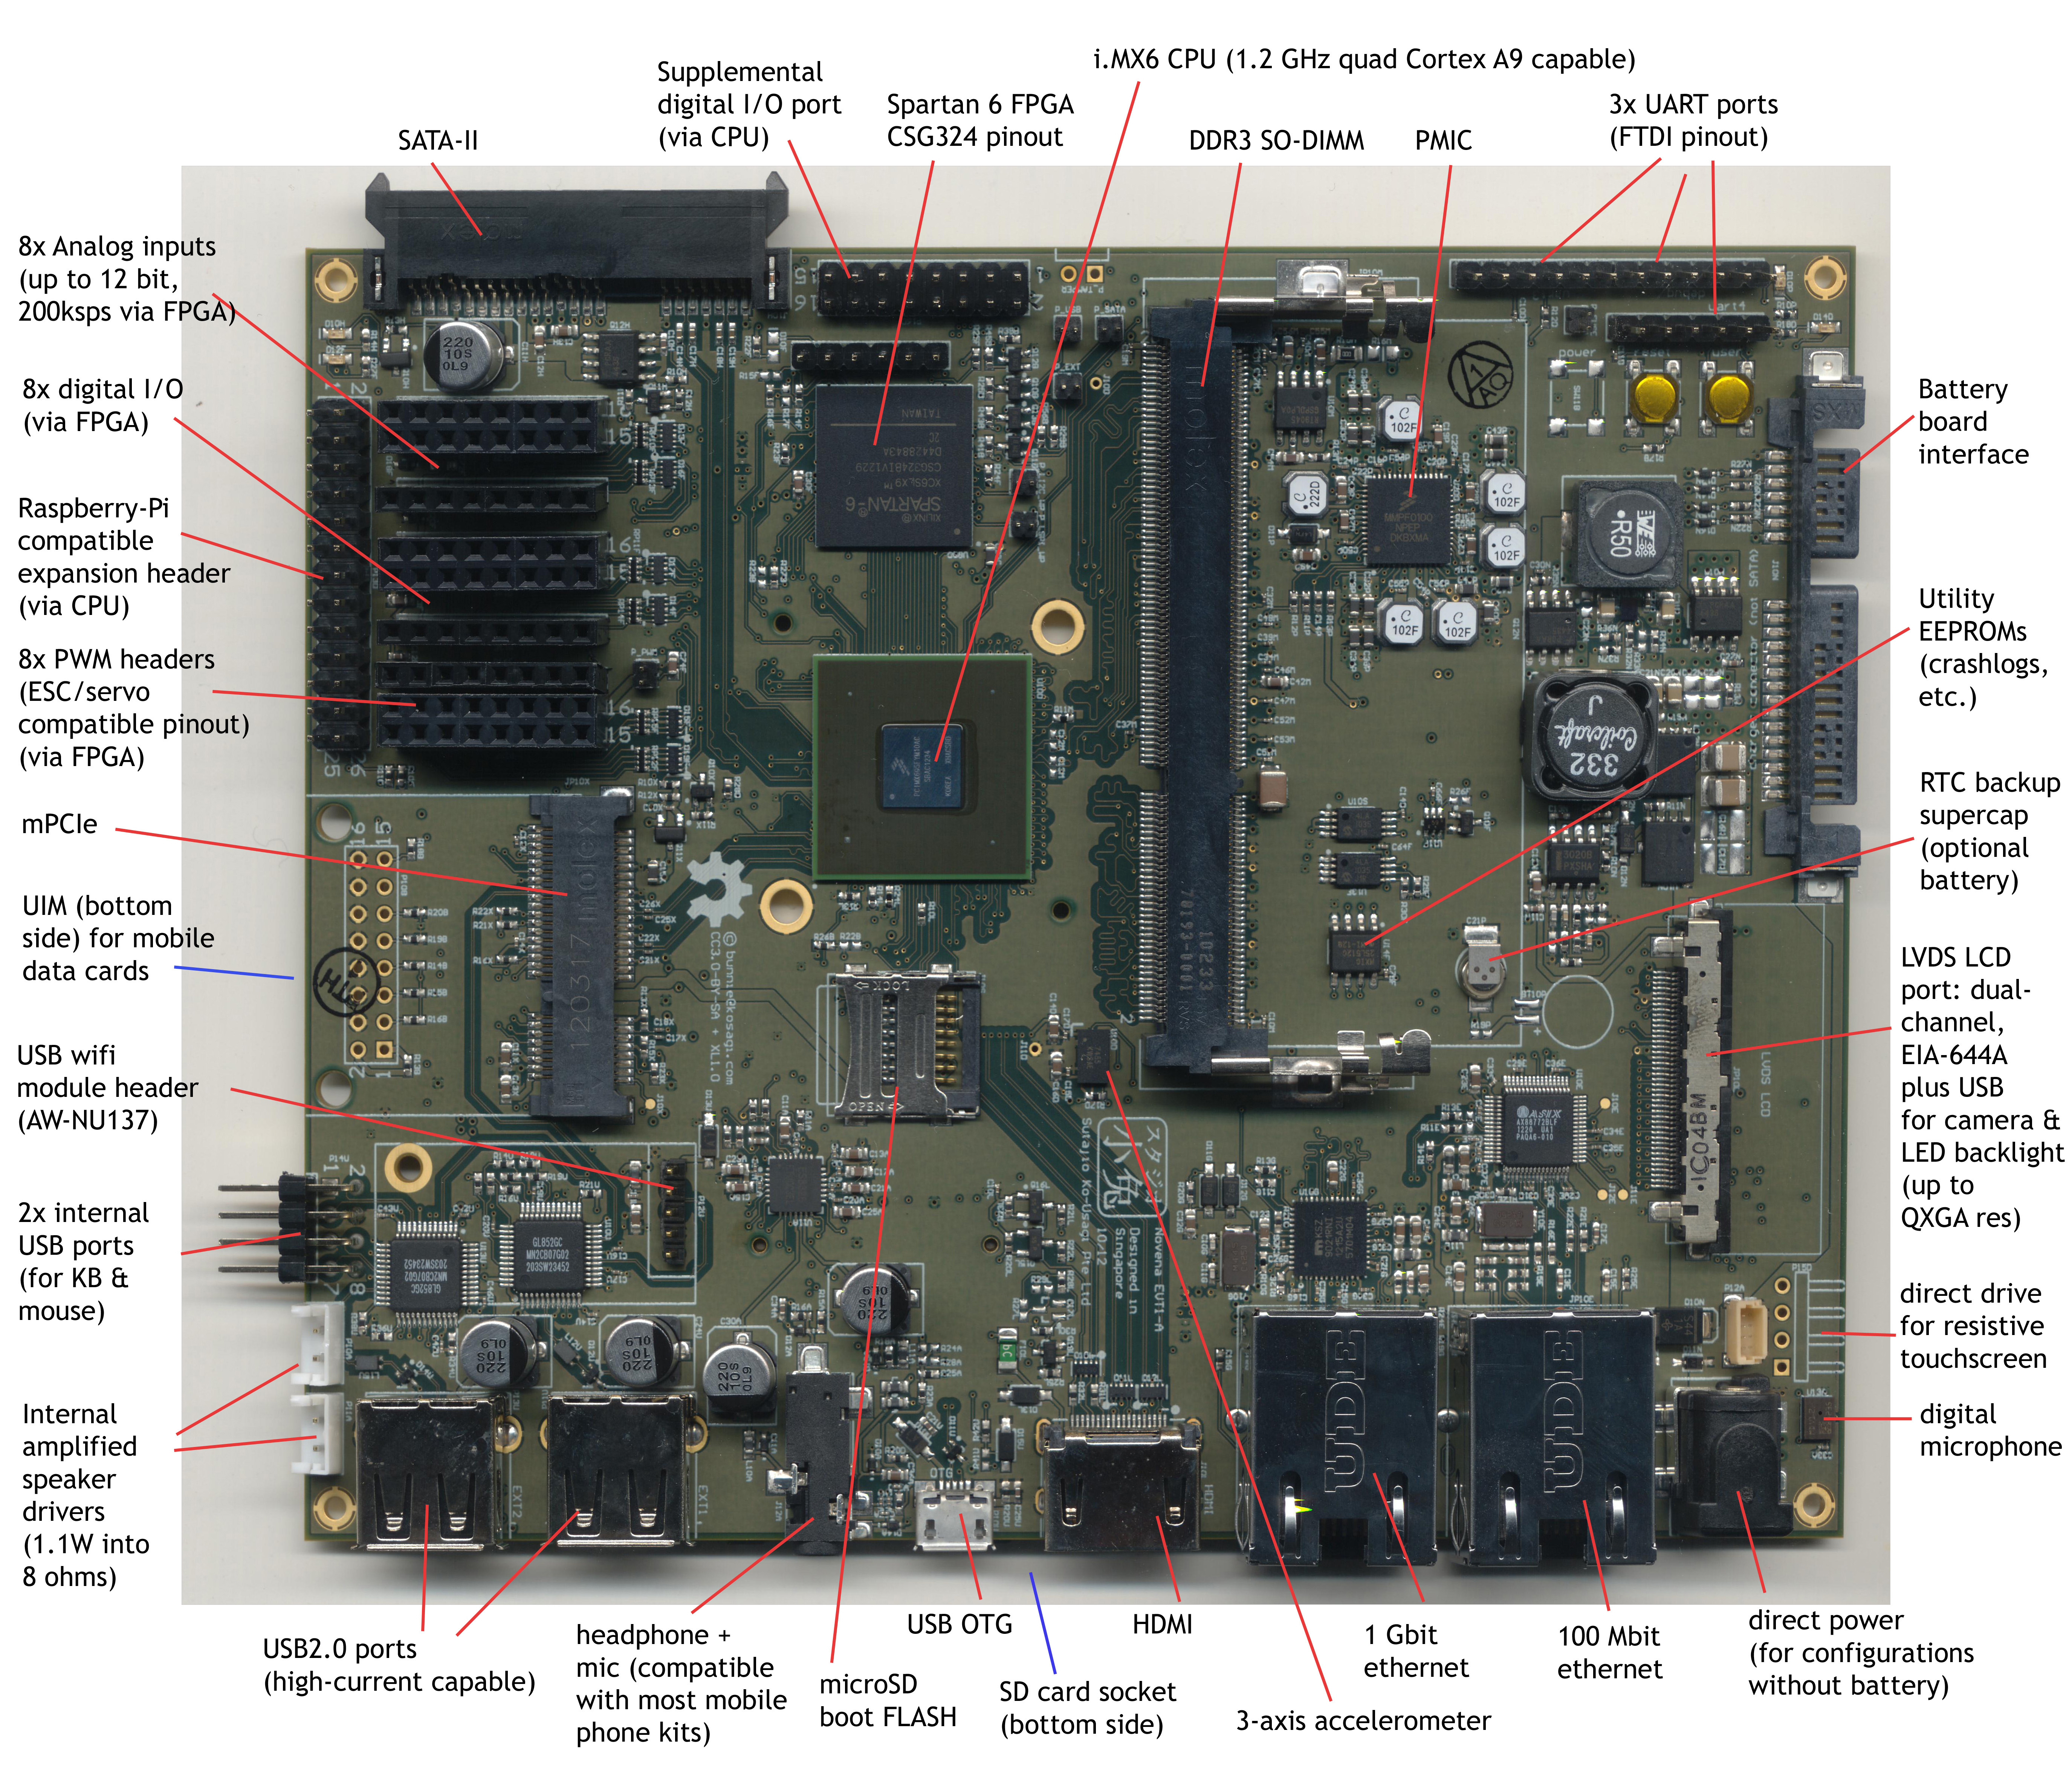
We designed Novena to be the most open platform we could practically build. The hardware blueprints and software source code are available for download. The entire OS is buildable from human-readable source, and requires no binary blobs to boot and run well.

However, there are elements of the i.MX6 SoC that lie dormant, due to a lack of open source drivers. In particular, the 2D/3D graphics accelerator in the i.MX6 has closed-source drivers. While we don’t force you to use these closed-source drivers, a major impediment to us being “libre” is the lack of open source drivers for these components.

We’re excited to announce a partnership with Jon Nettleton, an expert on Linux graphics drivers, to enable this crucial piece of the libre puzzle. Here is a short statement from Jon Nettleton himself on the prospect:

Novena Backers and OSS enthusiasts,

I am very pleased to announce myself, Jon Nettleton (a.k.a. jnettlet, linux4kix), as a stretch-goal partner for the Novena Project. I will be taking on the task of assuring that the shipping Novena platforms will not require a binary userspace driver for 2D/3D graphics acceleration. Utilizing my experience working on Linux graphics drivers along with my strong community involvement, I will be making sure that contributing developers have everything they need to keep the Etnaviv driver project moving forward.

To accomplish this we are requesting an additional $10,000 of funding. This additional capital will be used to not just fund my development effort, but to also provide incentives for other contributing developers. It will also benefit me the time to coordinate with other hardware vendors interested in supporting an open source graphics driver implementation for the Vivante chipset, and getting them involved. There is no “US“ and “THEM” in this effort. “WE” will bring to fruition a modern graphics accelerated desktop platform for the Novena Project.

Therefore, if we can raise $50k over our original target of $250k, we will donate the $10k that Jon needs for the effort for providing open 2D/3D graphics drivers for the Novena platform. The remainder of that raised will be used to help cover the costs of building the hardware you ordered.

Significantly, since this is an open source effort, everyone in the i.MX6 community can benefit from the outcome of this funding. Because of this, we’ve added a “Buy Jon a Six Pack ($30)” pledge tier (capped at 417 pledges) so that existing i.MX6 users who want to contribute toward this goal without buying our hardware can participate. For every dollar contributed to this pledge tier, we will give Jon Nettleton at least 80 cents, regardless of our ability to reach the first stretch goal. The other ~20 cents go toward compulsory campaign operation costs and financial operator transaction fees.

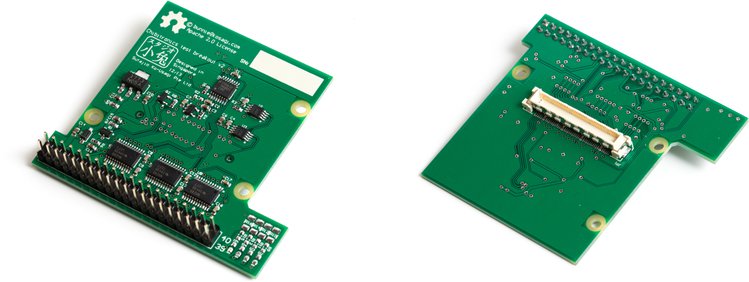
Stretch #2: General-Purpose Breakout Board: +$100k ($350k total)

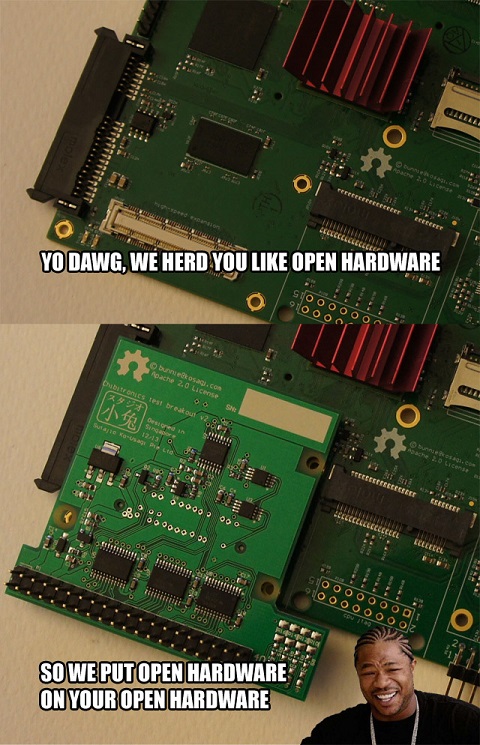
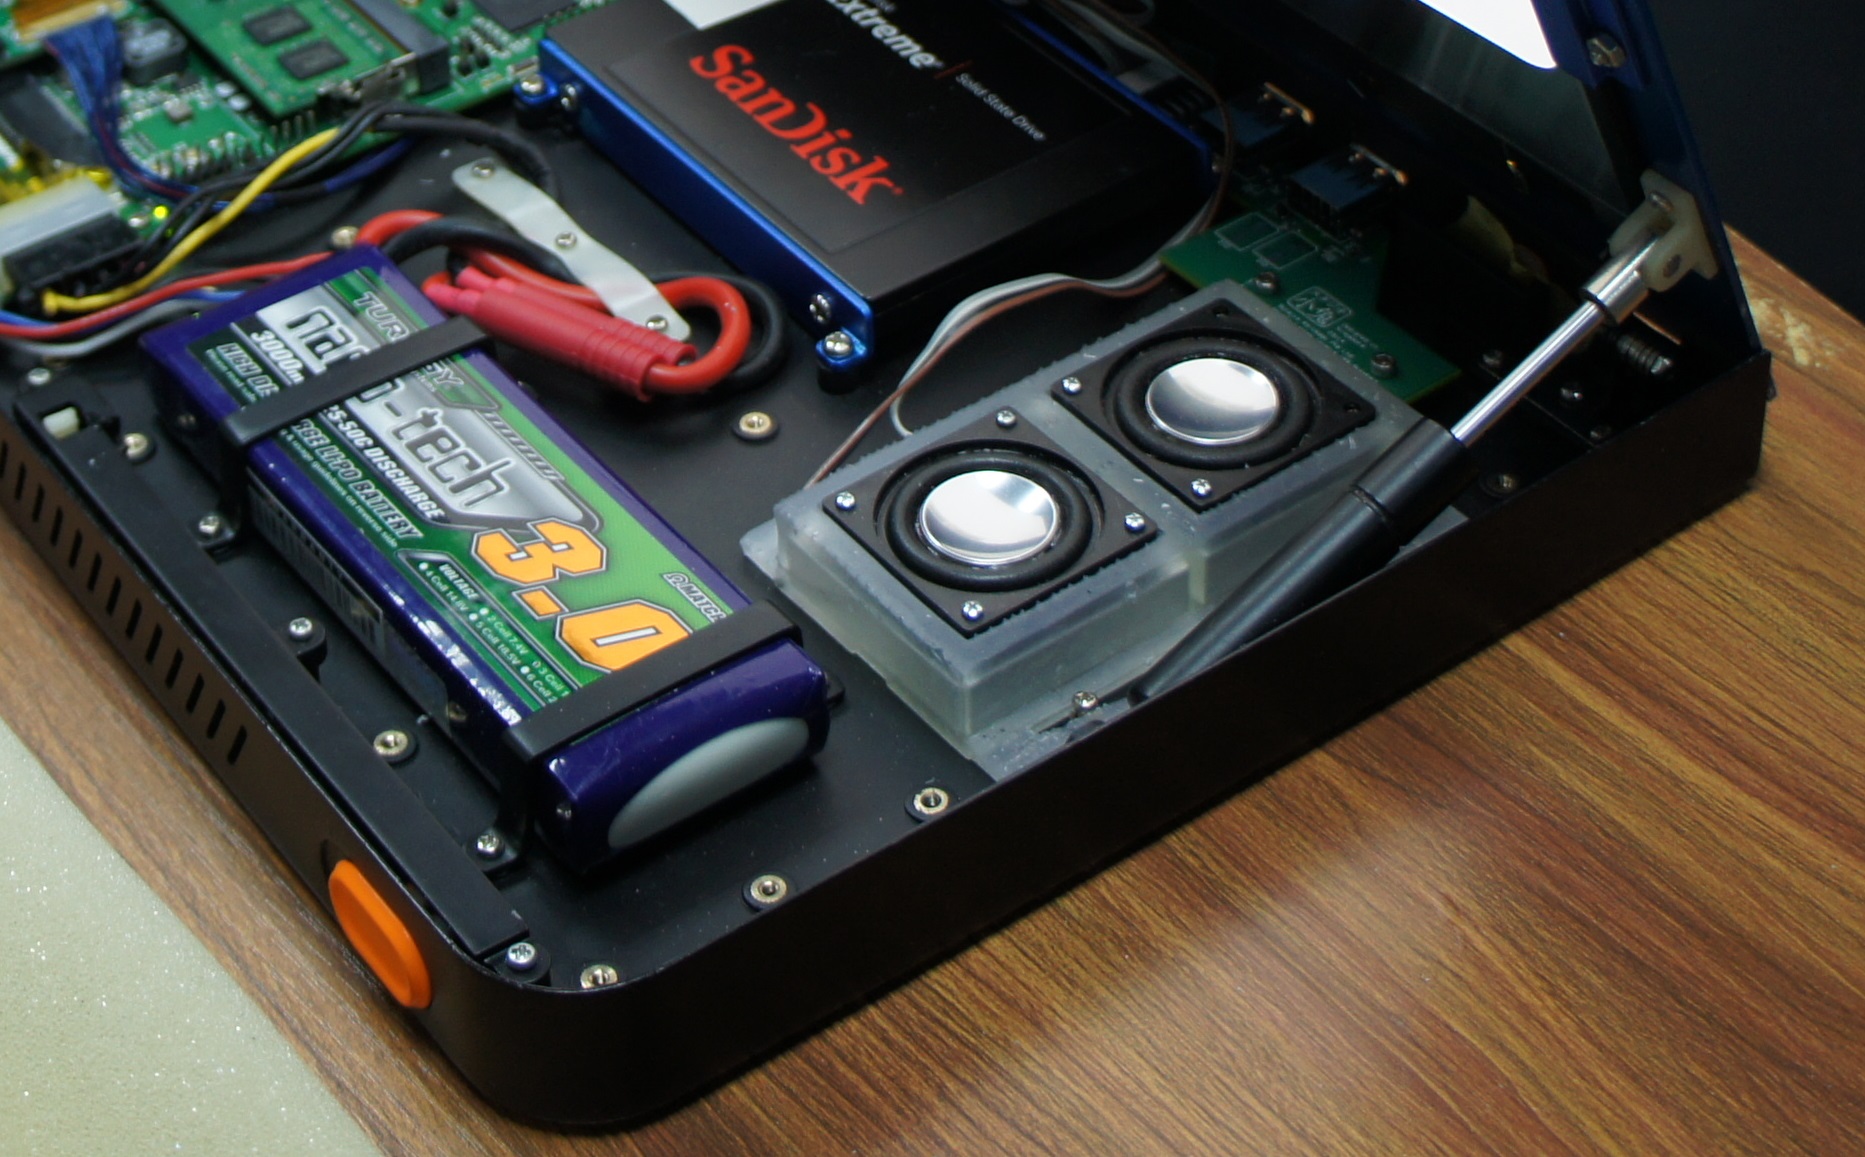
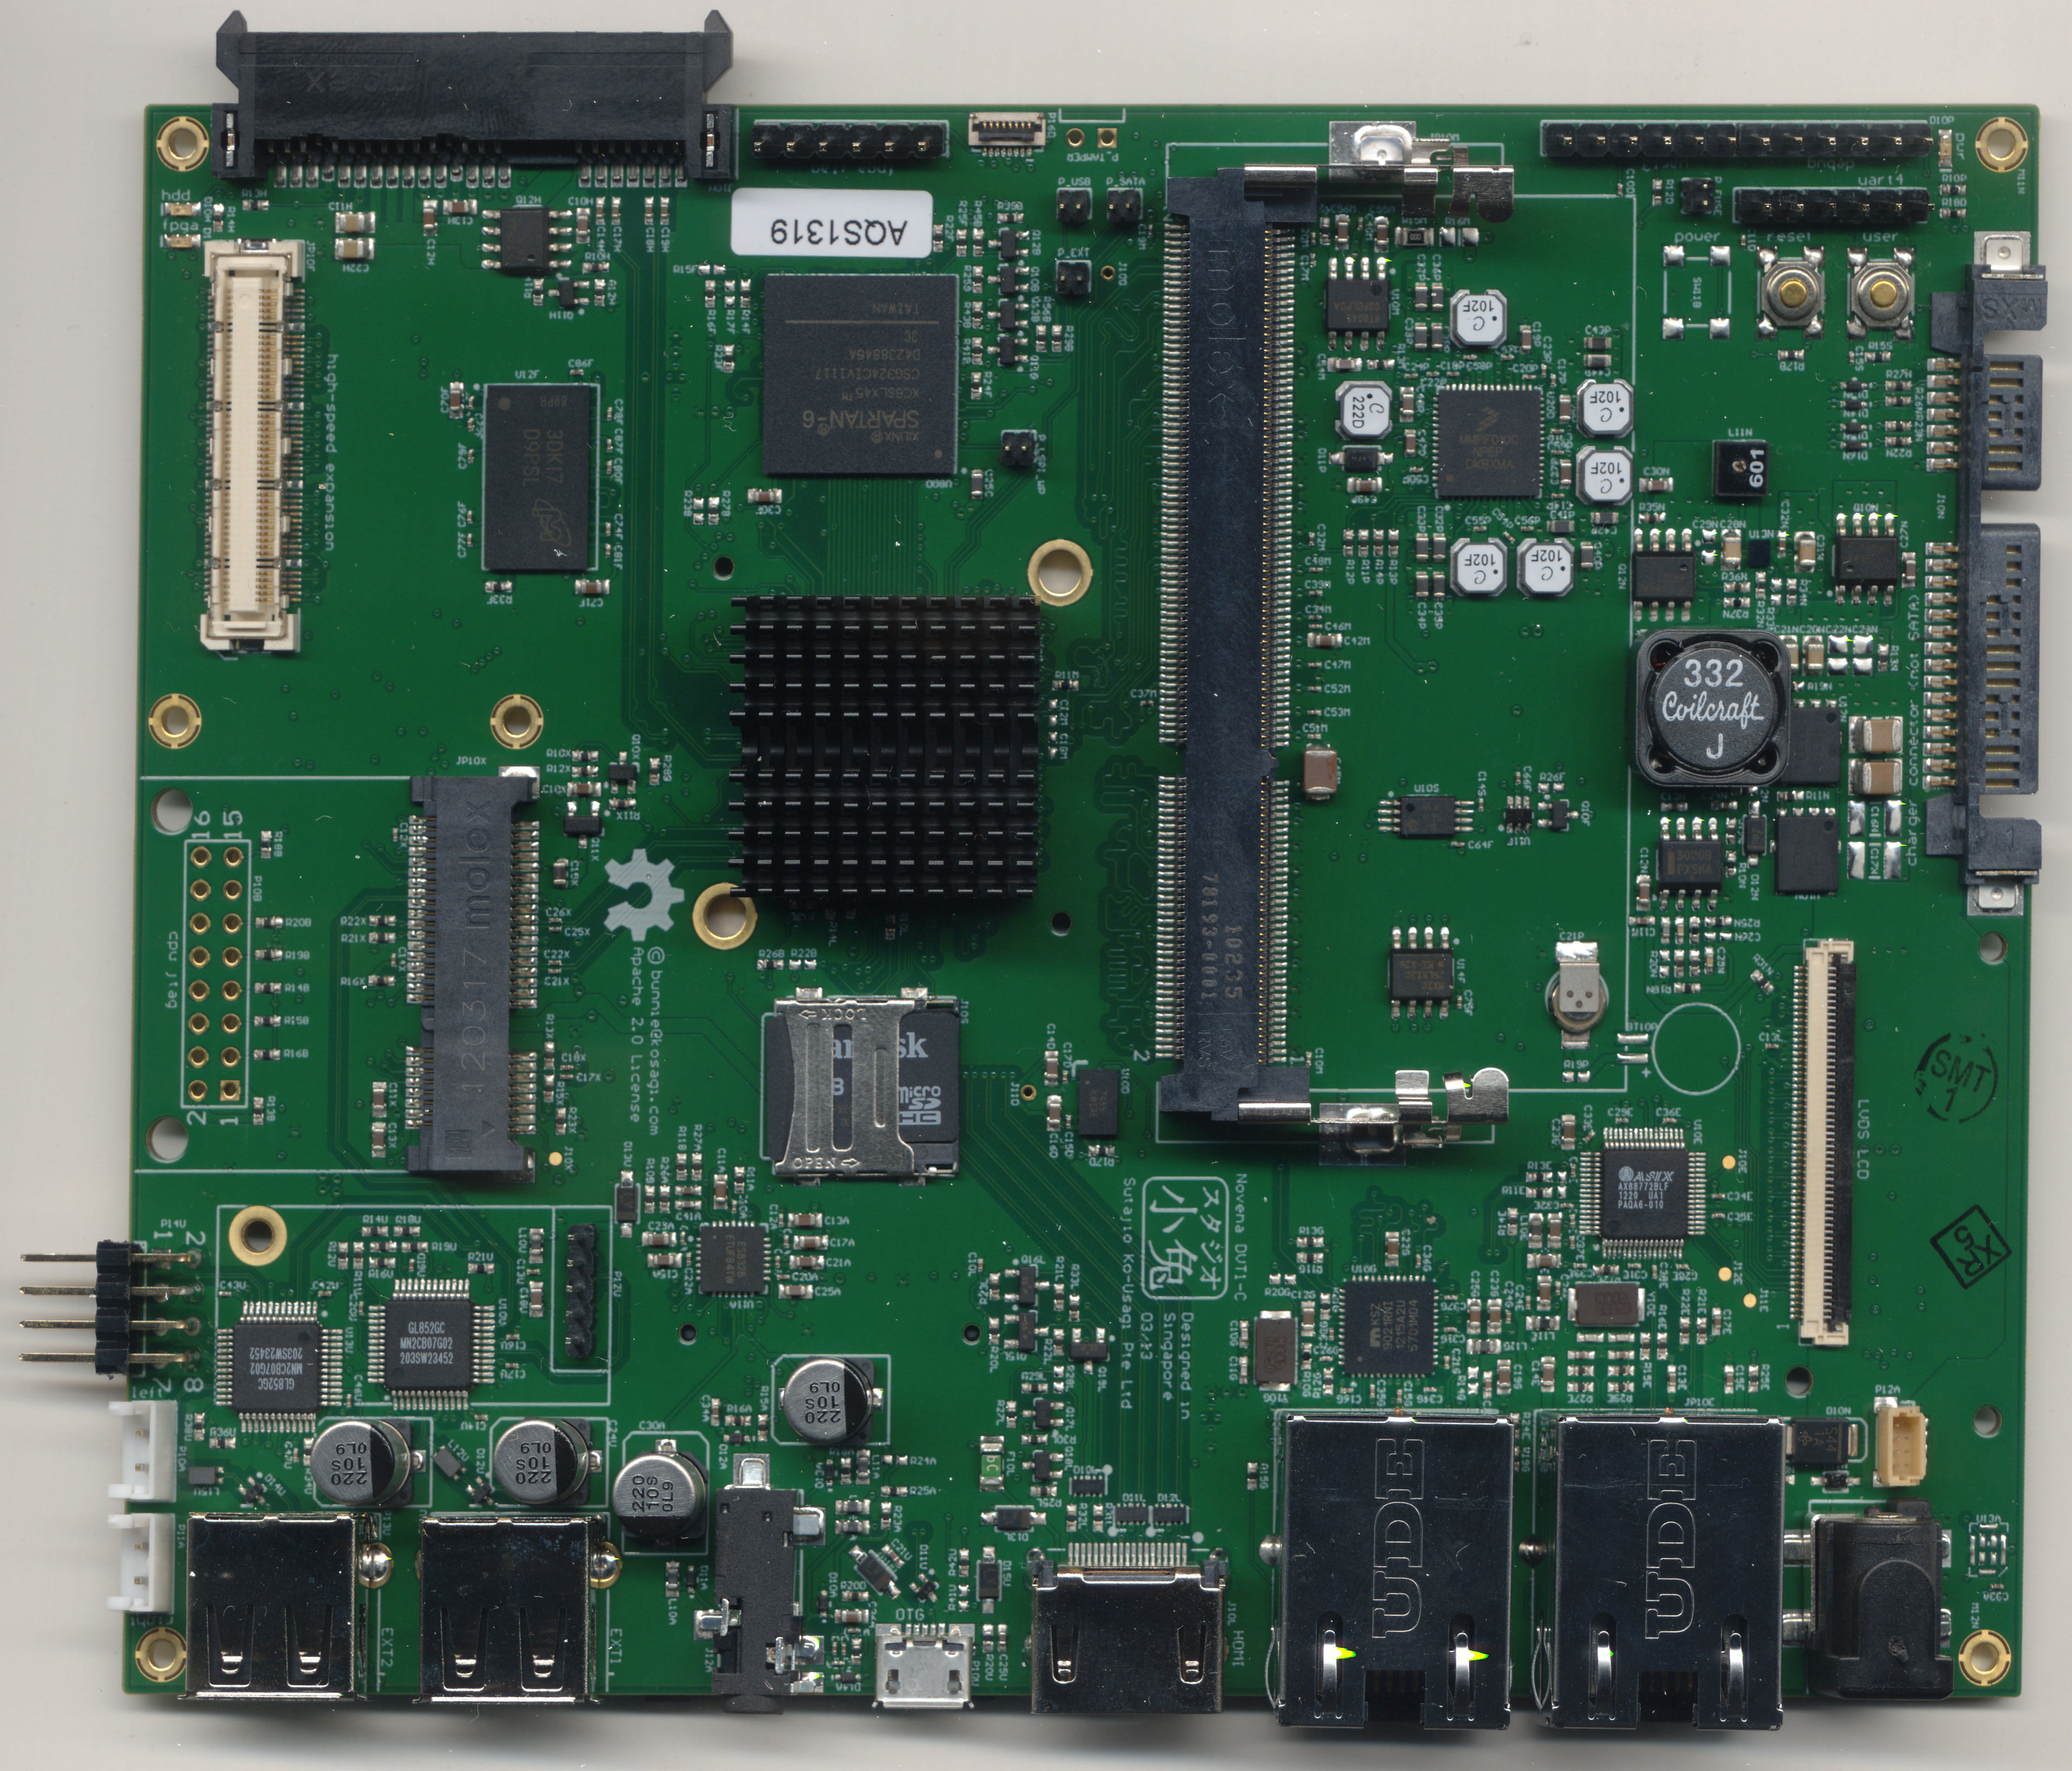
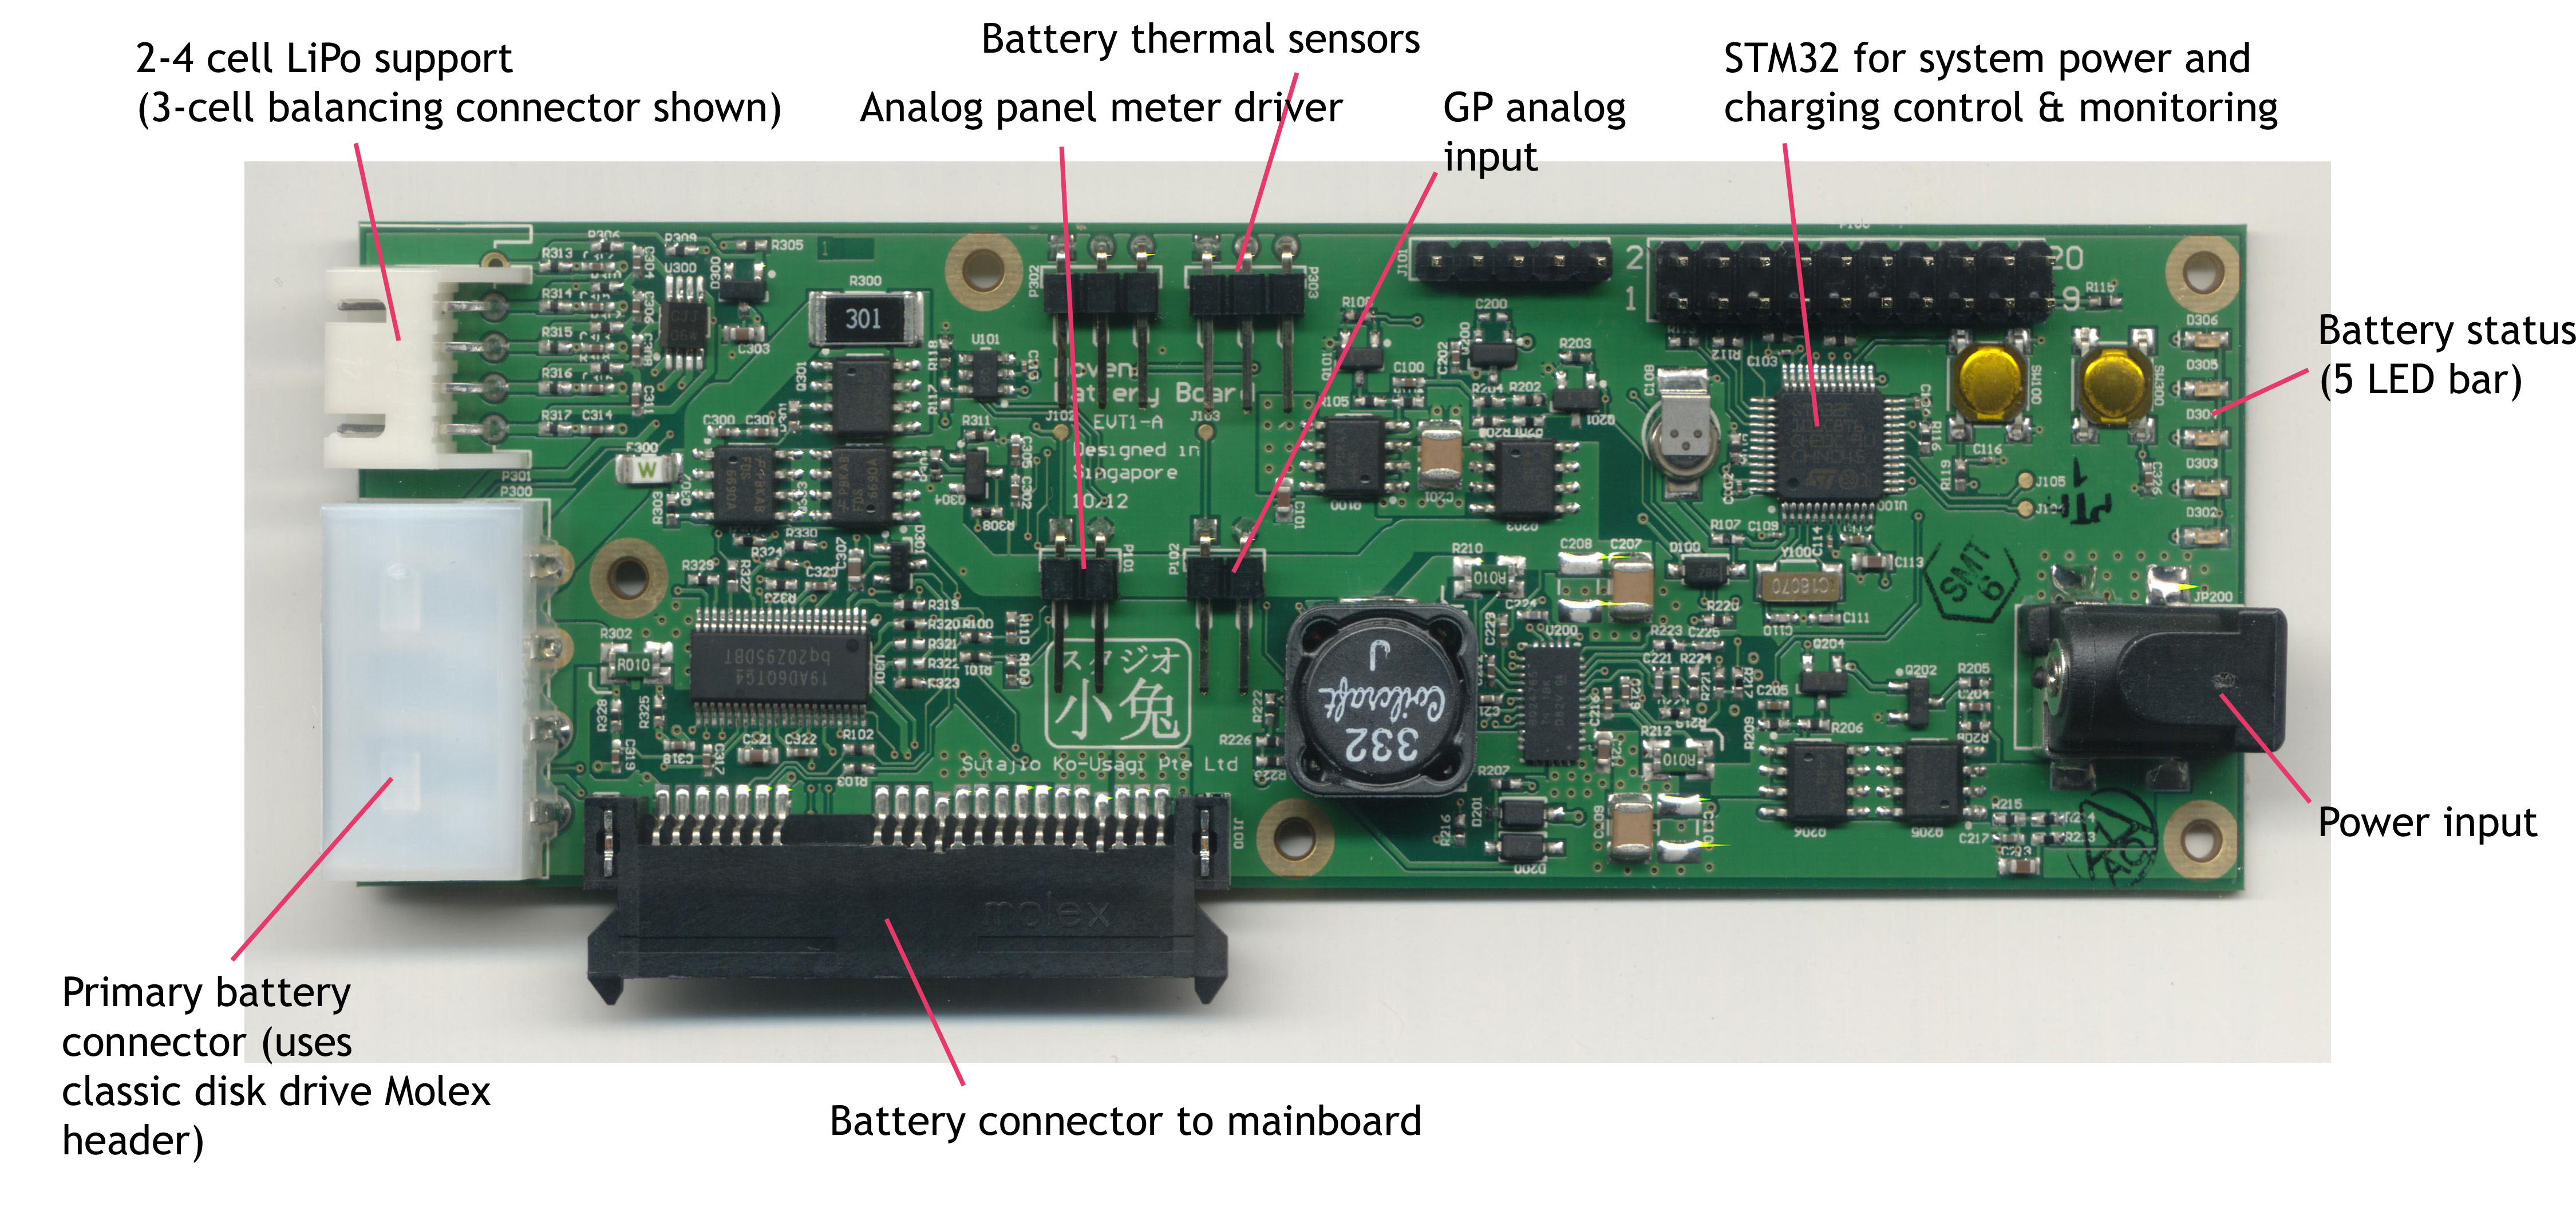
We include a FPGA and a nice high-speed connector, but many users just want to toggle a GPIO or take a simple analog reading without having to design and build a PCBA from scratch. If we can raise an additional $50k over the previous stretch goal, we will include a General Purpose Breakout Board (GPBB) with every piece of hardware we ship.

The GPBB buffers 16 FPGA outputs and 8 FPGA inputs to be compatible with either 3.3V or 5V, gang-selectable via software. It also provides six 10-bit analog inputs (up to 200ksps sample rate) and two 10bit analog outputs (~100ksps max rate), all broken out to an easy-to-use 40-pin male 0.1″ dual-row header.

The GPBB is handy for all kinds of control and sensing situations. Because the GPBB is backed by a powerful FPGA, each of the buffered FPGA output lines can be programmed for a wide range of applications. For example, an FPGA output could be configured as a precision PWM channel with hard-real time feedback control for demanding robotics motor driver applications. Or it can be used to interface with bespoke serial protocols, such as those found in modern LED strip lighting.

For user who don’t want to muck with FPGA code and prefer to grapple a GPIO from the command line, we have user-space drivers for the board prepared in Linux, through a combination of the Linux GPIO API, and the Linux I2C API. As a result it’s a snap to script up simple applications using your favorite high level language.

Significantly, the GPBB isn’t vaporware — we developed this board originally for use as a breakout for production testing circuit stickers from our Chibitronics product line. At this very moment, the GPBB design is being used to drive mass production of circuit stickers.

Stretch #3: ROMulator Breakout Board: +$150k ($400k total)

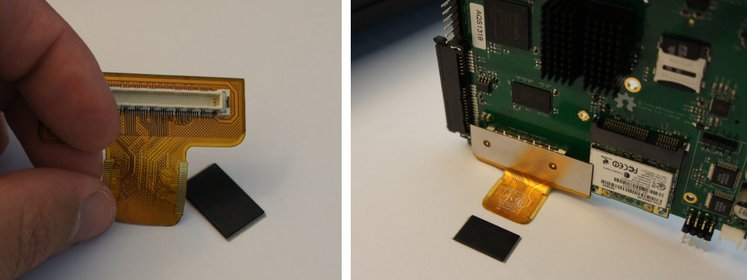
We designed Novena to be a versatile hacking tool. Case in point, last December we reported results at 30C3 revealing a secret knock that can allow arbitrary code execution on select SD card controllers. We discovered this in part with the assistance of Novena.

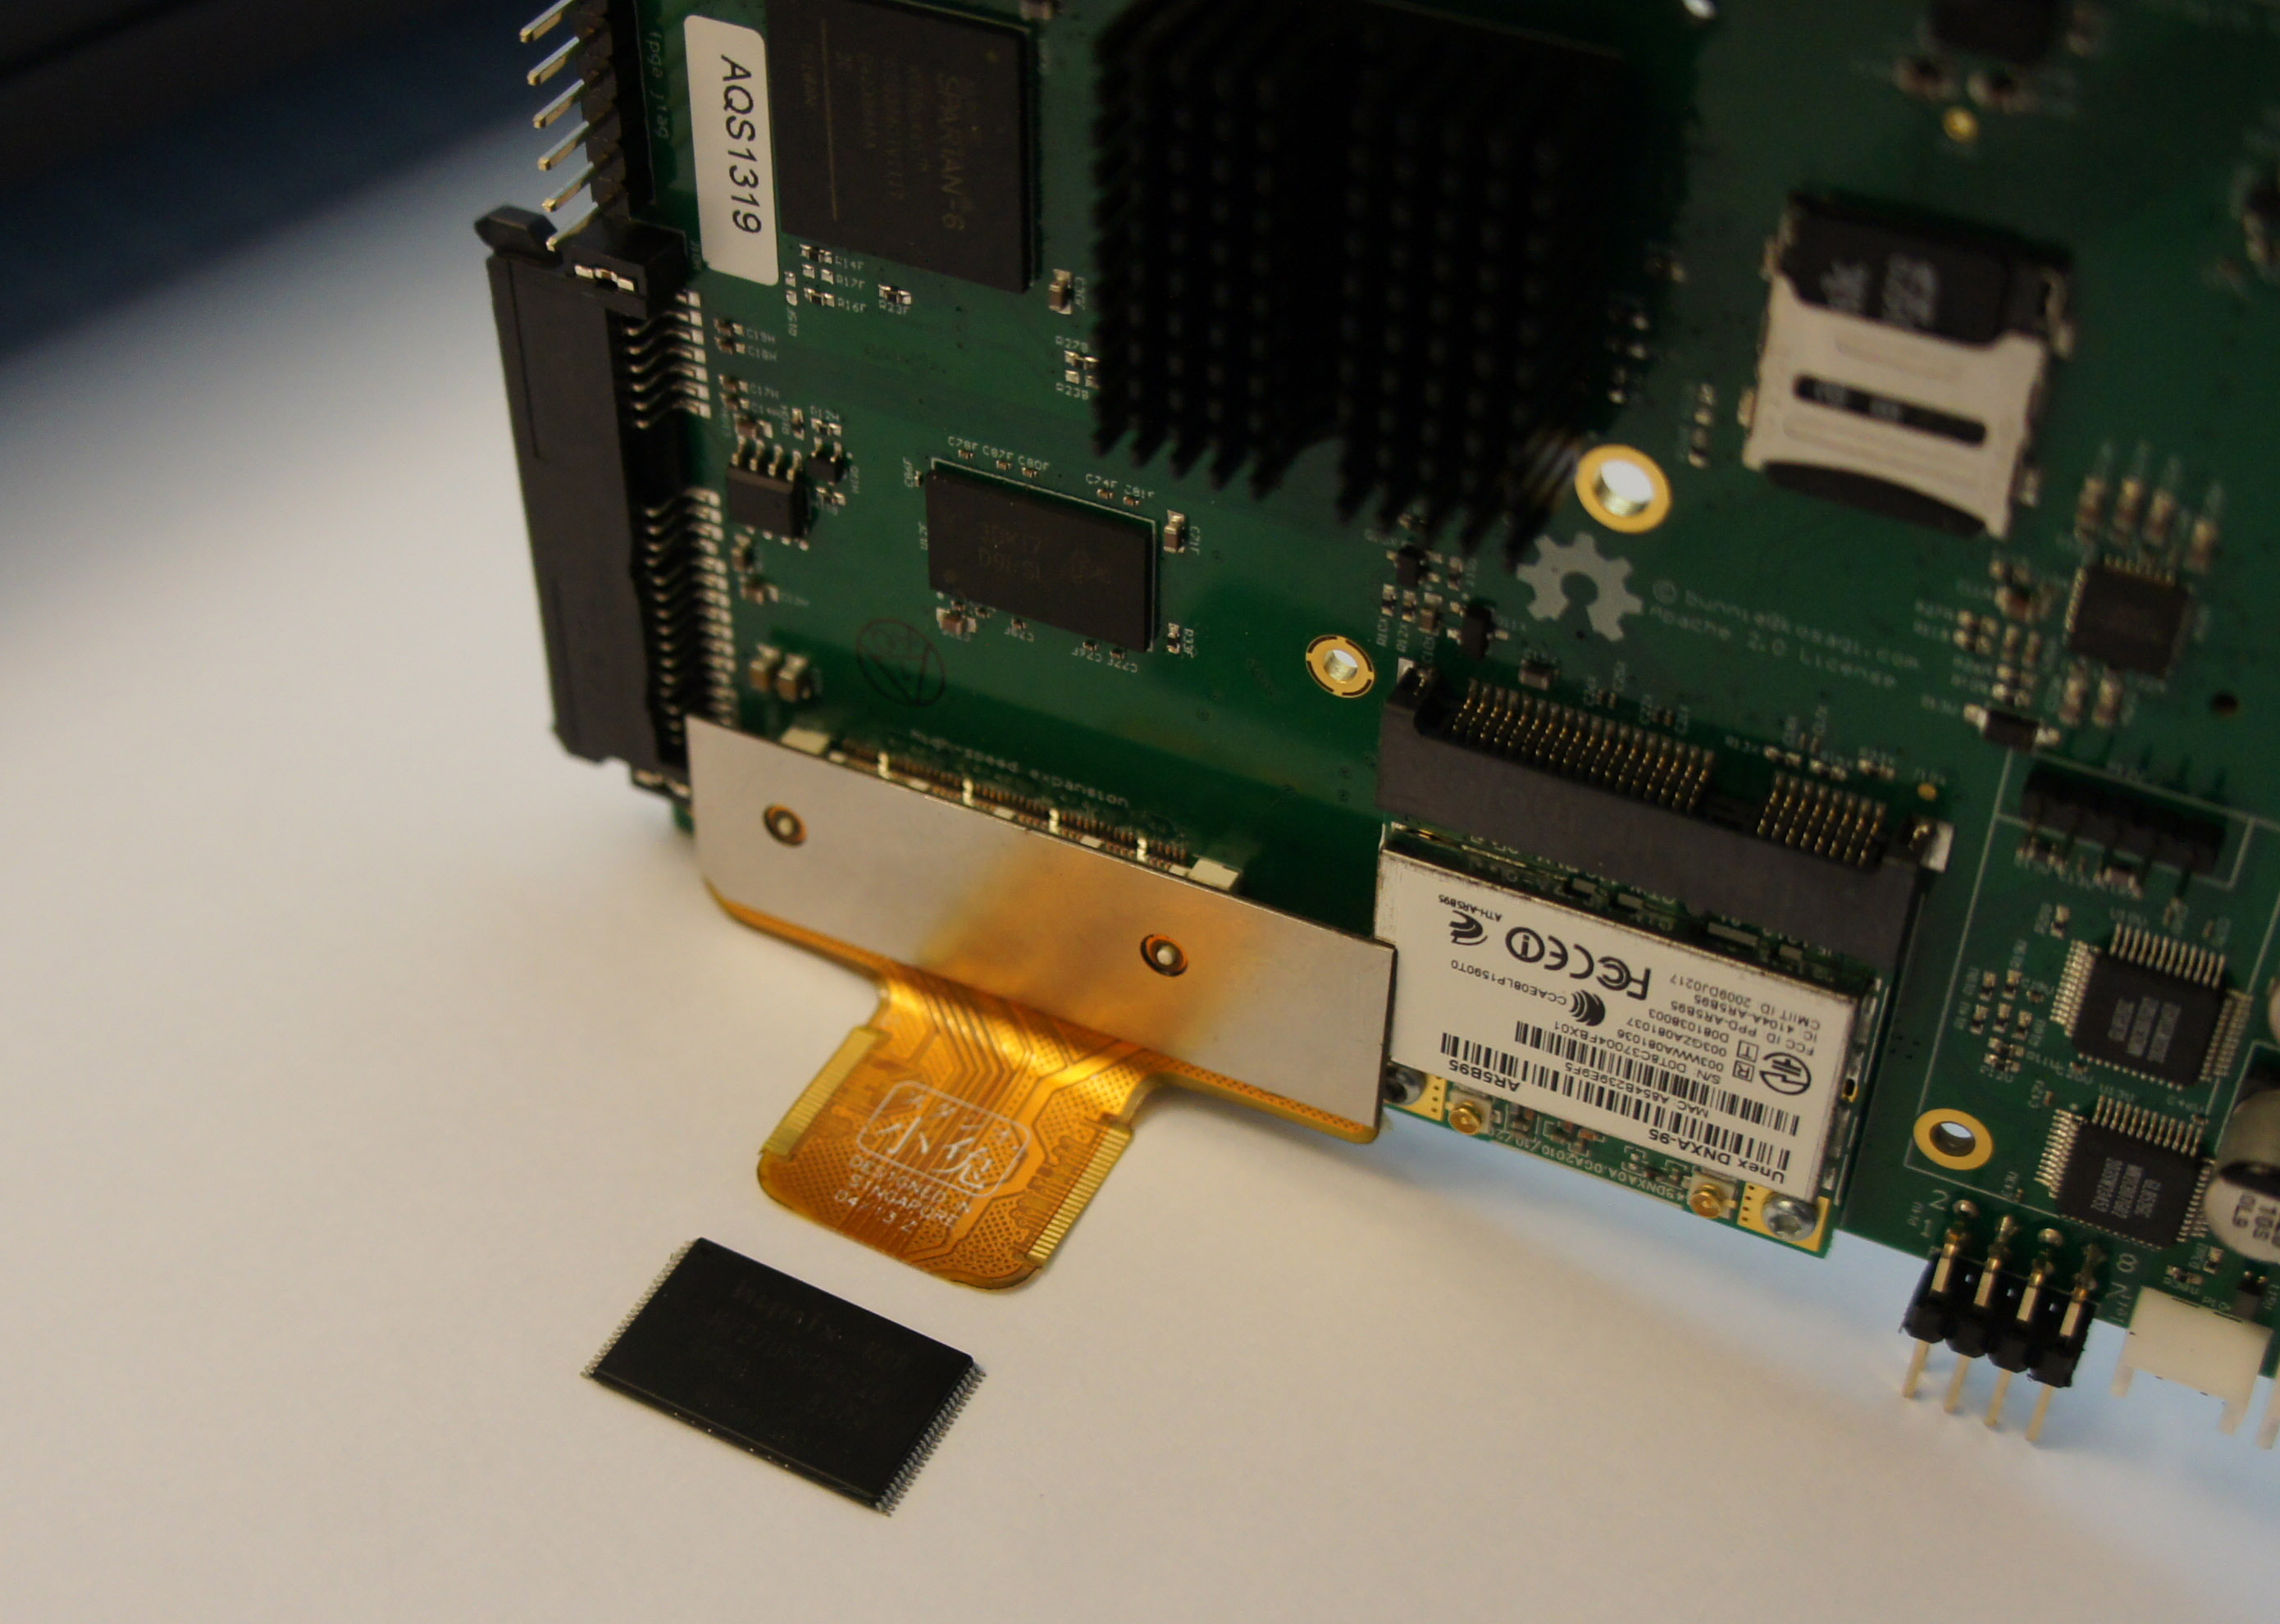
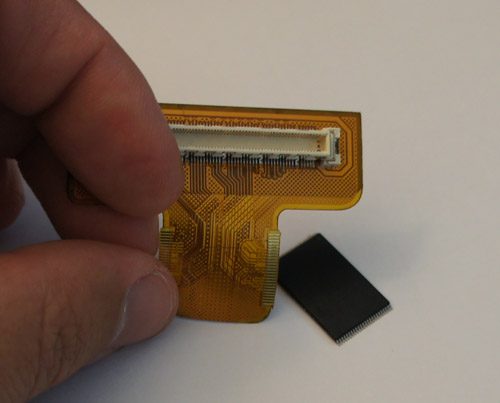
We used Novena as a ROMulator — a FLASH ROM emulator. For this application, we developed a flexible PCB that’s so thin, it can be soldered in between a TSOP FLASH ROM and the underlying PCB. In this mode, we can use the FPGA built into Novena to snoop the traffic going to and from the FLASH ROM.

Alternately, the FPGA can be used to emulate a ROM device using its local 256 MiB of DDR3 memory. Since the DDR3 controller implementation is multi-ported, during ROM emulation one can inspect and modify the ROM contents on the fly without disrupting target operation. This has a number of powerful applications, from ToC/ToU attacks to speeding up firmware development on devices that load from NAND.

If we can raise an additional $50k over the previous tier, we’ll include a ROMulator Breakout Board (in addition to the General Purpose Breakout Board) with every piece of hardware shipped.

Stretch #4: MyriadRF Software Defined Radio: +$250k ($500k total) or >200 backers for the desktop/laptop/heirloom version

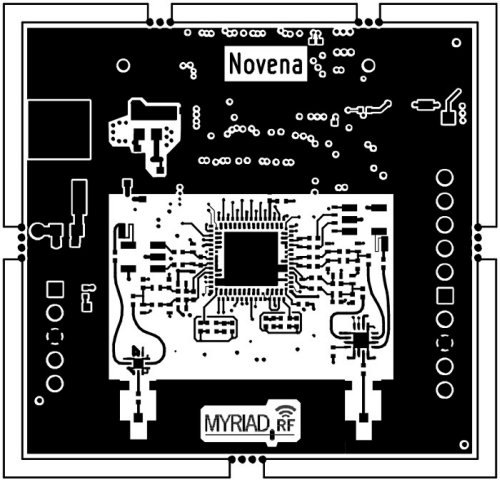
Software! Defined! Radio! We’re very excited to offer the possibility of teaming up with MyriadRF, to provide a custom-made SDR solution for Novena. Their open hardware SDR solution operates in all the major radio bands, including LTE, CDMA, TD-CDMA, W-CDMA, WiMAX, 2G and many more.

The retail price of the MyriadRF is $299, and MyriadRF has graciously pulled strings with their fabrication partner and enabled a low minimum order quantity of 200 units to build this custom version for Novena. If we can clear a total raise of $500k or at least 200 total backers for the desktop/laptop/heirloom version, we’ll include with every desktop/laptop/heirloom version a MyriadRF SDR board. Since the MyriadRF is such a high ticket-item, only desktop and higher tiers are eligible to receive this reward.

Significantly, the MyriadRF extends beyond the front of the Novena case, so part of the money from this tier is going toward buying the extra tooling to provision a removable panel on the front edge of the case, so that when the SDR module is installed it can comfortably hang out of the case, giving easy access to the U.FL RF connectors.

If you find these stretch goals exciting and/or useful, please visit our campaign page and join the community helping to bring open hardware to the world, and please help us spread the word!

Crowdfunding the Novena Open Laptop

Wednesday, April 2nd, 2014

We’re launching a crowdfunding campaign around our Novena open hardware computing platform. Originally, this started as a hobby project to build a computer just for me and xobs – something that we would use every day, easy to extend and to mod, our very own Swiss Army knife. I’ve posted here a couple of times about our experience building it, and it got a lot of interest. So by popular demand, we’ve prepared a crowdfunding offering and you can finally be a backer.


Background


Novena is a 1.2GHz, Freescale quad-core ARM architecture computer closely coupled with a Xilinx FPGA. It’s designed for users who want to modify and extend their hardware: all the documentation for the PCBs are open and free to download, and it comes with a variety of features that facilitate rapid prototyping.

We are offering four variations, and at the conclusion of the Crowd Supply campaign on May 18, all the prices listed below will go up by 10%:

  • “Just the board” ($500): For crafty people who want to build their case and define their own style, we’ll deliver to you the main PCBA, stuffed with 4GiB of RAM, 4GiB microSD card, and an Ath9k-based PCIe wifi card. Boots to a Debian desktop over HDMI.
  • “All-in-One Desktop” ($1195): Plug in your favorite keyboard and mouse, and you’re ready to go; perfect for labs and workbenches. You get the circuit board above, inside a hacker-friendly case with a Full HD (1920×1080) IPS LCD.
  • “Laptop” ($1995): For hackers on the go, we’ll send you the same case and board as above, but with battery controller board, 240 GiB SSD, and a user-installed battery. As everyone has their own keyboard preference, no keyboard is included.
  • “Heirloom Laptop” ($5000): A show stopper of beauty; a sure conversation piece. This will be the same board, battery, and SSD as above, but in a gorgeous, hand-crafted wood and aluminum case made by Kurt Mottweiler in Portland, Oregon. As it’s a clamshell design, it’s also the only offering that comes with a predetermined keyboard.

All configurations will come with Debian (GNU/Linux) pre-installed, but of course you can build and install whatever distro you prefer!

Novena Gen-2 Case Design

Followers of this blog may have seen a post featuring a prototype case design we put together last December. These were hand-built cases made from aluminum and leather and meant to validate the laptop use case. The design was rough and crafted by my clumsy hands – dubbed “gloriously fuggly [sic]” – yet the public response was overwhelmingly positive. It gave us confidence to proceed with a 2nd generation case design that we are now unveiling today.


The first thing you’ll notice about the design is that the screen opens “the wrong way”. This feature allows the computer to be usable as a wall-hanging unit when the screen is closed. It also solves a major problem I had with the original clamshell prototype – it was a real pain to access the hardware for hacking, as it’s blocked by the keyboard mounting plate.

Now, with the slide of a latch, the screen automatically pops open thanks to an internal gas spring. This isn’t just an open laptop — it’s a self-opening laptop! The internals are intentionally naked in this mode for easy access; it also makes it clear that this is not a computer for casual home use. Another side benefit of this design is there’s no fan noise – when the screen is up, the motherboard is exposed to open air and a passive heatsink is all you need to keep the CPU cool.

Another feature of this design is the LCD bezel is made out of a single, simple aluminum sheet. This allows users with access to a minimal machine shop to modify or craft their own bezels – no custom tooling required. Hopefully this makes adding knobs and connectors, or changing the LCD relatively easy. In order to encourage people to experiment, we will ship desktop and laptop devices with not one, but two LCD bezels, so you don’t have to worry about having an unusable machine if you mess up one of the bezels!

The panel covering the “port farm” on the right hand side of the case is designed to be replaceable. A single screw holds it in place, so if you design your own motherboard or if you want to upgrade in the future, you’re not locked into today’s port layout. We take advantage of this feature between the desktop and the laptop versions, as the DC power jack is in a different location for the two configurations.

Finally, the inside of the case features a “Peek Array”. It’s an array of M2.5 mounting holes (yes, they are metric) populating the extra unused space inside the case, on the right hand side in the photo above. It’s named after Nadya Peek, a graduate student at MIT’s Center for Bits and Atoms. Nadya is a consummate maker, and is a driving force behind the CBA’s Fab Lab initiative. When I designed this array of mounting bosses, I imagined someone like Nadya making their own circuit boards or whatever they want, and mounting it inside the case using the Peek Array.

The first thing I used the Peek Array for is the speaker box. I desire loud but good quality sound out of my laptop, so I 3D printed a speakerbox that uses 36mm mini-monitor drivers, and mounted it inside using the Peek Array. I would be totally stoked if a user with real audio design experience was to come up with and share a proper tuned-port design that I could install in my laptop. However, other users with weight, space or power concerns can just as easily design and install a more modest speaker.

I started the Gen-2 case design in early February, after xobs and I finally decided it was time to launch a crowdfunding campaign. With a bit of elbow grease and the help of a hard working team of engineers and project managers at my contract manufacturing partner, AQS (that’s Celia and Chemmy pictured above, doing an initial PCBA fitting two weeks ago), I was able to bring a working prototype to San Jose and use it to give my keynote at EELive today.

The Heirloom Design (Limited Quantities)

One of the great things about open hardware is it’s easier to set up design collaborations – you can sling designs and prototypes around without need for NDAs or cumbersome legal agreements. As part of this crowdfunding campaign, I wanted to offer a really outstanding, no-holds barred laptop case – something you would be proud to have for years, and perhaps even pass on to your children as an heirloom. So, we enlisted the help of Kurt Mottweiler to build an “heirloom laptop”. Kurt is a designer-craftsman situated in Portland, Oregon and drawing on his background in luthiery, builds bespoke cameras of outstanding quality from materials such as wood and aluminum. We’re proud to have this offering as part of our campaign.

For the prototype case, Kurt is featuring rift-sawn white oak and bead-blasted-and-anodized 6061 aluminum. He developed a composite consisting of outer layers of paper backed wood veneer over a high-density cork core with intervening layers of 5.5 ounce fiberglass cloth, all bonded with a high modulus epoxy resin. This composite is then gracefully formed into semi-monocoque curves, giving a final wavy shape that is both light, stiff, and considers the need for air cooling.

The overall architecture of Kurt’s case mimics the industry-standard clamshell notebook design, but with a twist. The keyboard used within the case is wireless, and can be easily removed to reveal the hardware within. This laptop is an outstanding blend of tasteful design, craftsmanship, and open hardware. And, to wit, since these are truly hand-crafted units, no two units will be exactly alike – each unit will have its own grain and a character that reflects Kurt’s judgment for that particular piece of wood.

How You can Help

For the crowdfunding campaign to succeed, xobs and I need a couple hundred open source enthusiasts to back the desktop or standard laptop offering.

And that underlies the biggest challenge for this campaign – how do we offer something so custom and so complex at a price that is comparable to a consumer version, in low volumes? Our minimum funding goal of $250,000 is a tiny fraction of what’s typically required to recover the million-plus dollar investment behind the development and manufacture of a conventional laptop.

We meet this challenge with a combination of unique design, know-how, and strong relationships with our supply chain. The design is optimized to reduce the amount of expensive tooling required, while still preserving our primary goal of being easy to hack and modify. We’ve spent the last year and a half poring over three revisions of the PCBA, so we have high confidence that this complex design will be functional and producible. We’re not looking to recover that R&D cost in the campaign – that’s a sunk cost, as anyone is free to download the source and benefit from our thoroughly vetted design today. We also optimized certain tricky components, such as the LCD and the internal display port adapter, for reliable sourcing at low volumes. Finally, I spent the last couple of months traveling the world, lining up a supply chain that we feel confident can deliver this design, even in low volume, at a price comparable to other premium laptop products.

To be clear, this is not a machine for the faint of heart. It’s an open source project, which means part of the joy – and frustration – of the device is that it is continuously improving. This will be perhaps the only laptop that ships with a screwdriver; you’ll be required to install the battery yourself, screw on the LCD bezel of your choice, and you’ll get the speakers as a kit, so you don’t have to use our speaker box design – if you have access to a 3D printer, you can make and fine tune your own speaker box.

If you’re as excited about having a hackable, open laptop as we are, please back our crowdfunding campaign at Crowd Supply, and follow @novenakosagi for real-time updates.

Make: Article on Novena

Thursday, January 9th, 2014

Recently, the Make: blog ran an article on our laptop project, Novena. You can now follow @novenakosagi for updates on the project. I’d also like to reiterate here that the photos shown in the article are just an early prototype, and the final forms of the machine are going to be different — quite different — from what’s shown.

Below is a copy of the article text for your convenient reading. And, as a reminder, specs and source files can be downloaded at our wiki.

Building an Open Source Laptop

About a year and a half ago, I engaged on an admittedly quixotic project to build my own laptop. By I, I mean we, namely Sean “xobs” Cross and me, bunnie. Building your own laptop makes about as much sense as retrofitting a Honda Civic with a 1000hp motor, but the lack of practicality never stopped the latter activity, nor ours.

My primary goal in building a laptop was to build something I would use every day. I had previously spent several years at chumby building hardware platforms that I’m ashamed to admit I rarely used. My parents and siblings loved those little boxes, but they weren’t powerful enough for a geek like me. I try to allocate my discretionary funds towards things based on how often I use them. Hence, I have a nice bed, as I spend a third of my life in it. The other two thirds of my life is spent tapping at a laptop (I refuse to downgrade to a phone or tablet as my primary platform), and so when picking a thing to build that I can use every day, a laptop is a good candidate.

SONY DSC I’m always behind a keyboard!

The project was also motivated by my desire to learn all things hardware. Before this project, I had never designed with Gigabit Ethernet (RGMII), SATA, PCI-express, DDR3, gas gauges, eDP, or even a power converter capable of handling 35 watts – my typical power envelope is under 10 watts, so I was always able to get away with converters that had integrated switches. Building my own laptop would be a great way for me to stretch my legs a bit without the cost and schedule constraints normally associated with commercial projects.

The final bit of motivation is my passion for Open hardware. I’m a big fan of opening up the blueprints for the hardware you run – if you can’t Hack it, you don’t Own it.

Back when I started the project, it was me and a few hard core Open ecosystem enthusiasts pushing this point, but Edward Snowden changed the world with revelations that the NSA has in fact taken advantage of the black-box nature of the closed hardware ecosystem to implement spying measures (“good news, we weren’t crazy paranoids after all”).

Our Novena Project is of course still vulnerable to techniques such as silicon poisoning, but at least it pushes openness and disclosure down a layer, which is tangible progress in the right direction.

While these heady principles are great for motivating the journey, actual execution needs a set of focused requirements. And so, the above principles boiled down to the following requirements for the design:

  • All the components should have a reasonably complete set of NDA-free documentation. This single requirement alone culled many choices. For example, Freescale is the only SoC vendor in this performance class where you can simply go to their website, click a link, and download a mostly complete 6,000-page programming manual. It’s a ballsy move on their part and I commend them for the effort.
  • Low cost is not an objective. I’m not looking to build a crippled platform based on some entry-level single-core SoC just so I can compete price-wise with the likes of Broadcom’s non-profit Raspberry Pi platform.
  • On the other hand, I can’t spec in unicorn hair, although I come close to that by making the outer case from genuine leather (I love that my laptop smells of leather when it runs). All the chips are ideally available off the shelf from distributors like Digi-Key and have at least a five year production lifetime.
  • Batteries are based off of cheap and commonly available packs used in RC hobby circles, enabling users to make the choice between battery pack size, runtime, and mass. This makes answering the question of “what’s the battery life” a bit hard to answer – it’s really up to you – although one planned scenario is the trans-Siberian railroad trek, which is a week-long trip with no power outlets.
  • The display should also be user-configurable. The US supply chain is weak when it comes to raw high-end LCD panels, and also to address the aforementioned trans-Siberian scenario, we’d need the ability to drive a low-power display like a Pixel Qi, but not make it a permanent choice. So, I designed the main board to work with a cheap LCD adapter board for maximum flexibility.
  • No binary blobs should be required to boot and operate the system for the scenarios I care about. This one is a bit tricky, as it heavily limits the wifi card selection, I don’t use the GPU, and I rely on software-only decoders for video. But overall, the bet paid off; the laptop is still very usable in a binary-blob free state. We prepared and gave a talk recently at 30C3 using only the laptops.
  • The physical design should be accessible – no need to remove a dozen screws just to pull off the keyboard. This design requires removing just two screws.
  • The design doesn’t have to be particularly thin or light; I’d be happy if it was on par with the 3cm-thick Thinkpads or Inspirons I would use back in the mid 2000’s.
  • The machine must be useful as a hardware hacking platform. This drives the rather unique inclusion of an FPGA into the mainboard.
  • The machine must be useful as a security hacking platform. This drives the other unusual inclusion of two Ethernet interfaces, a USB OTG port, and the addition of 256 MiB DDR3 RAM and a high-speed expansion connector off of the FPGA.
  • The machine must be able to build its own firmware from source. This drives certain minimum performance specs and mandates the inclusion of a SATA interface for running off of an SSD.

After over a year and a half of hard work, I’m happy to say our machines are in a usable form. The motherboards are very reliable, the display is a 13” 2560×1700 (239ppi) LED-backlit panel, and the cases have an endoskeleton made of 5052 and 7075 aluminum alloys, an exterior wrapping of genuine leather, an interior laminate of paper (I also love books and papercraft), and cosmetic panels 3D printed on a Form 1. The design is no Thinkpad Carbon X1, but they’ve held together through a couple of rough international trips, and we use our machines almost every day.

Laptop parked in front of the Form1 3D printer used to make its body panels.

I was surprised to find the laptop was well-received by hackers, given its homebrew appearance, relatively meager specs and high price. The positive response has encouraged us to plan a crowd funding campaign around a substantially simplified (think “all in one PC” with a battery) case design. We think it may be reasonable to kick off the campaign shortly after Chinese New Year, maybe late February or March. Follow @novenakosagi for updates on our progress!

The first two prototypes are wrapped in red sheepskin leather, and green pig suede leather.

Detail view of the business half of the laptop.

Update on Our Laptop (aka Novena)

Saturday, July 6th, 2013

Back in December, I posted that we’re building an open laptop. The post generated hundreds of comments, and I was surprised there was so much interest.

To be honest, that was overwhelming. Also, there were many who didn’t get what we’re trying to do — as indicated by suggestions along the vein of “use a Core i7 and a fast nVidia graphics chip and sell it for under a hundred bucks and then I’d buy it”.

Rather than try to convince the Internet about my opinions, or suffer the distraction of running a Kickstarter campaign around a very complex and risky project, I decided to hunker down and stick with what I do best — hacking hardware.

Despite the lack of updates here, the project is alive and kicking. All our progress has been publicly trackable via our git repos and on our wiki. There’s also a discussion forum, although I tend to check in only once every month. The board-bringup process and feature validation matrix is noted here, and the list of changes from EVT to DVT is documented here. We also had a little adventure writing code that could calibrate wire delays on the DDR3 bus for a variety of SO-DIMM modules.

The TL;DR version of the wiki documentation is: the board has gone through a major revision, and received a few upgrades that I think really refines its vision.

The FPGA

For me, the integration of the FPGA is a real point of differentiation, so I beefed it up; the DVT version sports a bigger Spartan 6 LX45 FPGA and an upgraded power supply to feed it. I want to be able to use the FPGA to do more coprocessing and data acquisition, and so I added a 2 Gbit DDR3 buffer, connected via a 16-bit, 800MT/s bus. And finally, I want to be able to plug in various high-speed data acquisition modules, so I dropped the Raspberry Pi header and low-speed analog I/Os, replacing the entire cluster with a single high-speed expansion header. The new high speed header breaks out 21 differential pairs plus some single-ended pins. This is sufficient to mate dual 8-bit 500++ Msps ADCs onto the FPGA, making for a fairly decent signal acquisition system.

The Display

I really care about having a lot of pixels on my laptop. So we revised the LCD interface to be easily upgradeable and interchangeable using mezzanine adapter boards. The first adapter board we designed is for a Retina display. We’re now using an LG LP129QE: 12.85″, 2560 x 1700 pixels (239ppi), with a 24-bit color depth. It looks gorgeous.

Below is what the mezzanine board looks like. Dual 24-bit LVDS channels, power, PWM, I2C and USB are fed into the mezzanine via a custom flex cable. The board itself has an LVDS-to-displayport converter chip, and connects to the display via the new IPEX-style micro-coaxial connectors.

I’ve spent some time on the ID, but I’m not ready to share those details with the world yet; however, I will say that the case will use leather and aluminum, and it’s designed to be open, accessible, and easily upgradable to future versions of the motherboard.

In the meantime, we’ve been developing on the system in an “exploded” fashion. The system below shows all the essential elements together and working; keyboard/mouse, LCD, hard drive, mainboard, hosting its own development environment. The desktop environment shown below is stock armhf Ubuntu with our custom kernel, but that is far from a final decision; we’re testing a broad field of distros for compatibility and convenience.

The Router Case

We’ve had a lot of interest from people wanting to use the Novena system as a secure router — the openness of the system is a selling point to many in that space. To that end, we’ve made a conversion case that can house the mainboard alone in a design suggestive of a conventional router.

The 2.5″ hard drive is shown for size scaling.

The lid is anodized aluminum, and most of the screws on the top are decorative. I wanted to buck the design trend of mysterious black monoliths and playing hide-the-screws. Instead, the screws are featured front-and-center, inviting the user to twist them and open things up. “There is no magic in this box. Open me and you shall understand.

Above is the “router” with the lid off and all the ports filled. Probably for the partners I’m working with, we’ll depopulate all of the ports except for the dual ethernet, OTG, and the power jack to reduce cost.

The First Hack (Romulator)

Already the DVT version of Novena has been put to task in helping with our hacking projects. We implemented a “romulator” using the high speed interface, FPGA and DDR3 combo.

The idea is to do real-time, in-circuit emulation of NAND FLASH using the FPGA + DDR3. The FPGA faithfully emulates a NAND device, whose contents can be monitored and modified real-time by the i.MX6 CPU — the DDR3 interface has oodles of bandwidth, and the interface macro provided by Xilinx is configured to provide four virtual access ports to the RAM. In addition, 16MB of the DDR3 is reserved for a logic analyzer-style trace capture of the NAND traffic, so we can dig through the time history of complex transactions and figure out what happened and what went wrong.

A small flexible circuit board adapter plugs into the high speed expansion socket. The board is thin enough to be soldered underneath a FLASH chip for passive monitoring, or directly to the target motherboard for active emulation.

Other boards will be made that plug into the high speed port. My short list includes a high speed ADC board, variants focusing on digital signal acquisition, and PHYs to standards such as USB or HDMI.

The Bottom Line
At the end of the day, we’re having fun building the laptop we always wanted — it’s now somewhere between a python-scriptable oscilloscope, logic analyzer, and a laptop. I think it will be an indispensable tool for hacking, particularly for doing signal analysis which requires coordination across multiple protocol layers, complex trigger conditions and/or feedback stimulus loops.

As for the inevitable question about if these will be sold, and for how much…once we’re done building the system (and, “done” is a moving target — really, the whole idea is this is continuously under development and improving) I’ll make it available to qualified buyers. Because it’s open-source and a bit quirky, I’m shy on the idea of just selling it to anyone who comes along wanting a laptop. I’m worried about buyers who don’t understand that “open” also means a bit of DIY hacking to get things working, and that things are continuously under development. This could either lead to a lot of returns, or spending the next four years mired in basic customer support instead of doing development; neither option appeals to me. So, I’m thinking that the order inquiry form will be a python or javascript program that has to be correctly modified and submitted via github; or maybe I’ll just sell the kit of components, as this would target buyers who know what they are getting into, and can RTFM. And probably, it will be priced in accordance with what you’d expect to pay for a bespoke digital oscilloscope meant to take a position at the lab bench for years, and not a generic craptop that you’ll replace within a year. Think “heirloom laptop”.

Anyways, that’s the update. Back to hacking!

Building my Own Laptop

Sunday, December 16th, 2012

We are building an open laptop, with some wacky features in it for hackers like me.

This is a lengthy project. Fortunately, ARM CPUs are getting fast enough, and Moore’s Law is slowing down, so that even if it took a year or so to complete, I won’t be left with a woefully useless design. Today’s state of the art ARM CPUs — quad-core with GHz+ performance levels — is good enough for most day-to-day code development, email checking, browsing etc.

We started the design in June, and last week I got my first prototype motherboards, hot off the SMT line. It’s booting linux, and I’m currently grinding through the validation of all the sub-components. I thought I’d share the design progress with my readers.

Of course, a feature of a build-it-yourself laptop is that all the design documentation is open, so others of sufficient skill and resources can also build it. The hardware and its sub-components are picked so as to make this the most practically open hardware laptop I could create using state of the art technology. You can download, without NDA, the datasheets for all the components, and key peripheral options are available so it’s possible to build a complete firmware from source with no opaque blobs.

Above is an annotated diagram of the circuit board. The dimensions of the board are approximately 121mm x 150mm — sized to fit comfortably underneath a standard-sized laptop keyboard. The image above is rotated versus the installation orientation; the port farm is meant to be on the right hand side of the laptop, not on the bottom. The overall height of the board is just under 14mm, with the height being set by the thickness of an Ethernet connector. The thickness on my Lenovo T520 base portion is just under 24mm, so once we stack a keyboard and plastics on this it’ll be just about the same.

Here are some of the features of the laptop motherboard:

  • Freescale iMX6 CPU — same footprint can support dual-lite and quad versions:
  • Internal memory:
    • Boot from microSD firmware
    • 64-bit, DDR3-1066 SO-DIMM, upgradable to 4GB
    • SATA-II (3Gbps)
  • Internal ports & sensors:
    • mini PCI-express slot (for blob-free wifi, bluetooth, mobile data, etc.)
    • UIM slot for mPCIe mobile data cards
    • Dual-channel LVDS LCD connector (up to QXGA (2048×1536) @ 60Hz resolution) with USB2.0 side-channel for a display-side camera
    • Resistive touchscreen controller (note: captouch displays typically come with a controller)
    • 1.1W, 8-ohm internal speaker connectors
    • 2x USB2.0 internal connectors for keyboard and mouse/trackpad
    • Digital microphone
    • 3-axis accelerometer
    • header for optional AW-NU137 wifi module (*)
  • External ports:
    • HDMI
    • SD card reader
    • headphone + mic port (compatible with most mobile phone headsets, supports sensing in-line cable buttons)
    • 2x USB 2.0 ports, supporting high-current (1.5A) device charging
    • 1Gbit ethernet
  • “Fun” features:
    • 100 Mbit ethernet — dual Ethernet capability allows laptop to be used as an in-line packet filter or router
    • USB OTG — enables laptop to spoof/fuzz ethernet, serial, etc. over USB via gadget interface to other USB hosts
    • Utility serial EEPROM — for storing crash logs and other bits of handy data
    • Spartan-6 CSG324-packaged FPGA — has several interfaces to the CPU, including a 2Gbit/s (peak) RAM-like bus — for your bitcoin mining needs. Or whatever else you might want to toss in an FPGA.
    • 8x FPGA-driven 12-bit, 200ksps analog inputs
    • 8x FPGA-driven digital I/O
    • 8x FPGA-driven PWM headers, compatible with hobby ESC and PWM pinouts — enables direct interfacing with various RC motor/servo configurations & quad-copter controllers
    • Raspberry-Pi compatible expansion header
    • 13x CPU-driven supplemental digital I/Os
    • 3x internal UART ports

    Items marked with an asterisk (*) require a closed-source firmware blob, but the system is functional and bootable without the blob.

    In order to give maximum power management flexibility, the battery interface functions are implemented on a daughtercard. I co-opt a cheap and common SATA-style connector to route power and control signals between the mainboard and the daughtercard. To prevent users from accidentally plugging a hard drive into the battery port, I inverted the gender of the battery-SATA connector from the actual mass storage SATA-II connector. The current battery card is meant to work with the battery packs used by most RC enthusiasts — LiPo packs ranging from 2S1P to 4S1P (2-cell to 4-cell). RC packs are great because they are designed for super-fast charging. They are also cheap and easy to buy. For the board-side battery plug I decided to use the Molex connector found on classic disk drives, since they are cheap, common, and easy to assemble with simple tools. I couldn’t use a standard RC connector because the vast majority of them are designed for in-line use, and the few that have board mounts are too thick or too weird for use in this application.

    The battery board can charge batteries at rates in excess of 4A. This means charging a 3-cell, 45Wh (4Ah) pack in about one hour. I’m estimating that a typical power consumption for a reasonable system configuration might be around 5-6W, so that’s 7-8 hours of runtime with a 1-hour charge time using that type of battery pack. Of course, since the whole laptop is user-configurable, typical power consumption is really hard to estimate — you could drop in a monster LCD and a power-hungry magnetic hard drive with loads of peripherals and the power consumption could be much higher. Of course, you can drop in a 100Wh battery pack if you wanted as well :)

    Another cute feature of the battery board is that it can drive an analog panel meter. Xobs had suggested that it would be neat to embed a retro analog needle meter into the palmrest of the laptop to give a real-time display of power consumption. I thought it was a great idea, so I designed that in. Of course, the analog meter is driven by a DAC on the battery microcontroller, so it can be configured to perform a multitude of useful (or not so useful) analog read-outs, such as remaining runtime, battery voltage, temperature, the time (represented as an analog value), etc.

    Next up is to spend a couple months validating all the features on the board — a long list of features to grind through indeed — and port drivers and a linux distro (no small task, but I’ll have Xobs‘ skillful help). I also am looking forward to designing the enclosure. Probably for the first rev, I will do something out of laser-cut acrylic that is vaguely tablet-like, to avoid having to mess around with a friction clutch on version 1 of the plastics.

    A detached keyboard/trackpoint is attractive to me because I’ve always wanted a display I can “hang” on the seat in front of mine when sitting in an airplane or a bus — it’s a lot easier on the neck and the arrangement actually works better if the person in front reclines their seat.

    Once I’ve got some experience integrating the whole thing, I’ll probably design a rev-2 case using CNC-cut ABS and aluminum. CNC cut ABS is almost as robust as injection molded ABS, and can produce reasonably intricate shapes. It’s also relatively economical to produce in single quantities. The CNC-cut design could be a clamshell design, or maybe some other funky design. Maybe I’ll try using wood and brass — who knows, the whole idea of making my own laptop is to play around with some new ideas!

    It occurs to me that maybe other people might also be interested in owning a laptop like this, but don’t want to go through the trouble of fabricating their own circuit boards. If it seems like a few hundred folks are interested, I might be convinced to try a Kickstarter campaign in several months, once the design is stable and tested. However, I’m not looking to break any low-price records for this laptop — if you just want a cheap linux laptop you’re better off buying a netbook or EeePC. This is a low-volume, hand-crafted laptop made with uniquely open-source components, so the pricing would be consistent with such crafted goods.

    For those interested in the source files for the current early prototype iteration of the design, bounce over to the Novena wiki, and keep an eye on Xobs’ blog. Novena (yet another Singaporean metro station, and also Latin for “nine”) is our stand-in codename for the laptop motherboard.