Posts Tagged ‘open hardware’

Why I’m Using Bitmarks on my Products

Friday, October 13th, 2017

One dirty secret of hardware is that a profitable business isn’t just about design innovation, or even product cost reduction: it’s also about how efficiently one can move stuff from point A to B. This explains the insane density of hardware suppliers around Shenzhen; it explains the success of Ikea’s flat-packed furniture model; and it explains the rise of Amazon’s highly centralized, highly automated warehouses.

Unfortunately, reverse logistics – the system for handling returns & exchanges of hardware products – is not something on the forefront of a hardware startup’s agenda. In order to deal with defective products, one has to ship a product first – an all-consuming goal. However, leaving reverse logistics as a “we’ll fix it after we ship” detail could saddle the venture with significant unanticipated customer support costs, potentially putting the entire business model at risk.

This is because logistics are much more efficient in the “forward” direction: the cost of a centralized warehouse to deliver packages to an end consumer’s home address is orders of magnitude less than it is for a residential consumer to mail that same parcel back to the warehouse. This explains the miracle of Amazon Prime, when overnighting a pair of hand-knit mittens to your mother somehow costs you $20. Now repeat the hand-knit mittens thought experiment and replace it with a big-screen TV that has to find its way back to a factory in Shenzhen. Because the return shipment can no longer take advantage of bulk shipping discounts, the postage to China is likely more than the cost of the product itself!

Because of the asymmetry in forward versus reverse logistics cost, it’s generally not cost effective to send defective material directly back to the original factory for refurbishing, recycling, or repair. In many cases the cost of the return label plus the customer support agent’s time will exceed the cost of the product. This friction in repatriating defective product creates opportunities for unscrupulous middlemen to commit warranty fraud.

The basic scam works like this: a customer calls in with a defective product and gets sent a replacement. The returned product is sent to a local processing center, where it may be declared unsalvageable and slated for disposal. However, instead of a proper disposal, the defective goods “escape” the processing center and are resold as new to a different customer. The duped customer then calls in to exchange the same defective product and gets sent a replacement. Rinse lather repeat, and someone gets rich quick selling scrap at full market value.

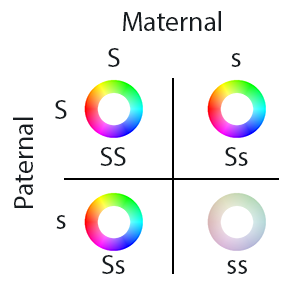
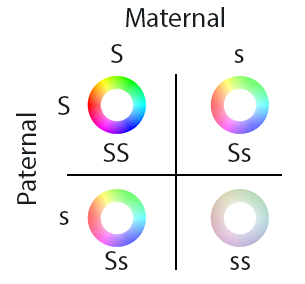
Similarly, high-quality counterfeits can sap profits from companies. Clones of products are typically produced using cut-rate or recycled parts but sold at full price. What happens when customers then find quality issues with the clone? That’s right – they call the authentic brand vendor and ask for an exchange. In this case, the brand makes zero money on the customer but incurs the full cost of supporting a defective product. This kind of warranty fraud is pandemic in smart phones and can cost producers many millions of dollars per year in losses.


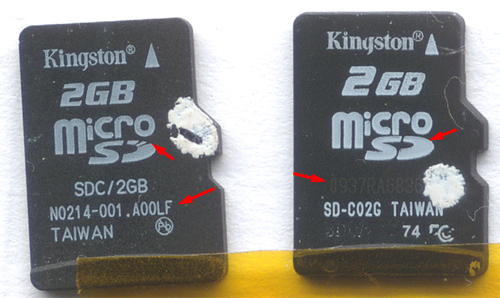
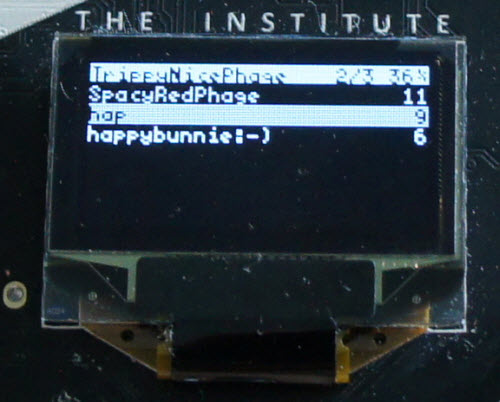
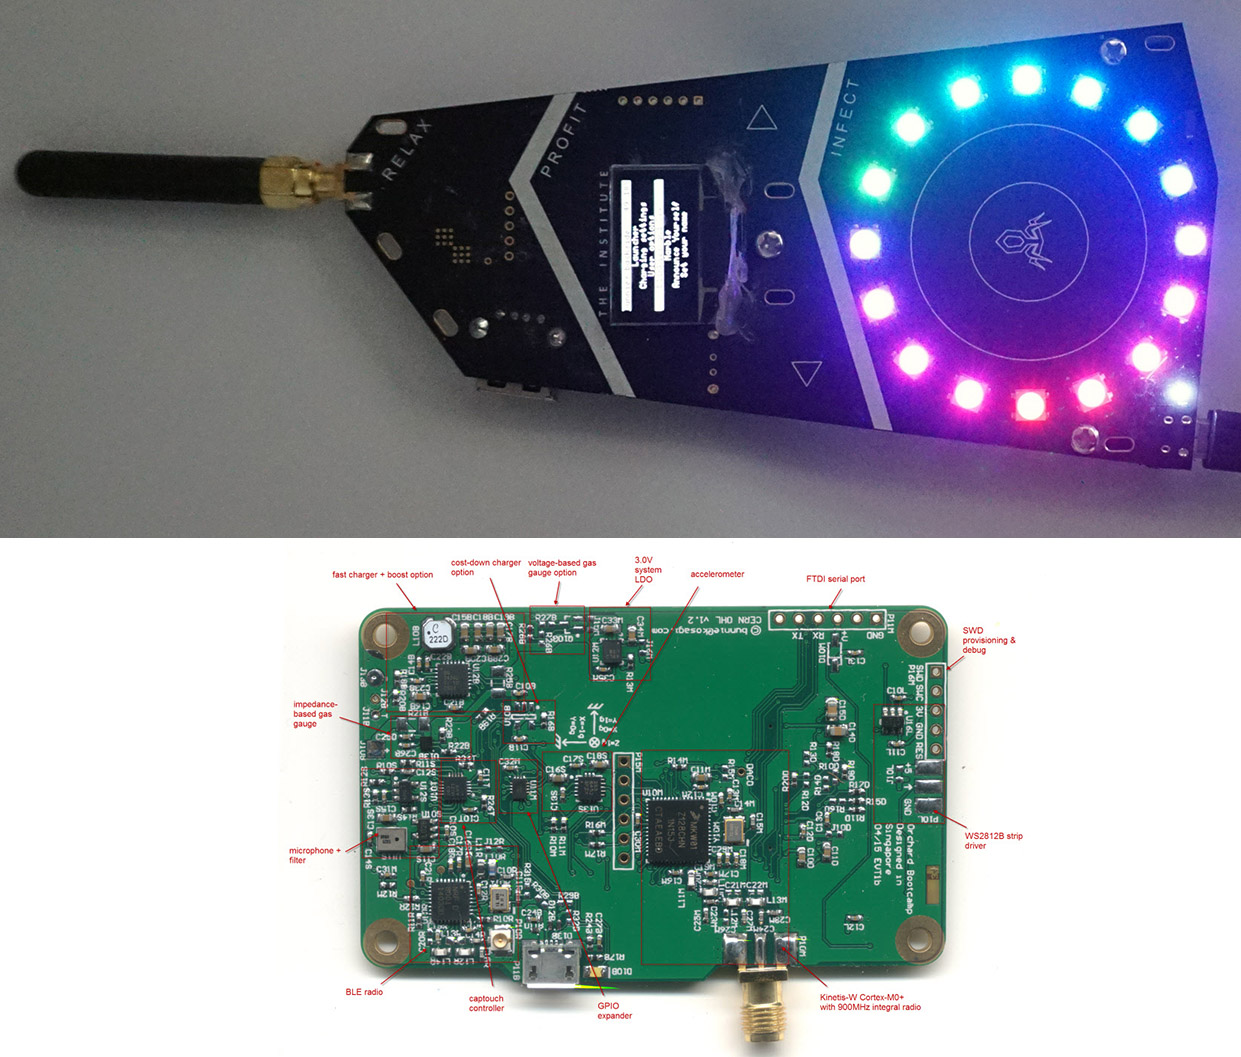
High-quality clones, like the card on the left, can cost businesses millions of dollars in warranty fraud claims.

Serial numbers help mitigate these problems, but it’s easy to guess a simple serial number. More sophisticated schemes tie serial numbers to silicon IDs, but that necessitates a system which can reliably download the serialization data from the factory. This might seem a trivial task but for a lot of reasons – from failures in storage media to human error to poor Internet connectivity in factories – it’s much harder than it seems to make this happen. And for a startup, losing an entire lot of serialization data due to a botched upload could prove fatal.

As a result, most hardware startups ship products with little to no plan for product serialization, much less a plan for reverse logistics. When the first email arrives from an unhappy customer, panic ensues, and the situation is quickly resolved, but by the time the product arrives back at the factory, the freight charges alone might be in the hundreds of dollars. Repeat this exercise a few dozen times, and any hope for a profitable run is rapidly wiped out.

I’ve wrestled with this problem on and off through several startups of my own and finally landed on a solution that looks promising: it’s reasonably robust, fraud-resistant, and dead simple to implement. The key is the bitmark – a small piece of digital data that links physical products to the blockchain.

Most people are familiar with blockchains through Bitcoin. Bitcoin uses the blockchain as a public ledger to prevent double-spending of the same virtual coin. This same public ledger can be applied to physical hardware products through a bitmark. Products that have been bitmarked can have their provenance tracked back to the factory using the public ledger, thus hampering cloning and warranty fraud – the physical equivalent of double-spending a Bitcoin.

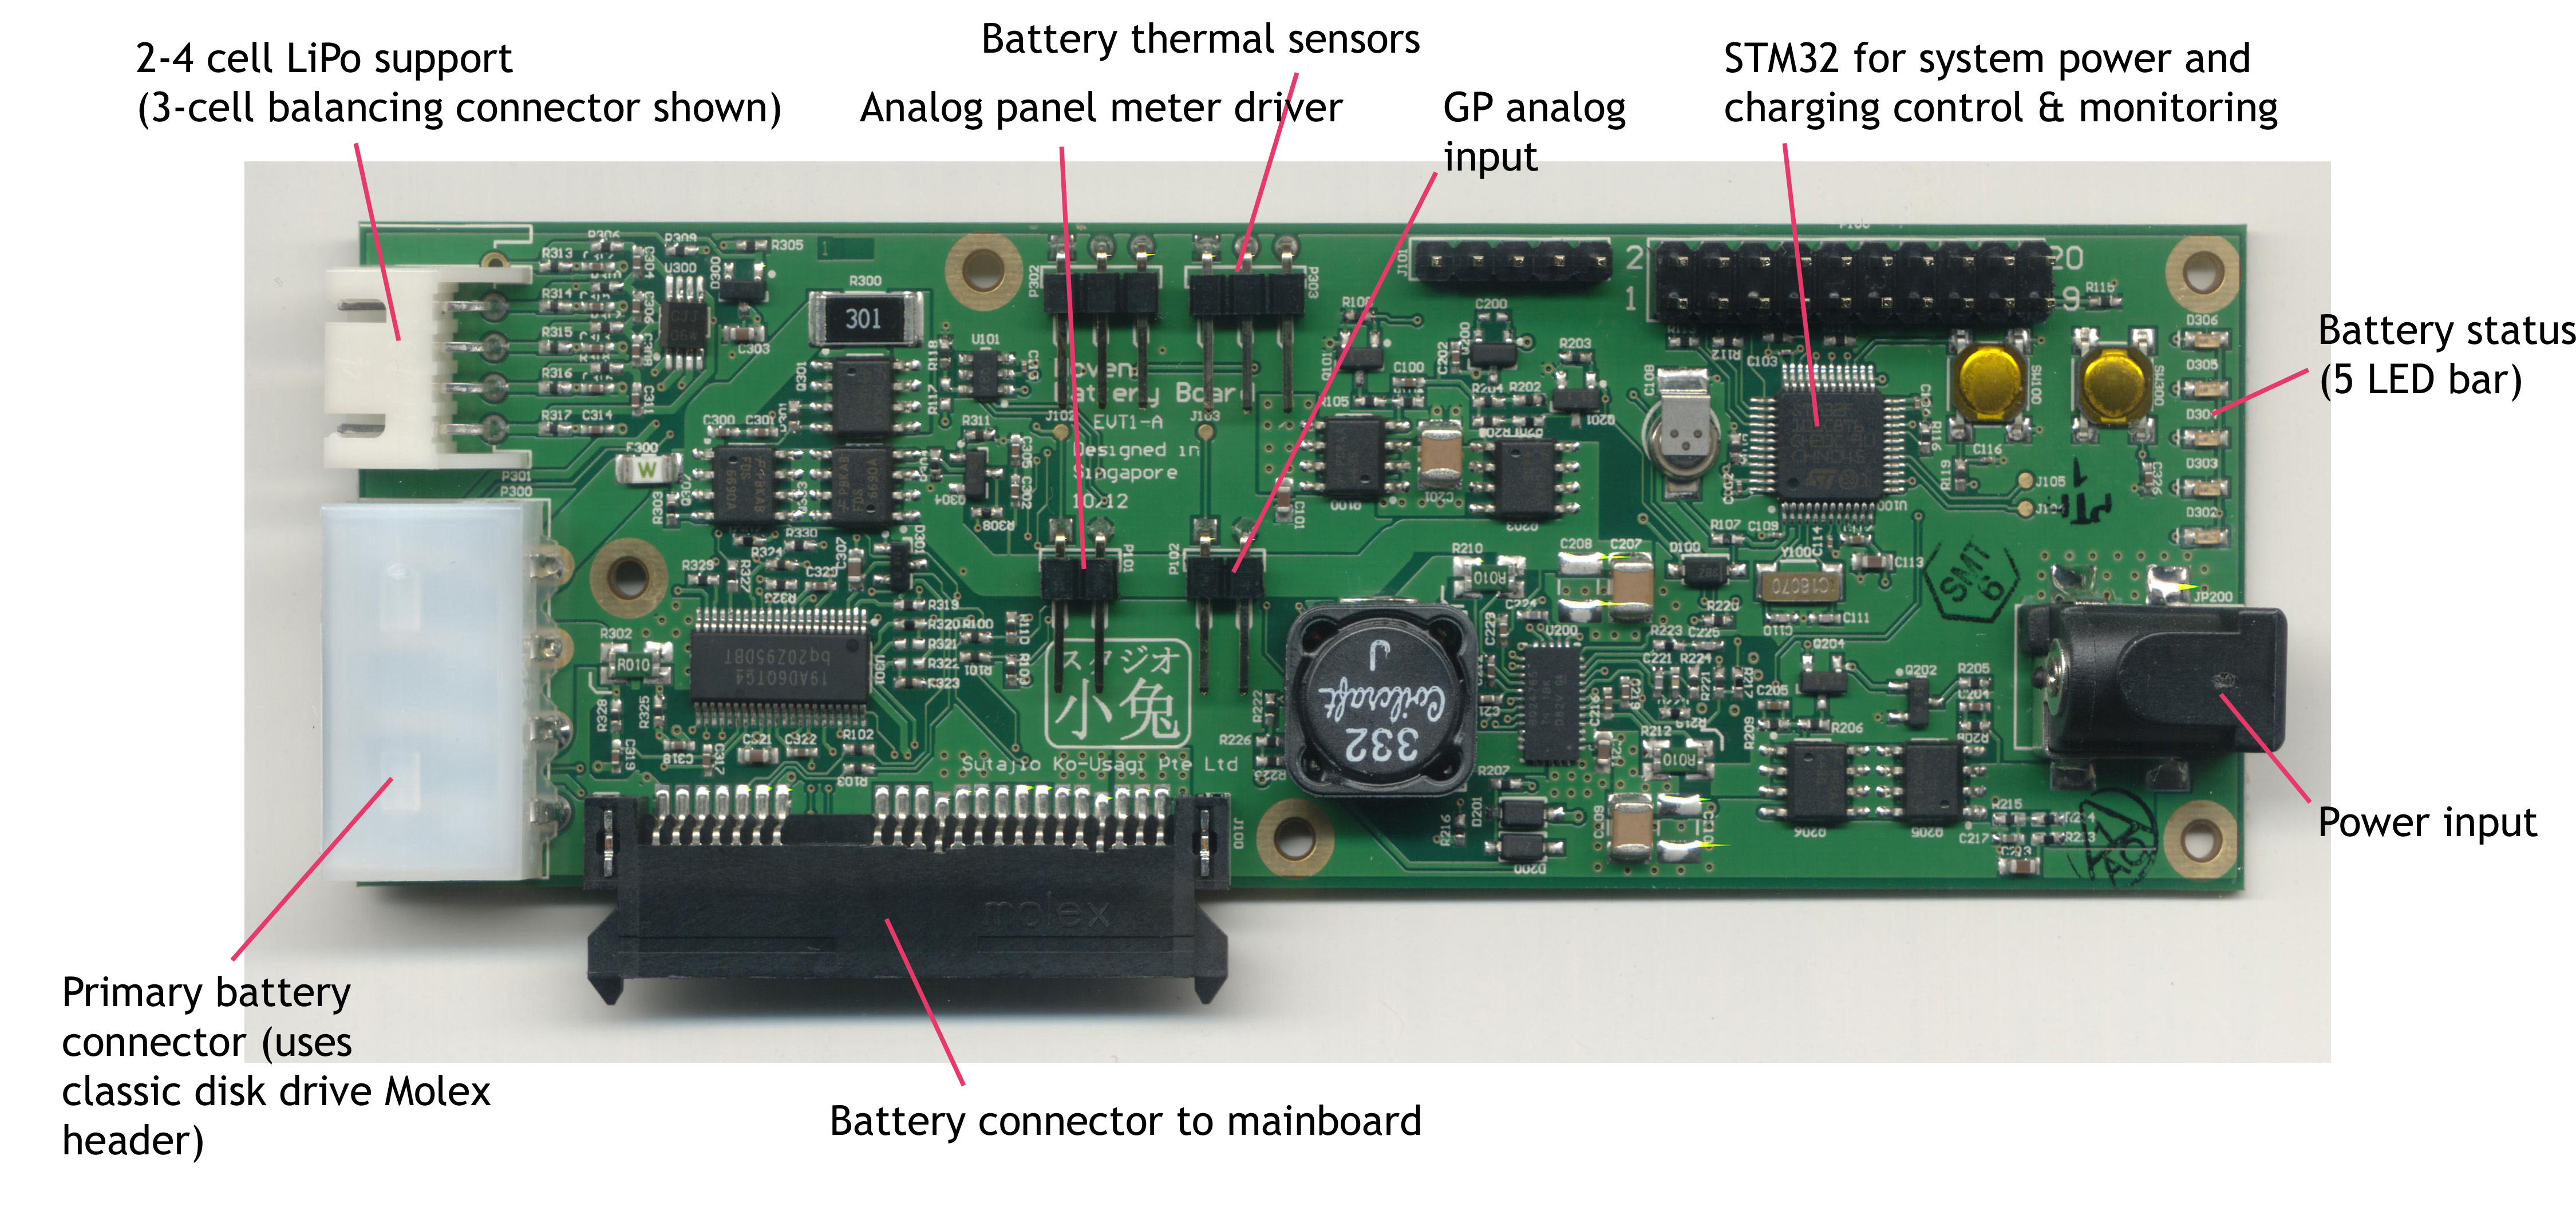
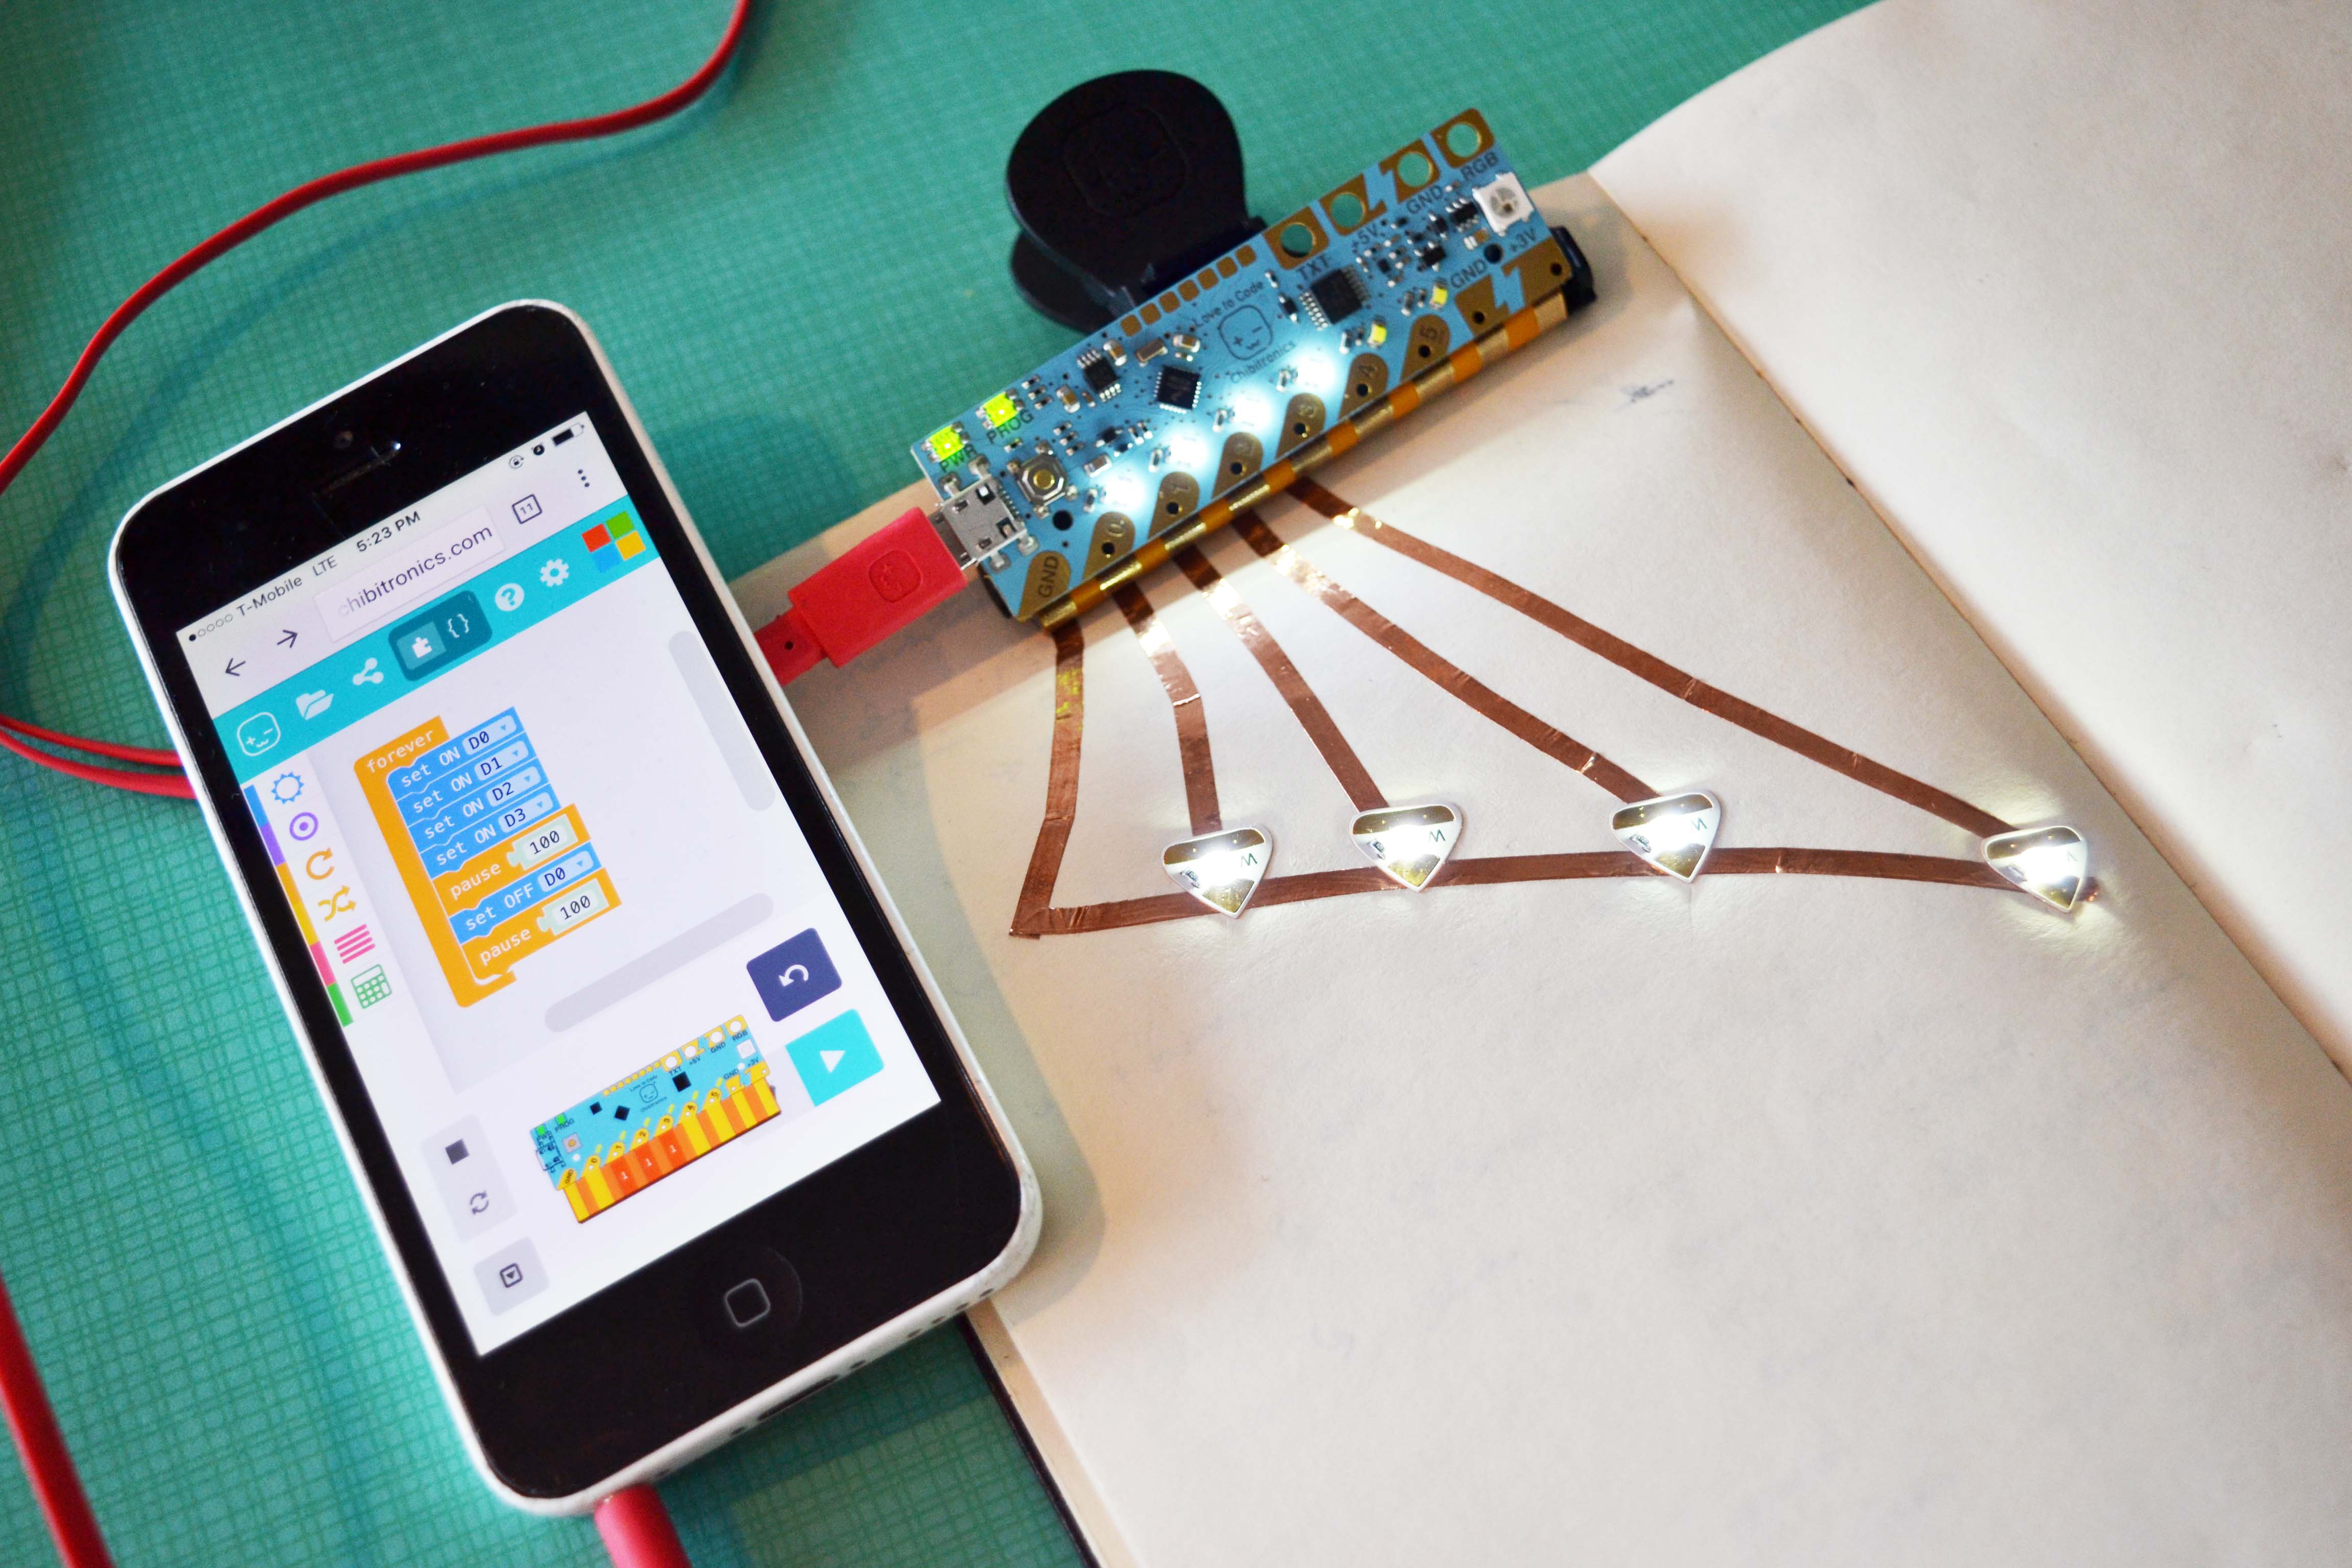
One of my most recent hardware startups, Chibitronics has teamed up with Bitmark to develop an end-to-end solution for Chibitronics’ newest microcontroller product, the Chibi Chip.

As an open hardware business, we welcome people to make their own versions of our product, but we can’t afford to give free Chibi Chips to customers that bought cut-rate clones and then report them as defective for a free upgrade to an authentic unit. We’re also an extremely lean startup, so we can’t afford the personnel to build a full serialization and reverse logistics system from scratch. This is where Bitmark comes in.

Bitmark has developed a turn-key solution for serialization and reverse logistics triage. They issue us bitmarks as lists of unique, six-word phrases. The six-word phrases are less frustrating for users to type in than strings of random characters. We then print the phrases onto labels that are stuck onto the back of each Chibi Chip.


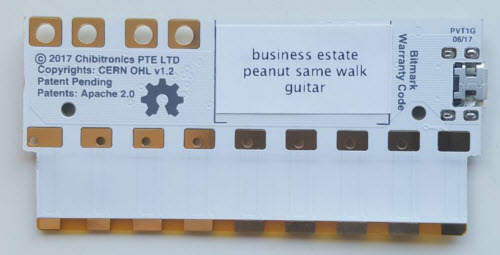
Bitmark claim code on the back of a Chibi Chip

We release just enough of these pre-printed labels to the factory to run our authorized production quantities. This allows us to trace a bitmark back to a given production lot. It also prevents “ghost shifting” – that is, authorized factories producing extra bootleg units on a midnight shift that are sold into the market at deep discounts. Bitmark created a website for us where customers can then claim their bitmarks, thus registering their product and making it eligible for warranty service. In the event of an exchange or return, the product’s bitmark is updated to record this event. Then if a product fails to be returned to the factory, it can’t be re-claimed as defective because the blockchain ledger would evidence that bitmark as being mapped to a previously returned product. This allows us to defer the repatriation of the product to the factory. It also enables us to use unverified third parties to handle returned goods, giving us a large range of options to reduce reverse logistics costs.

Bitmark also plans to roll out a site where users can verify the provenance of their bitmarks, so buyers can check if a product’s bitmark is authentic and if it has been previously returned for problems before they buy it. This increases the buyer’s confidence, thus potentially boosting the resale value of used Chibi Chips.

For the cost and convenience of a humble printed label, Bitmark enhances control over our factories, enables production lot traceability, deters cloning, prevents warranty fraud, enhances confidence in the secondary market, and gives us ample options to streamline our reverse logistics.

Of course, the solution isn’t perfect. A printed label can be peeled off one product and stuck on another, so people could potentially just peel labels off good products and resell the labels to users with broken clones looking to upgrade by committing warranty fraud. This scenario could be mitigated by using tamper-resistant labels. And for every label that’s copied by a cloner, there’s one victim who will have trouble getting support on an authentic unit. Also, if users are generally lax about claiming their bitmark codes, it creates an opportunity for labels to be sparsely duplicated in an effort to ghost-shift/clone without being detected; but this can be mitigated with a website update that encouraging customers to immediately register their bitmarks before using the web-based services tied to the product. We also have to exercise care in handling lists of unclaimed phrases because, until a customer registers their bitmark claim phrase in the blockchain, the phrases have value to would-be fraudsters.

But overall, for the cost and convenience, the solution outperforms all the other alternatives I’ve explored to date. And perhaps most importantly for hardware startups like mine that are short on time and long on tasks, printing bitmarks is simple enough for us to implement that it’s hard to justify doing anything else.

Disclosure: I am a technical advisor and shareholder of Bitmark.

Sex, Circuits & Deep House

Monday, September 28th, 2015

P9010002
Cari with the Institute Blinky Badge at Burning Man 2015. Photo credit: Nagutron.

This year for Burning Man, I built a networked light badge for my theme camp, “The Institute”. Walking in the desert at night with no light is a dangerous proposition – you can get run over by cars, bikes, or twist an ankle tripping over an errant bit of rebar sticking out of the ground. Thus, the outrageous, bordering grotesque, lighting spectacle that Burning Man becomes at night grows out of a central need for safety in the dark. While a pair of dimly flashing red LEDs should be sufficient to ensure one’s safety, anything more subtle than a Las Vegas strip billboard tends to go unnoticed by fast-moving bikers thanks to the LED arms race that has become Burning Man at night.

I wanted to make a bit of lighting that my campmates could use to stay safe – and optionally stay classy by offering a range of more subtle lighting effects. I also wanted the light patterns to be individually unique, allowing easy identification in dark, dusty nights. However, diddling with knobs and code isn’t a very social experience, and few people bring laptops to Burning Man. I wanted to come up with a way for people to craft an identity that was inherently social and interactive. In an act of shameless biomimicry, I copied nature’s most popular protocol for creating individuals – sex.

By adding a peer-to-peer radio in each badge, I was able to implement a protocol for the breeding of lighting patterns via sex.


Some examples of the unique light patterns possible through sex.

Sex

When most people think of sex, what they are actually thinking about is sexual intercourse. This is understandable, as technology allows us to have lots of sexual intercourse without actually accomplishing sexual reproduction. Still, the double-entendre of saying “Nice lights! Care to have sex?” is a playful ice breaker for new interactions between camp mates.

Sex, in this case, is used to breed the characteristics of the badge’s light pattern as defined through a virtual genome. Things like the color range, blinking rate, and saturation of the light pattern are mapped into a set of diploid (two copies of each gene) chromosomes (code) (spec). Just as in biological sex, a badge randomly picks one copy of each gene and packages them into a sperm and an egg (every badge is a hermaphrodite, much like plants). A badge’s sperm is transmitted wirelessly to another host badge, where it’s mixed with the host’s egg and a new individual blending traits of both parents is born. The new LED pattern replaces the current pattern on the egg donor’s badge.

Biological genetic traits are often analog, not digital – height or weight are not coded as discrete values in a genome. Instead, observed traits are the result of a complex blending process grounded in the minutiae of metabolic pathways and the efficacy of enzymes resulting from the DNA blueprint and environment. The manifestation of binary situations like recessive vs. dominant is often the result of a lot of gain being applied to an analog signal, thus causing the expressed trait to saturate quickly if it’s expressed at all.

In order to capture the wonderful diversity offered by sex, I implement quantitative traits in the light genome. Instead of having a single bit for each trait, it’s a byte, and there’s an expression function that combines the values from each gene (alleles) to derive a final observed trait (phenotype).

By carefully picking expression functions, I can control how the average population looks. Let’s consider saturation (I used an HSV colorspace, instead of RGB, which makes it much easier to create aesthetically pleasing color combinations). A highly saturated color is vivid and bright. A less saturated color appears pastel, until finally it’s washed out and looks just white or gray (a condition analogous to albinism).

If I want albinism to be rare, and bright colors to be common, the expression function could be a saturating add. Thus, even if one allele (copy of the gene) has a low value, the other copy just needs to be a modest value to result in a bright, vivid coloration. Albinism only occurs when both copies have a fairly low value.


Population makeup when using saturating addition to combine the maternal and paternal saturation values. Albinism – a badge light pattern looking white or gray – happens only when both maternal and paternal values are small. ‘S’ means large saturation, and ‘s’ means little saturation. ‘SS’ and ‘Ss’ pairings of genes leads to saturated colors, while only the ‘ss’ combination leads to a net low saturation (albinism).

On the other hand, if I wanted the average population to look pastel, I can simply take the average of each allele, and take that to be the saturation value. In this case, a bright color can only be achieved in both alleles have a high value. Likewise, an albino can only be achieved if both alleles have a low value.


Population makeup when using averaging to combine the maternal and paternal saturation values. The most common case is a pastel palette, with vivid colors and albinism both suppressed in the population.

For Burning Man, I chose saturating addition as the expression function, to have the population lean toward vivid colors. I implemented other features such as cyclic dimming, hue rotation, and color range using similar techniques.

It’s important when thinking about biological genes to remember that they aren’t like lines of computer code. Rather, they are like the knobs on an analog synth, and the resulting sound depends not just on the position of the knob, but where it is in the signal chain how it interacts with other effects.

Gender and Consent

Beyond genetics, there is a minefield of thorny decisions to be made when implementing the social policies and protocols around sex. What are the gender roles? And what about consent? This is where technology and society collide, making for a fascinating social experiment.

I wanted everyone to have an opportunity to play both gender roles, so I made the badges hermaphroditic, in the sense that everyone can give or receive genetic material. The “maternal” role receives sperm, combines it with an egg derived from the currently displayed light pattern, and replaces its light pattern with a new hybrid of both. The “paternal” role can transmit a sperm derived from the currently displayed pattern. Each badge has the requisite ports to play both roles, and thus everyone can play the role of male or female simply by being either the originator of or responder to a sex request.

This leads us to the question of consent. One fundamental flaw in the biological implementation of sex is the possibility of rape: operating the hardware doesn’t require mutual consent. I find the idea of rape disgusting, even if it’s virtual, so rape is disallowed in my implementation. In other words, it’s impossible for a paternal badge to force a sperm into a maternal badge: male roles are not allowed to have sex without first being asked by a female role. Instead, the person playing the female role must first initiate sex with a target mate. Conversely, female roles can’t steal sperm from male roles; sperm is only generated after explicit consent from the male. Assuming consent is given, a sperm is transmitted to the maternal badge and the protocol is complete. This two-way handshake assures mutual consent.

This non-intuitive and partially role-reversed implementation of sex lead to users asking support questions akin to “I’m trying to have sex, but why am I constantly being denied?” and my response was – well, did you ask your potential mate if it was okay to have sex first? Ah! Consent. The very important but often overlooked step before sex. It’s a socially awkward question, but with some practice it really does become more natural and easy to ask.

Some users were enthusiastic early adopters of explicit consent, while others were less comfortable with the question. It was interesting to see the ways straight men would ask other straight men for sex – they would ask for “ahem, blinky sex” – and anecdotally women seemed more comfortable and natural asking to have sex (regardless of the gender of the target user).

As an additional social experiment, I introduced a “rare” trait (pegged at ~3% of a randomly generated population) consisting of a single bright white pixel that cycles around the LED ring. I wanted to see if campmates would take note and breed for the rare trait simply because it’s rare. At the end of the week, more people were expressing the rare phenotype than at the beginning, so presumably some selective breeding for the trait did happen.

In the end, I felt that having sex to breed interesting light patterns was a lot more fun for everyone than tweaking knobs and sliders in a UI. Also, because traits are inherited through sexual reproduction, by the end of the event one started to see families of badges gaining similar traits, but thanks to the randomness inherent in sex you could still tell individuals apart in the dark by their light patterns.

Finding Friends

Implementing sex requires a peer-to-peer radio. So why not also use the radio to help people locate nearby friends? Seems like a good idea on the outside, but the design of this system is a careful balance between creating a general awareness of friends in the area vs. creating a messaging client.

Personally, one of the big draws of going to Burning Man is the ability to unplug from the Internet and live in an environment of intimate immediacy – if you’re physically present, you get 100% of my attention; otherwise, all bets are off. Email, SMS, IRC, and other media for interaction (at least, I hear there are others, but I don’t use them…) are great for networking and facilitating business, but they detract from focusing on the here and now. For me there’s something ironic about seeing a couple in a fancy restaurant, both hopelessly lost staring deeply into their smartphones instead of each other’s eyes. Being able to set an auto-responder for two weeks which states that your email will never be read is pretty liberating, and allows me to open my mind up to trains of thought that can take days to complete. Thus, I really wanted to avoid turning the badge into a chat client, or any sort of communication medium that sets any expectation of reading messages and responding in a timely fashion.

On the other hand, meeting up with friends at Burning Man is terribly hard. It’s life before the cell phone – if you’re old enough to remember that. Without a cell phone, you have a choice between enjoying the music, stalking around the venue to find friends, or dancing in one spot all night long so you’re findable. Simply knowing if my friends have finally showed up is a big help; if they haven’t arrived yet, I can get lost in the music and check out the sound in various parts of the venue until they arrive.

Thus, I designed a very simple protocol which will only reveal if your friends are nearby, and nothing else. Every badge emits a broadcast ping every couple of seconds. Ideally, I’d use an RSSI (receive signal strength indicator) to figure out how far the ping is, but due to a quirk of the radio hardware I was unable to get a reliable RSSI reading. Instead, every badge would listen for the pings, and decrement the ping count at a slightly slower average rate than the ping broadcast. Thus, badges solidly within radio range would run up a ping count, and as people got farther and farther away, the ping count would decrease as pings gradually get lost in the noise.


Friend finding UI in action. In this case, three other badges are nearby, SpacyRedPhage, hap, and happybunnie:-). SpacyRedPhage is well within range of the radio, and the other two are farther away.

The system worked surprisingly well. The reliable range of the radio worked out to be about 200m in practice, which is about the sound field of a major venue at Burning Man. It was very handy for figuring out if my friends had left already for the night, or if they were still prepping at camp; and there was one memorable reunion at sunrise where a group of my camp mates drove our beloved art car, Dr. Brainlove, to Robot Heart and I was able to quickly find them thanks to my badge registering a massive amount of pings as they drove into range.

Hardware Details

I’m not so lucky that I get to design such a complex piece of hardware exclusively for a pursuit as whimsical as Burning Man. Rather, this badge is a proof-of concept of a larger effort to develop a new open-source platform for networked embedded computers (please don’t call it IoT) backed by a rapid deployment supply chain. Our codename for the platform is Orchard.

The Burning Man badge was our first end-to-end test of Orchard’s “supply chain as a service” concept. The core reference platform is fairly well-documented here, and as you can see looks nothing like the final badge.


Bottom: orchard reference design; top: orchard variant as customized for Burning Man.

However, the only difference at a schematic level between the reference platform and the badge is the addition of 14 extra RGB LEDs, the removal of the BLE radio, and redesign of the captouch electrode pattern. Because the BOM of the badge is a strict subset of the reference design, we were able to go from a couple prototypes in advance of a private Crowd Supply campaign to 85 units delivered at the door of camp mates in about 2.5 months – and the latency of shipping units from China to front doors in the US accounts for one full month of that time.


The badge sports an interactive captouch surface, an OLED display, 900MHz ISM band peer-to-peer radio, microphone, accelerometer, and more!

If you’re curious, you can view documentation about the Orchard platform here, and discuss it at the Kosagi forum.

Reflection

As an engineer, my “default” existence is confined on four sides by cost, schedule, quality, and specs, with a sprinkling of legal, tax, and regulatory constraints on top. It’s pretty easy to lose your creative spark when every day is spent threading the needle of profit and loss.

Even though the implementation of Burning Man’s principles of decommodification and gifting is far from perfect, it’s sufficient to enable me to loosen the shackles of my daily existence and play with technology as a medium for enhancing human interactions, and not simply as a means for profit. In other words, thanks to the values of the community, I’m empowered and supported to build stuff that wouldn’t make sense for corporate shareholders, but might improve the experiences of my closest friends. I think this ability to leave daily existence behind for a couple weeks is important for staying balanced and maintaining perspective, because at least for me maximizing profit is rarely the same as maximizing happiness. After all, a warm smile and a heartfelt hug is priceless.

Crowdfunding the Novena Open Laptop

Wednesday, April 2nd, 2014

We’re launching a crowdfunding campaign around our Novena open hardware computing platform. Originally, this started as a hobby project to build a computer just for me and xobs – something that we would use every day, easy to extend and to mod, our very own Swiss Army knife. I’ve posted here a couple of times about our experience building it, and it got a lot of interest. So by popular demand, we’ve prepared a crowdfunding offering and you can finally be a backer.


Background


Novena is a 1.2GHz, Freescale quad-core ARM architecture computer closely coupled with a Xilinx FPGA. It’s designed for users who want to modify and extend their hardware: all the documentation for the PCBs are open and free to download, and it comes with a variety of features that facilitate rapid prototyping.

We are offering four variations, and at the conclusion of the Crowd Supply campaign on May 18, all the prices listed below will go up by 10%:

  • “Just the board” ($500): For crafty people who want to build their case and define their own style, we’ll deliver to you the main PCBA, stuffed with 4GiB of RAM, 4GiB microSD card, and an Ath9k-based PCIe wifi card. Boots to a Debian desktop over HDMI.
  • “All-in-One Desktop” ($1195): Plug in your favorite keyboard and mouse, and you’re ready to go; perfect for labs and workbenches. You get the circuit board above, inside a hacker-friendly case with a Full HD (1920×1080) IPS LCD.
  • “Laptop” ($1995): For hackers on the go, we’ll send you the same case and board as above, but with battery controller board, 240 GiB SSD, and a user-installed battery. As everyone has their own keyboard preference, no keyboard is included.
  • “Heirloom Laptop” ($5000): A show stopper of beauty; a sure conversation piece. This will be the same board, battery, and SSD as above, but in a gorgeous, hand-crafted wood and aluminum case made by Kurt Mottweiler in Portland, Oregon. As it’s a clamshell design, it’s also the only offering that comes with a predetermined keyboard.

All configurations will come with Debian (GNU/Linux) pre-installed, but of course you can build and install whatever distro you prefer!

Novena Gen-2 Case Design

Followers of this blog may have seen a post featuring a prototype case design we put together last December. These were hand-built cases made from aluminum and leather and meant to validate the laptop use case. The design was rough and crafted by my clumsy hands – dubbed “gloriously fuggly [sic]” – yet the public response was overwhelmingly positive. It gave us confidence to proceed with a 2nd generation case design that we are now unveiling today.


The first thing you’ll notice about the design is that the screen opens “the wrong way”. This feature allows the computer to be usable as a wall-hanging unit when the screen is closed. It also solves a major problem I had with the original clamshell prototype – it was a real pain to access the hardware for hacking, as it’s blocked by the keyboard mounting plate.

Now, with the slide of a latch, the screen automatically pops open thanks to an internal gas spring. This isn’t just an open laptop — it’s a self-opening laptop! The internals are intentionally naked in this mode for easy access; it also makes it clear that this is not a computer for casual home use. Another side benefit of this design is there’s no fan noise – when the screen is up, the motherboard is exposed to open air and a passive heatsink is all you need to keep the CPU cool.

Another feature of this design is the LCD bezel is made out of a single, simple aluminum sheet. This allows users with access to a minimal machine shop to modify or craft their own bezels – no custom tooling required. Hopefully this makes adding knobs and connectors, or changing the LCD relatively easy. In order to encourage people to experiment, we will ship desktop and laptop devices with not one, but two LCD bezels, so you don’t have to worry about having an unusable machine if you mess up one of the bezels!

The panel covering the “port farm” on the right hand side of the case is designed to be replaceable. A single screw holds it in place, so if you design your own motherboard or if you want to upgrade in the future, you’re not locked into today’s port layout. We take advantage of this feature between the desktop and the laptop versions, as the DC power jack is in a different location for the two configurations.

Finally, the inside of the case features a “Peek Array”. It’s an array of M2.5 mounting holes (yes, they are metric) populating the extra unused space inside the case, on the right hand side in the photo above. It’s named after Nadya Peek, a graduate student at MIT’s Center for Bits and Atoms. Nadya is a consummate maker, and is a driving force behind the CBA’s Fab Lab initiative. When I designed this array of mounting bosses, I imagined someone like Nadya making their own circuit boards or whatever they want, and mounting it inside the case using the Peek Array.

The first thing I used the Peek Array for is the speaker box. I desire loud but good quality sound out of my laptop, so I 3D printed a speakerbox that uses 36mm mini-monitor drivers, and mounted it inside using the Peek Array. I would be totally stoked if a user with real audio design experience was to come up with and share a proper tuned-port design that I could install in my laptop. However, other users with weight, space or power concerns can just as easily design and install a more modest speaker.

I started the Gen-2 case design in early February, after xobs and I finally decided it was time to launch a crowdfunding campaign. With a bit of elbow grease and the help of a hard working team of engineers and project managers at my contract manufacturing partner, AQS (that’s Celia and Chemmy pictured above, doing an initial PCBA fitting two weeks ago), I was able to bring a working prototype to San Jose and use it to give my keynote at EELive today.

The Heirloom Design (Limited Quantities)

One of the great things about open hardware is it’s easier to set up design collaborations – you can sling designs and prototypes around without need for NDAs or cumbersome legal agreements. As part of this crowdfunding campaign, I wanted to offer a really outstanding, no-holds barred laptop case – something you would be proud to have for years, and perhaps even pass on to your children as an heirloom. So, we enlisted the help of Kurt Mottweiler to build an “heirloom laptop”. Kurt is a designer-craftsman situated in Portland, Oregon and drawing on his background in luthiery, builds bespoke cameras of outstanding quality from materials such as wood and aluminum. We’re proud to have this offering as part of our campaign.

For the prototype case, Kurt is featuring rift-sawn white oak and bead-blasted-and-anodized 6061 aluminum. He developed a composite consisting of outer layers of paper backed wood veneer over a high-density cork core with intervening layers of 5.5 ounce fiberglass cloth, all bonded with a high modulus epoxy resin. This composite is then gracefully formed into semi-monocoque curves, giving a final wavy shape that is both light, stiff, and considers the need for air cooling.

The overall architecture of Kurt’s case mimics the industry-standard clamshell notebook design, but with a twist. The keyboard used within the case is wireless, and can be easily removed to reveal the hardware within. This laptop is an outstanding blend of tasteful design, craftsmanship, and open hardware. And, to wit, since these are truly hand-crafted units, no two units will be exactly alike – each unit will have its own grain and a character that reflects Kurt’s judgment for that particular piece of wood.

How You can Help

For the crowdfunding campaign to succeed, xobs and I need a couple hundred open source enthusiasts to back the desktop or standard laptop offering.

And that underlies the biggest challenge for this campaign – how do we offer something so custom and so complex at a price that is comparable to a consumer version, in low volumes? Our minimum funding goal of $250,000 is a tiny fraction of what’s typically required to recover the million-plus dollar investment behind the development and manufacture of a conventional laptop.

We meet this challenge with a combination of unique design, know-how, and strong relationships with our supply chain. The design is optimized to reduce the amount of expensive tooling required, while still preserving our primary goal of being easy to hack and modify. We’ve spent the last year and a half poring over three revisions of the PCBA, so we have high confidence that this complex design will be functional and producible. We’re not looking to recover that R&D cost in the campaign – that’s a sunk cost, as anyone is free to download the source and benefit from our thoroughly vetted design today. We also optimized certain tricky components, such as the LCD and the internal display port adapter, for reliable sourcing at low volumes. Finally, I spent the last couple of months traveling the world, lining up a supply chain that we feel confident can deliver this design, even in low volume, at a price comparable to other premium laptop products.

To be clear, this is not a machine for the faint of heart. It’s an open source project, which means part of the joy – and frustration – of the device is that it is continuously improving. This will be perhaps the only laptop that ships with a screwdriver; you’ll be required to install the battery yourself, screw on the LCD bezel of your choice, and you’ll get the speakers as a kit, so you don’t have to use our speaker box design – if you have access to a 3D printer, you can make and fine tune your own speaker box.

If you’re as excited about having a hackable, open laptop as we are, please back our crowdfunding campaign at Crowd Supply, and follow @novenakosagi for real-time updates.

Make: Article on Novena

Thursday, January 9th, 2014

Recently, the Make: blog ran an article on our laptop project, Novena. You can now follow @novenakosagi for updates on the project. I’d also like to reiterate here that the photos shown in the article are just an early prototype, and the final forms of the machine are going to be different — quite different — from what’s shown.

Below is a copy of the article text for your convenient reading. And, as a reminder, specs and source files can be downloaded at our wiki.

Building an Open Source Laptop

About a year and a half ago, I engaged on an admittedly quixotic project to build my own laptop. By I, I mean we, namely Sean “xobs” Cross and me, bunnie. Building your own laptop makes about as much sense as retrofitting a Honda Civic with a 1000hp motor, but the lack of practicality never stopped the latter activity, nor ours.

My primary goal in building a laptop was to build something I would use every day. I had previously spent several years at chumby building hardware platforms that I’m ashamed to admit I rarely used. My parents and siblings loved those little boxes, but they weren’t powerful enough for a geek like me. I try to allocate my discretionary funds towards things based on how often I use them. Hence, I have a nice bed, as I spend a third of my life in it. The other two thirds of my life is spent tapping at a laptop (I refuse to downgrade to a phone or tablet as my primary platform), and so when picking a thing to build that I can use every day, a laptop is a good candidate.

SONY DSC I’m always behind a keyboard!

The project was also motivated by my desire to learn all things hardware. Before this project, I had never designed with Gigabit Ethernet (RGMII), SATA, PCI-express, DDR3, gas gauges, eDP, or even a power converter capable of handling 35 watts – my typical power envelope is under 10 watts, so I was always able to get away with converters that had integrated switches. Building my own laptop would be a great way for me to stretch my legs a bit without the cost and schedule constraints normally associated with commercial projects.

The final bit of motivation is my passion for Open hardware. I’m a big fan of opening up the blueprints for the hardware you run – if you can’t Hack it, you don’t Own it.

Back when I started the project, it was me and a few hard core Open ecosystem enthusiasts pushing this point, but Edward Snowden changed the world with revelations that the NSA has in fact taken advantage of the black-box nature of the closed hardware ecosystem to implement spying measures (“good news, we weren’t crazy paranoids after all”).

Our Novena Project is of course still vulnerable to techniques such as silicon poisoning, but at least it pushes openness and disclosure down a layer, which is tangible progress in the right direction.

While these heady principles are great for motivating the journey, actual execution needs a set of focused requirements. And so, the above principles boiled down to the following requirements for the design:

  • All the components should have a reasonably complete set of NDA-free documentation. This single requirement alone culled many choices. For example, Freescale is the only SoC vendor in this performance class where you can simply go to their website, click a link, and download a mostly complete 6,000-page programming manual. It’s a ballsy move on their part and I commend them for the effort.
  • Low cost is not an objective. I’m not looking to build a crippled platform based on some entry-level single-core SoC just so I can compete price-wise with the likes of Broadcom’s non-profit Raspberry Pi platform.
  • On the other hand, I can’t spec in unicorn hair, although I come close to that by making the outer case from genuine leather (I love that my laptop smells of leather when it runs). All the chips are ideally available off the shelf from distributors like Digi-Key and have at least a five year production lifetime.
  • Batteries are based off of cheap and commonly available packs used in RC hobby circles, enabling users to make the choice between battery pack size, runtime, and mass. This makes answering the question of “what’s the battery life” a bit hard to answer – it’s really up to you – although one planned scenario is the trans-Siberian railroad trek, which is a week-long trip with no power outlets.
  • The display should also be user-configurable. The US supply chain is weak when it comes to raw high-end LCD panels, and also to address the aforementioned trans-Siberian scenario, we’d need the ability to drive a low-power display like a Pixel Qi, but not make it a permanent choice. So, I designed the main board to work with a cheap LCD adapter board for maximum flexibility.
  • No binary blobs should be required to boot and operate the system for the scenarios I care about. This one is a bit tricky, as it heavily limits the wifi card selection, I don’t use the GPU, and I rely on software-only decoders for video. But overall, the bet paid off; the laptop is still very usable in a binary-blob free state. We prepared and gave a talk recently at 30C3 using only the laptops.
  • The physical design should be accessible – no need to remove a dozen screws just to pull off the keyboard. This design requires removing just two screws.
  • The design doesn’t have to be particularly thin or light; I’d be happy if it was on par with the 3cm-thick Thinkpads or Inspirons I would use back in the mid 2000’s.
  • The machine must be useful as a hardware hacking platform. This drives the rather unique inclusion of an FPGA into the mainboard.
  • The machine must be useful as a security hacking platform. This drives the other unusual inclusion of two Ethernet interfaces, a USB OTG port, and the addition of 256 MiB DDR3 RAM and a high-speed expansion connector off of the FPGA.
  • The machine must be able to build its own firmware from source. This drives certain minimum performance specs and mandates the inclusion of a SATA interface for running off of an SSD.

After over a year and a half of hard work, I’m happy to say our machines are in a usable form. The motherboards are very reliable, the display is a 13” 2560×1700 (239ppi) LED-backlit panel, and the cases have an endoskeleton made of 5052 and 7075 aluminum alloys, an exterior wrapping of genuine leather, an interior laminate of paper (I also love books and papercraft), and cosmetic panels 3D printed on a Form 1. The design is no Thinkpad Carbon X1, but they’ve held together through a couple of rough international trips, and we use our machines almost every day.

Laptop parked in front of the Form1 3D printer used to make its body panels.

I was surprised to find the laptop was well-received by hackers, given its homebrew appearance, relatively meager specs and high price. The positive response has encouraged us to plan a crowd funding campaign around a substantially simplified (think “all in one PC” with a battery) case design. We think it may be reasonable to kick off the campaign shortly after Chinese New Year, maybe late February or March. Follow @novenakosagi for updates on our progress!

The first two prototypes are wrapped in red sheepskin leather, and green pig suede leather.

Detail view of the business half of the laptop.

Building my Own Laptop

Sunday, December 16th, 2012

We are building an open laptop, with some wacky features in it for hackers like me.

This is a lengthy project. Fortunately, ARM CPUs are getting fast enough, and Moore’s Law is slowing down, so that even if it took a year or so to complete, I won’t be left with a woefully useless design. Today’s state of the art ARM CPUs — quad-core with GHz+ performance levels — is good enough for most day-to-day code development, email checking, browsing etc.

We started the design in June, and last week I got my first prototype motherboards, hot off the SMT line. It’s booting linux, and I’m currently grinding through the validation of all the sub-components. I thought I’d share the design progress with my readers.

Of course, a feature of a build-it-yourself laptop is that all the design documentation is open, so others of sufficient skill and resources can also build it. The hardware and its sub-components are picked so as to make this the most practically open hardware laptop I could create using state of the art technology. You can download, without NDA, the datasheets for all the components, and key peripheral options are available so it’s possible to build a complete firmware from source with no opaque blobs.

Above is an annotated diagram of the circuit board. The dimensions of the board are approximately 121mm x 150mm — sized to fit comfortably underneath a standard-sized laptop keyboard. The image above is rotated versus the installation orientation; the port farm is meant to be on the right hand side of the laptop, not on the bottom. The overall height of the board is just under 14mm, with the height being set by the thickness of an Ethernet connector. The thickness on my Lenovo T520 base portion is just under 24mm, so once we stack a keyboard and plastics on this it’ll be just about the same.

Here are some of the features of the laptop motherboard:

  • Freescale iMX6 CPU — same footprint can support dual-lite and quad versions:
  • Internal memory:
    • Boot from microSD firmware
    • 64-bit, DDR3-1066 SO-DIMM, upgradable to 4GB
    • SATA-II (3Gbps)
  • Internal ports & sensors:
    • mini PCI-express slot (for blob-free wifi, bluetooth, mobile data, etc.)
    • UIM slot for mPCIe mobile data cards
    • Dual-channel LVDS LCD connector (up to QXGA (2048×1536) @ 60Hz resolution) with USB2.0 side-channel for a display-side camera
    • Resistive touchscreen controller (note: captouch displays typically come with a controller)
    • 1.1W, 8-ohm internal speaker connectors
    • 2x USB2.0 internal connectors for keyboard and mouse/trackpad
    • Digital microphone
    • 3-axis accelerometer
    • header for optional AW-NU137 wifi module (*)
  • External ports:
    • HDMI
    • SD card reader
    • headphone + mic port (compatible with most mobile phone headsets, supports sensing in-line cable buttons)
    • 2x USB 2.0 ports, supporting high-current (1.5A) device charging
    • 1Gbit ethernet
  • “Fun” features:
    • 100 Mbit ethernet — dual Ethernet capability allows laptop to be used as an in-line packet filter or router
    • USB OTG — enables laptop to spoof/fuzz ethernet, serial, etc. over USB via gadget interface to other USB hosts
    • Utility serial EEPROM — for storing crash logs and other bits of handy data
    • Spartan-6 CSG324-packaged FPGA — has several interfaces to the CPU, including a 2Gbit/s (peak) RAM-like bus — for your bitcoin mining needs. Or whatever else you might want to toss in an FPGA.
    • 8x FPGA-driven 12-bit, 200ksps analog inputs
    • 8x FPGA-driven digital I/O
    • 8x FPGA-driven PWM headers, compatible with hobby ESC and PWM pinouts — enables direct interfacing with various RC motor/servo configurations & quad-copter controllers
    • Raspberry-Pi compatible expansion header
    • 13x CPU-driven supplemental digital I/Os
    • 3x internal UART ports

    Items marked with an asterisk (*) require a closed-source firmware blob, but the system is functional and bootable without the blob.

    In order to give maximum power management flexibility, the battery interface functions are implemented on a daughtercard. I co-opt a cheap and common SATA-style connector to route power and control signals between the mainboard and the daughtercard. To prevent users from accidentally plugging a hard drive into the battery port, I inverted the gender of the battery-SATA connector from the actual mass storage SATA-II connector. The current battery card is meant to work with the battery packs used by most RC enthusiasts — LiPo packs ranging from 2S1P to 4S1P (2-cell to 4-cell). RC packs are great because they are designed for super-fast charging. They are also cheap and easy to buy. For the board-side battery plug I decided to use the Molex connector found on classic disk drives, since they are cheap, common, and easy to assemble with simple tools. I couldn’t use a standard RC connector because the vast majority of them are designed for in-line use, and the few that have board mounts are too thick or too weird for use in this application.

    The battery board can charge batteries at rates in excess of 4A. This means charging a 3-cell, 45Wh (4Ah) pack in about one hour. I’m estimating that a typical power consumption for a reasonable system configuration might be around 5-6W, so that’s 7-8 hours of runtime with a 1-hour charge time using that type of battery pack. Of course, since the whole laptop is user-configurable, typical power consumption is really hard to estimate — you could drop in a monster LCD and a power-hungry magnetic hard drive with loads of peripherals and the power consumption could be much higher. Of course, you can drop in a 100Wh battery pack if you wanted as well :)

    Another cute feature of the battery board is that it can drive an analog panel meter. Xobs had suggested that it would be neat to embed a retro analog needle meter into the palmrest of the laptop to give a real-time display of power consumption. I thought it was a great idea, so I designed that in. Of course, the analog meter is driven by a DAC on the battery microcontroller, so it can be configured to perform a multitude of useful (or not so useful) analog read-outs, such as remaining runtime, battery voltage, temperature, the time (represented as an analog value), etc.

    Next up is to spend a couple months validating all the features on the board — a long list of features to grind through indeed — and port drivers and a linux distro (no small task, but I’ll have Xobs‘ skillful help). I also am looking forward to designing the enclosure. Probably for the first rev, I will do something out of laser-cut acrylic that is vaguely tablet-like, to avoid having to mess around with a friction clutch on version 1 of the plastics.

    A detached keyboard/trackpoint is attractive to me because I’ve always wanted a display I can “hang” on the seat in front of mine when sitting in an airplane or a bus — it’s a lot easier on the neck and the arrangement actually works better if the person in front reclines their seat.

    Once I’ve got some experience integrating the whole thing, I’ll probably design a rev-2 case using CNC-cut ABS and aluminum. CNC cut ABS is almost as robust as injection molded ABS, and can produce reasonably intricate shapes. It’s also relatively economical to produce in single quantities. The CNC-cut design could be a clamshell design, or maybe some other funky design. Maybe I’ll try using wood and brass — who knows, the whole idea of making my own laptop is to play around with some new ideas!

    It occurs to me that maybe other people might also be interested in owning a laptop like this, but don’t want to go through the trouble of fabricating their own circuit boards. If it seems like a few hundred folks are interested, I might be convinced to try a Kickstarter campaign in several months, once the design is stable and tested. However, I’m not looking to break any low-price records for this laptop — if you just want a cheap linux laptop you’re better off buying a netbook or EeePC. This is a low-volume, hand-crafted laptop made with uniquely open-source components, so the pricing would be consistent with such crafted goods.

    For those interested in the source files for the current early prototype iteration of the design, bounce over to the Novena wiki, and keep an eye on Xobs’ blog. Novena (yet another Singaporean metro station, and also Latin for “nine”) is our stand-in codename for the laptop motherboard.