Last month’s ware were boards from a Sony HCD-T1. Thanks again to spida for contributing the ware, and congratulations to marcan for nailing it. Ping me if you want a prize!
Archive for the ‘Hacking’ Category
Winner, Name that Ware October 2024
Saturday, November 30th, 2024Name that Ware, October 2024
Wednesday, October 30th, 2024The Ware for October 2024 is shown below.
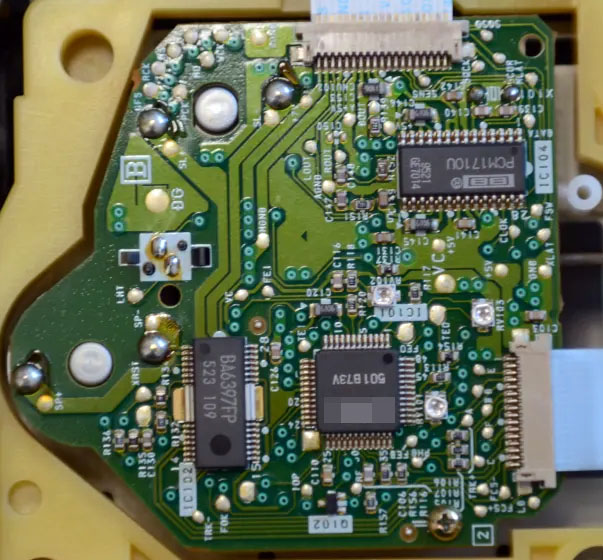
This one should be a smidge easier to guess than last month’s ware. The main reason I liked this ware is actually the board shown below with the prominent star-routing. It’s such traditional hand-routing work, I love craftsmanship like this.
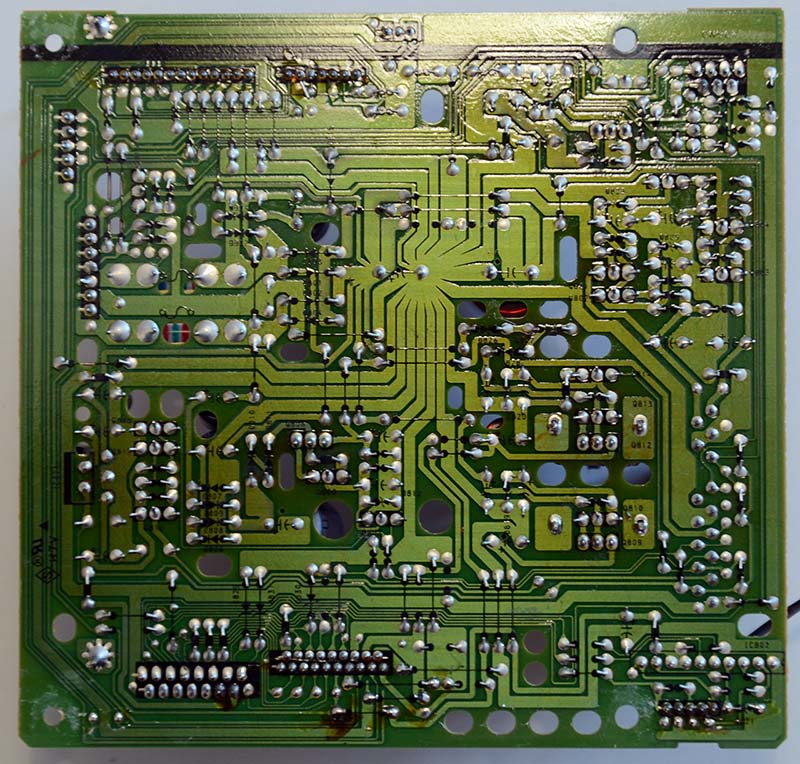
For completeness, this is the top side of the board shown above:

Thanks to spida for sharing this ware!
Also, just in time for Halloween, this spooky ware made its way to my desk:
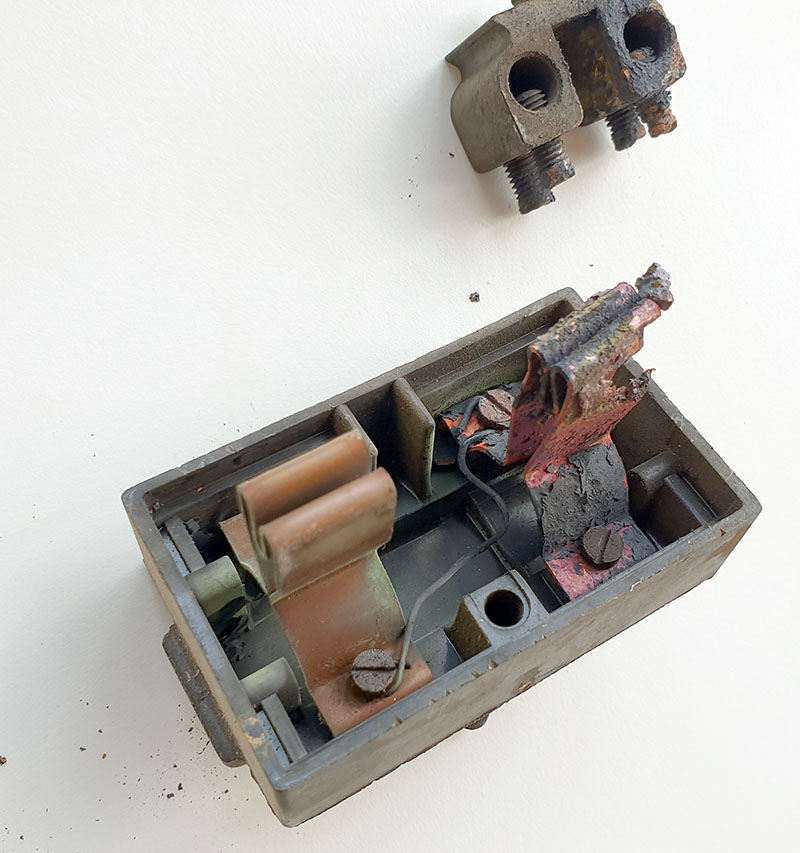
This is the “fuse box” that was connecting my flat to the power mains. I live in one of the oldest buildings in Singapore; I’m pretty sure this is part of the original wiring, which makes it over 50 years old. I guess at some point, someone decided to replace the fuse with a…wire.
OK, sure.
That’s spooky enough as it is … but also not so spooky, given that downstream of it are two very modern circuit breaker boxes with GFIs. So, I think its sole purpose was to give the power company a “switch” to disconnect the power meter from the mains, if they had to service the meter.
However, the fuse cartridge probably also played some role in pushing the copper fingers into the receptacle, so without the fuse in place, the fingers were not pushing firmly against the terminal block. Over time, one of the fingers turned into a miniature electron milling experiment.
The air quality sensor in my place had ticked up slightly a couple days ago, and I thought maybe it was the haze coming back; but then last night I smelled an acrid smell I know all too well, and when I poked my head out I heard the slight crackling of electricity arcing coming from the mains panel, and knew I had to drop everything and look for the source of trouble.
So, the servers were down for a bit yesterday, but at least I have power now and only a slightly charred mounting board at the power entry point of the unit, instead no electricity and an entirely charred unit. My place is now slightly less cursed, but if I were to be honest, this is probably not the most cursed circuit on the premises…my lab is a veritable crypt of cursed circuitry!
Winner, Name that Ware September 2024
Wednesday, October 30th, 2024Last month’s Ware was a Cue COVID test reader. It uses LAMP (loop-mediated isothermal amplification) to perform a fast and sensitive detection of nucleic acid sequences. Thanks again to Curtis Galloway for contributing this ware for me to take apart and photograph!
Nobody had guessed the ware exactly, but “microfluidic lab on a chip” is a pretty fair generic description of a LAMP reader, so I’ll give the prize to Jimmy. Congrats and email me for your prize!
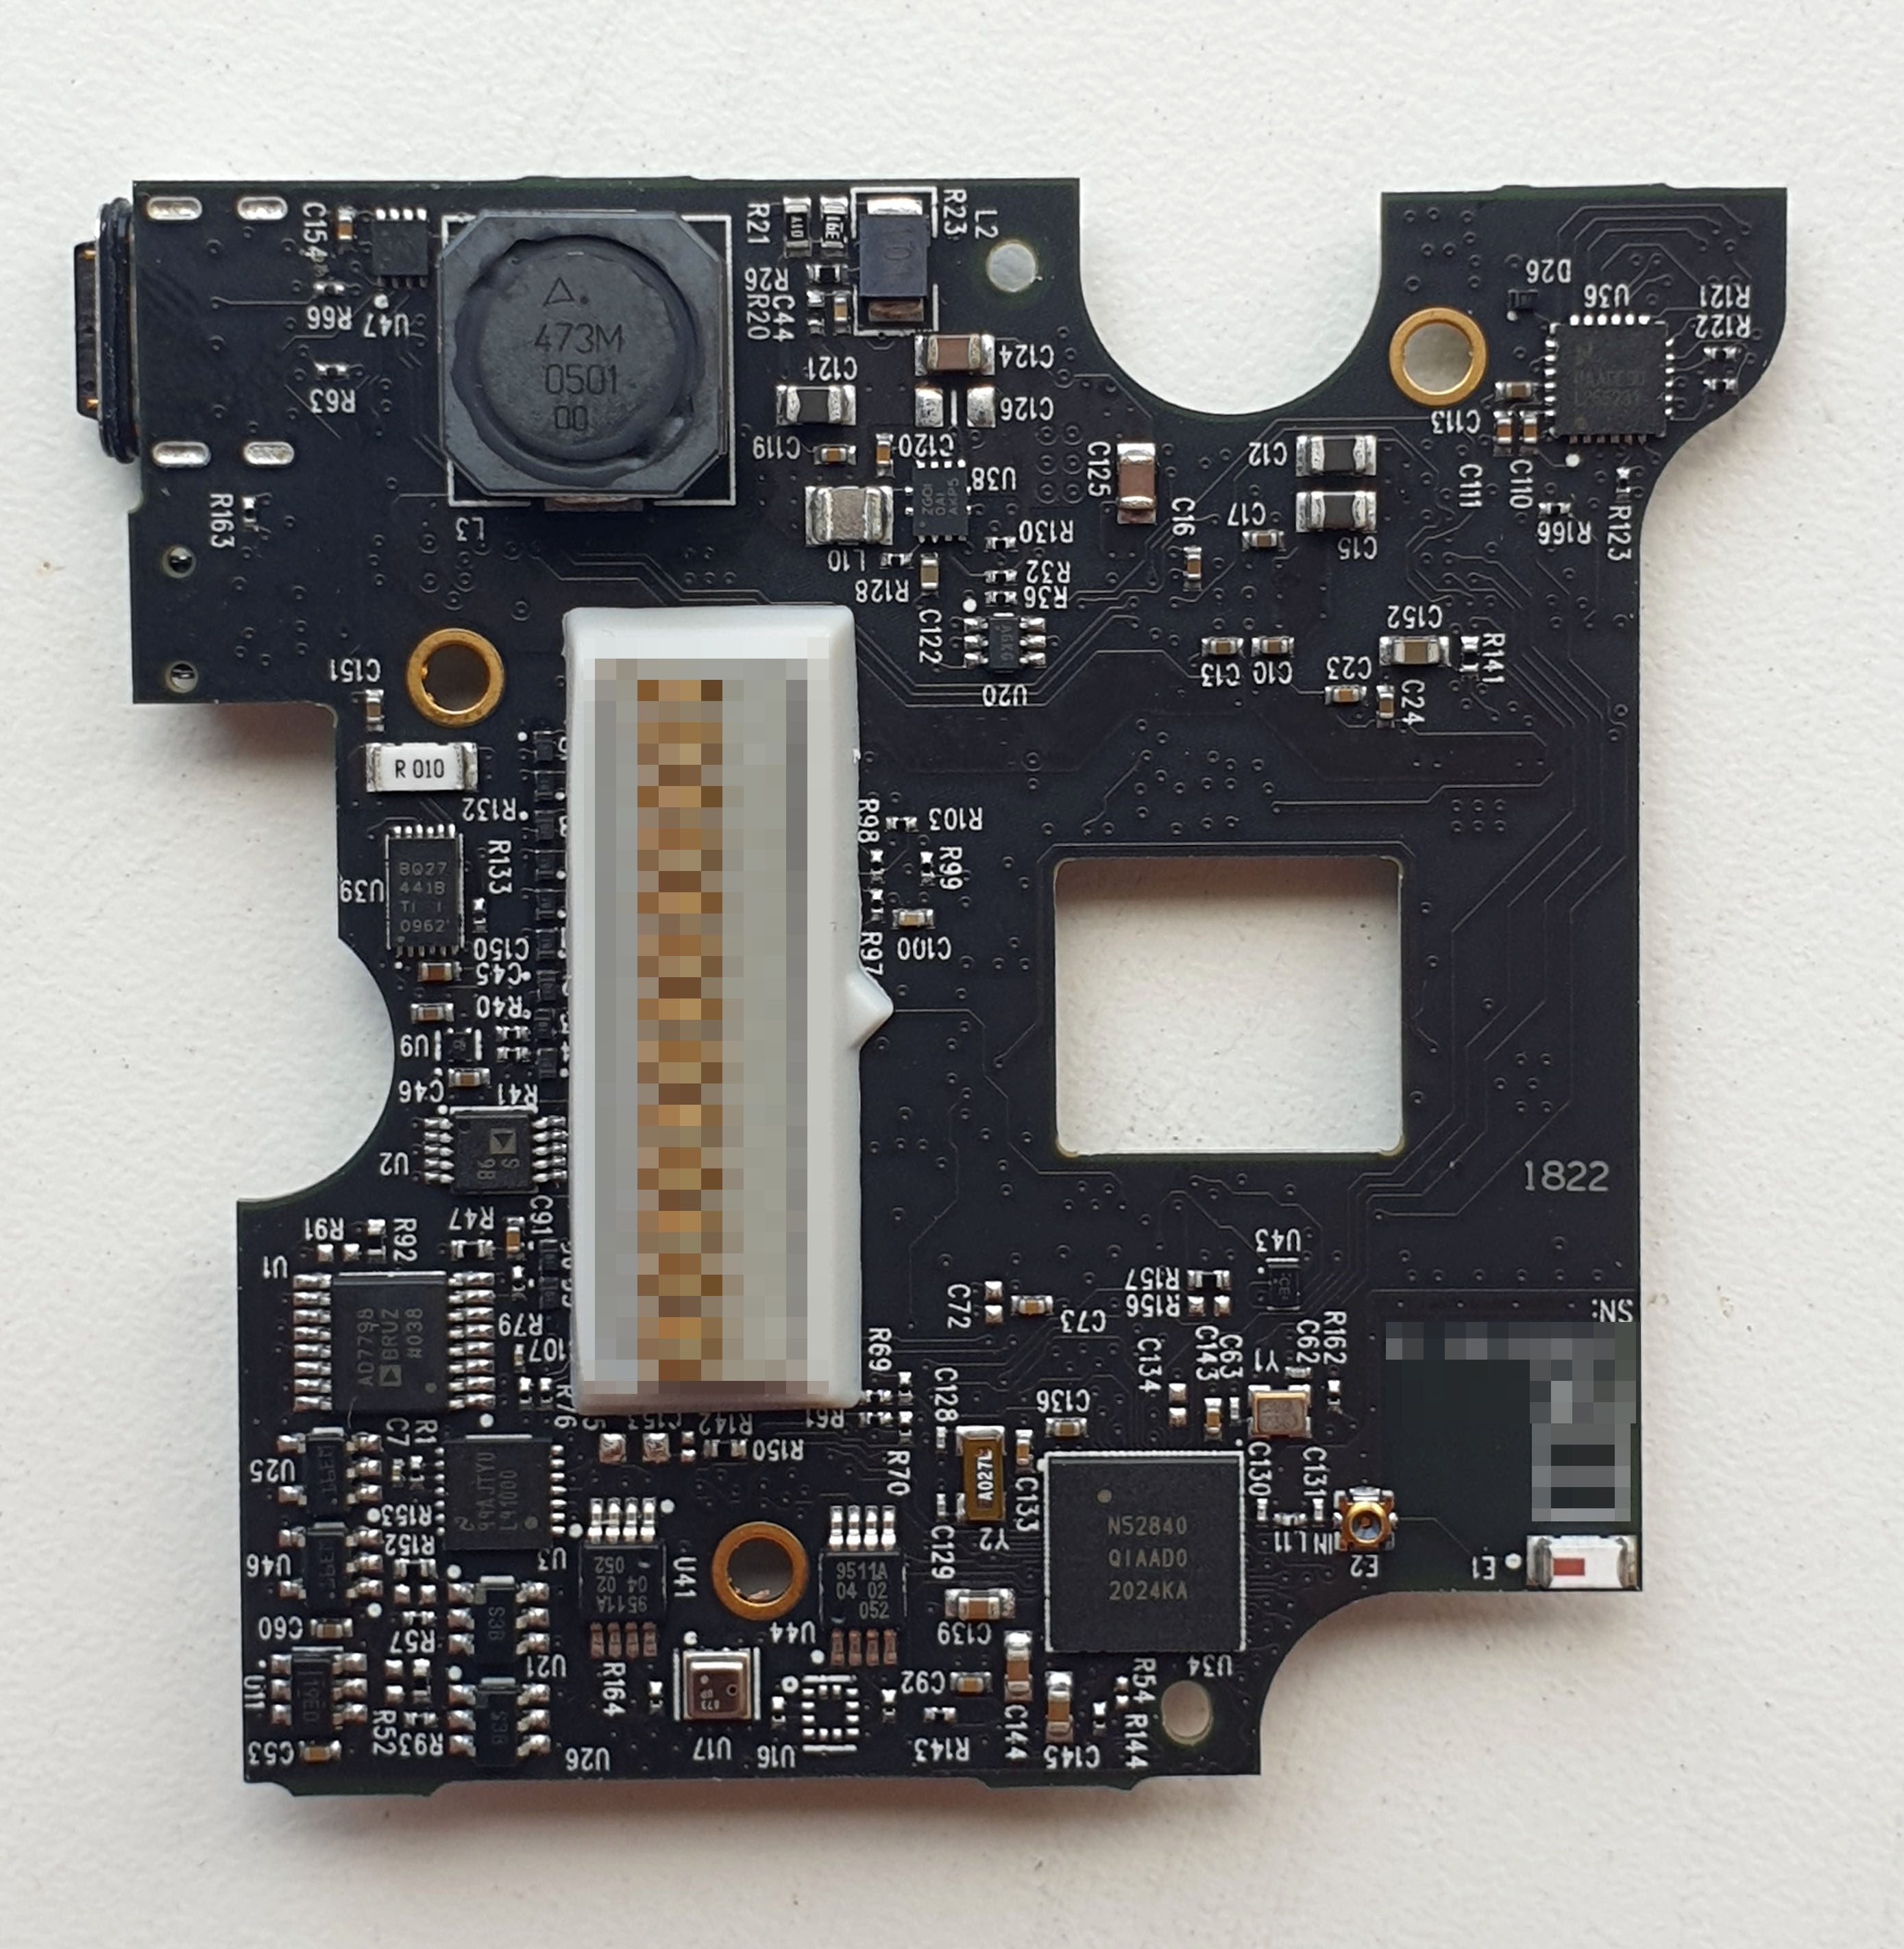
I had perhaps gotten a bit overzealous with the image redaction, but here is the connector on the PCB that I had blurred out previously. I figured this connector would have been a dead ringer for the mating Cue cartridge.

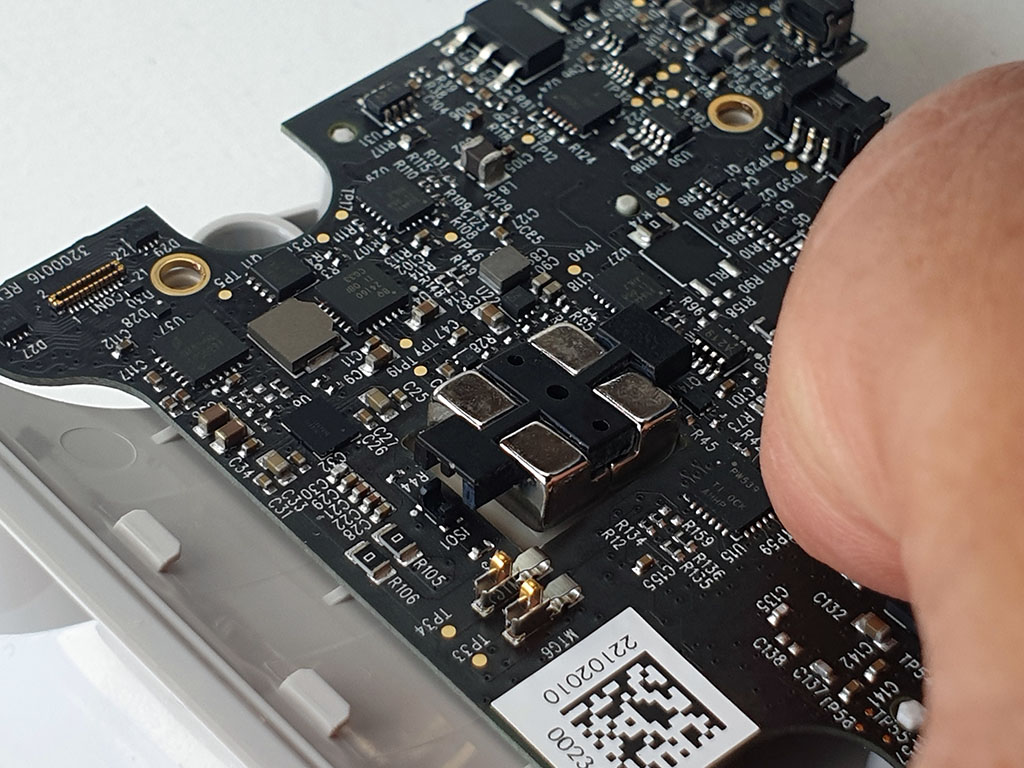
One other interesting facet – the miniature optical interrupters I highlighted previously are used to detect when the assembly shown above is no longer flush to the circuit board. It’s basically a set of very strong magnets on a flexible polymer membrane.
I’m not quite sure how it works as I’ve never used the test myself, but I seem to recall the test cartridge having a slug of metal in it that would mate with this magnet. Probably, the magnets help to hold the test in place and make firm contact with the connector while giving positive feedback to the user it’s been inserted correctly, and the interrupters allow the circuitry to know when the cartridge is all the way in. The entire thing is constructed to resist some amount of accidental liquid exposure, so this perhaps explains the need for a mechanism to detect cartridge insertion via a sealed, flexible polymer membrane.
Name that Ware, September 2024
Monday, September 30th, 2024The Ware for September 2024 is shown below:
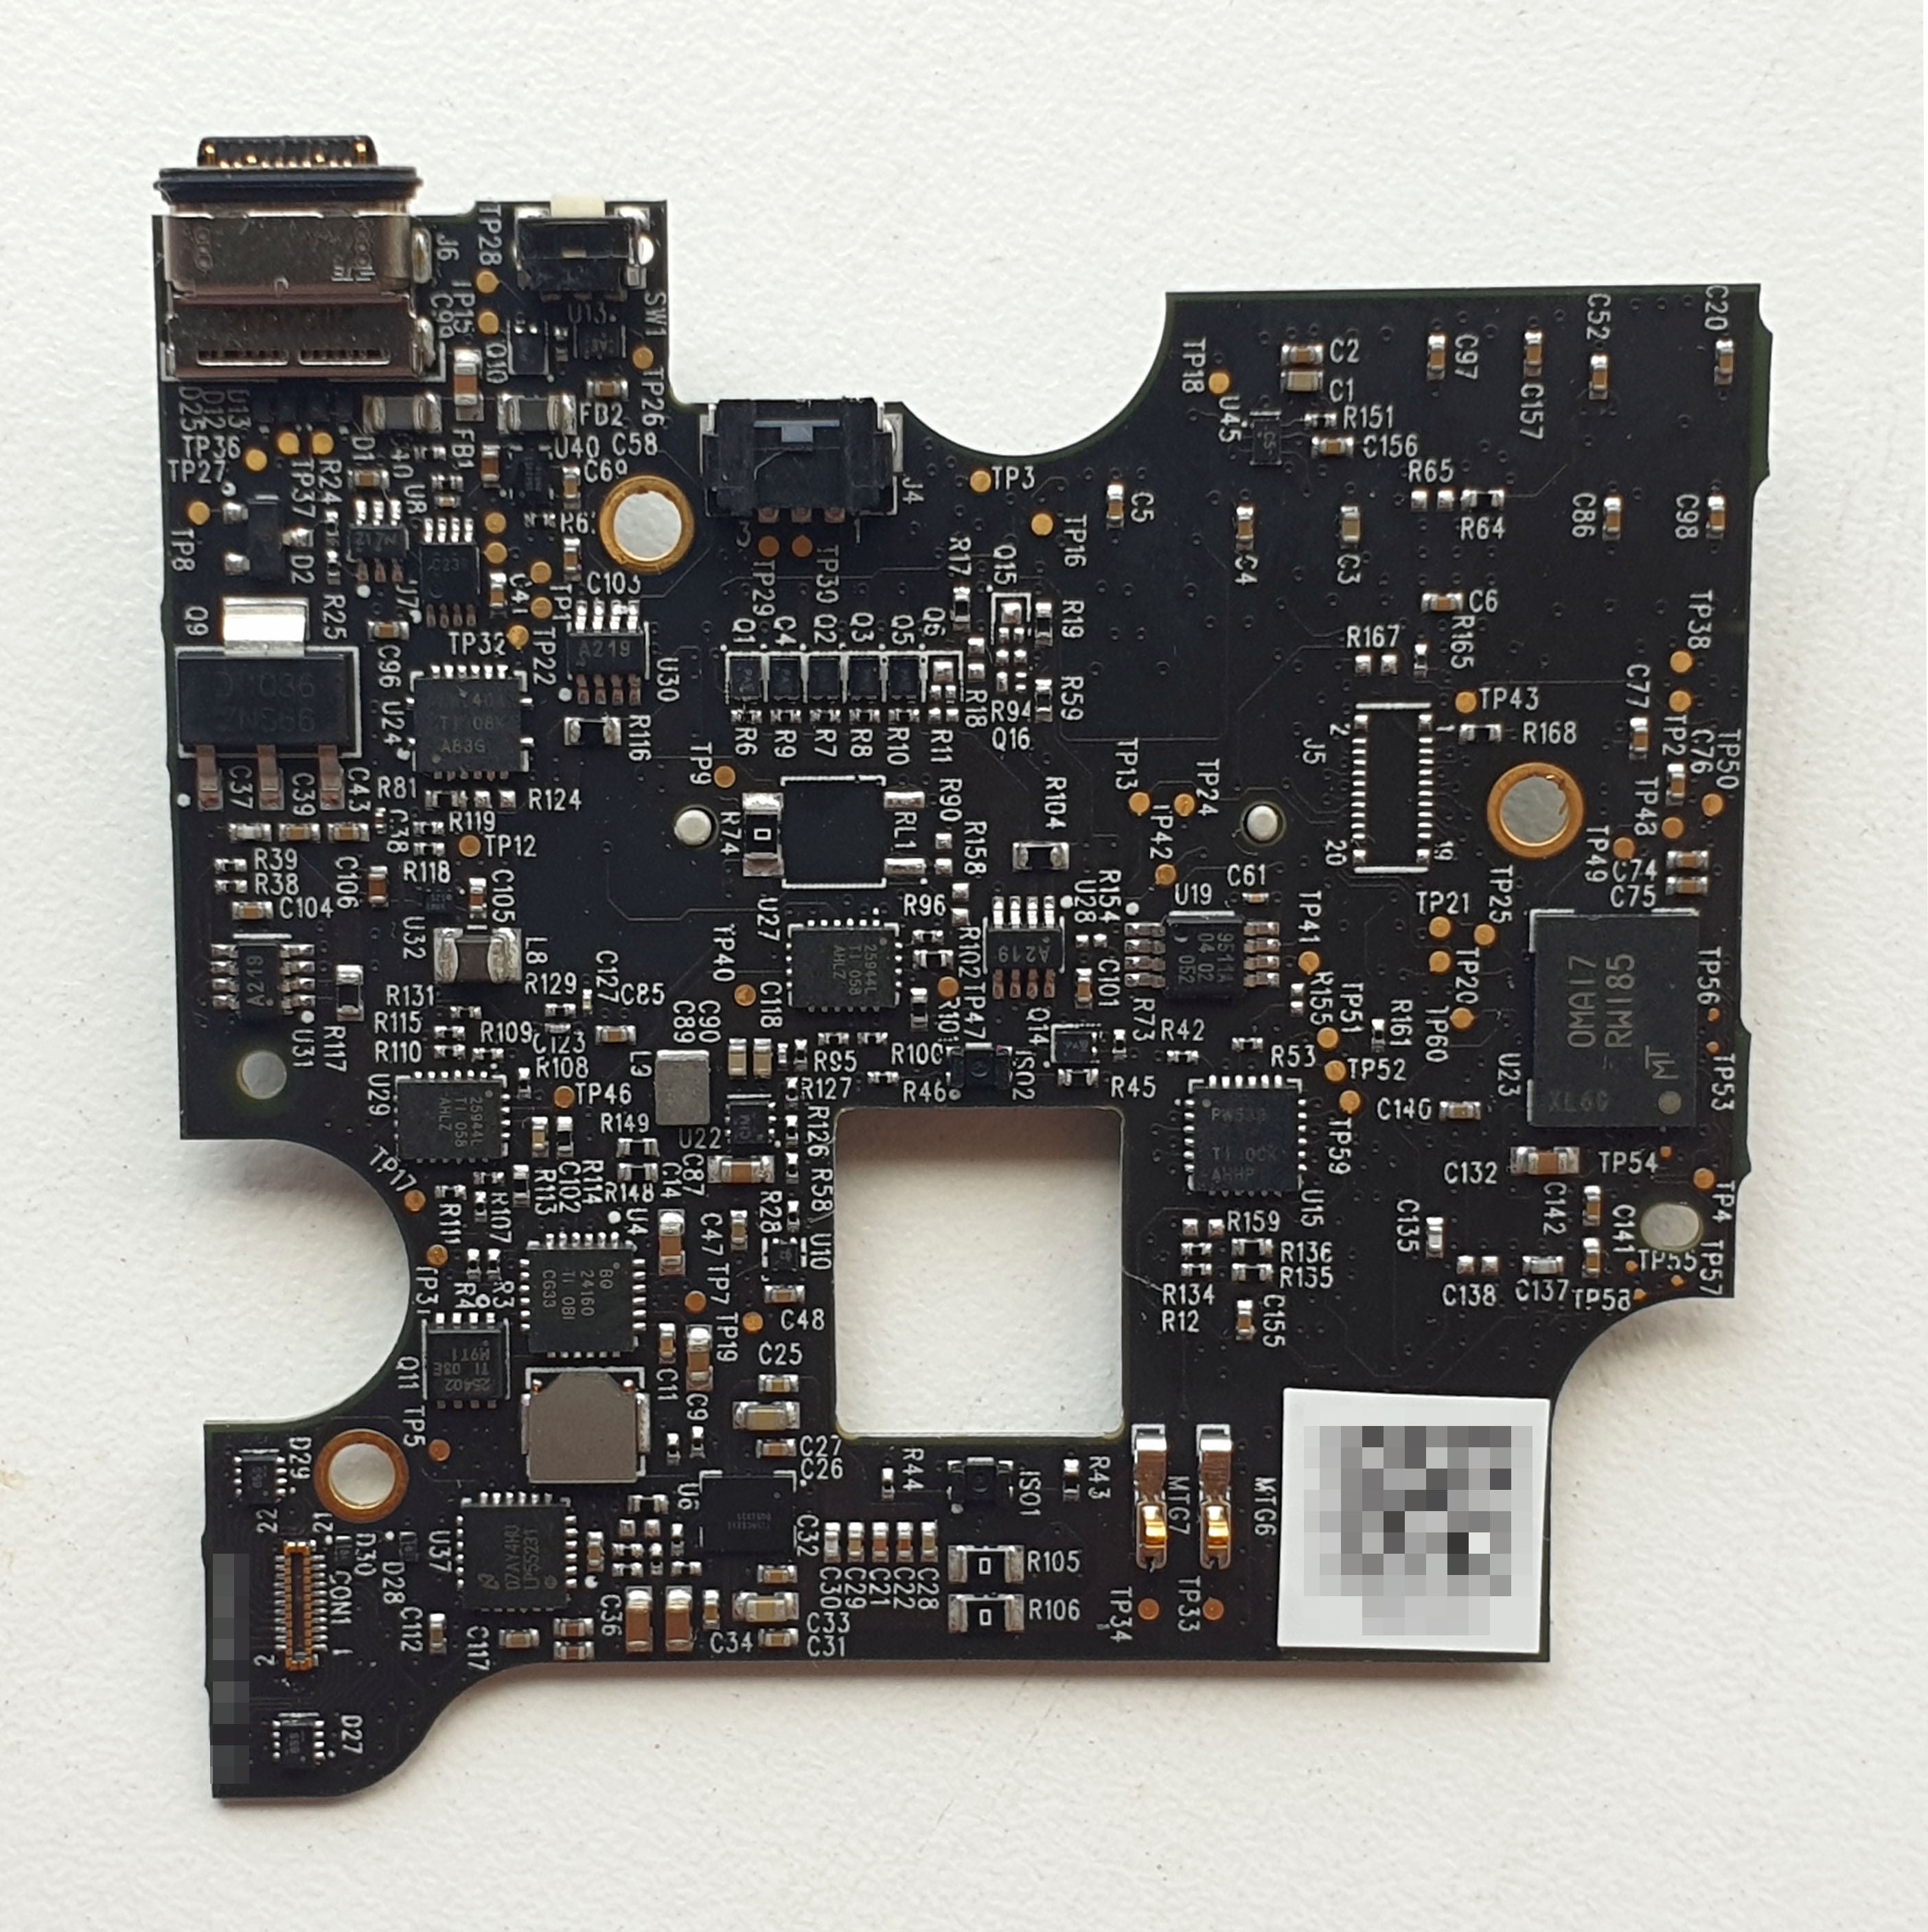
This ware was a gift, but I won’t credit the donor until the solution is revealed, because the credit itself might give a clue about the ware.
My first reaction to seeing this board is: “this thing has a high BOM cost”. My second thought is the engineers who put it together (hopefully) got a lot of free lunches and design advice from US-based FAEs (been there, done that!). My third reaction is, huh, this is a thing (link goes to a Digikey listing for the tiniest photointerrupter that I have ever seen – 2.26 x 1.4 x 1.6mm – it’s ISO1 and ISO2 in the first image of the board; they are flanking the top and bottom of the rectangular cut-out in the board. Could come in handy someday, especially with the compact electromechanics of IRIS…).
Winner, Name that Ware August 2024
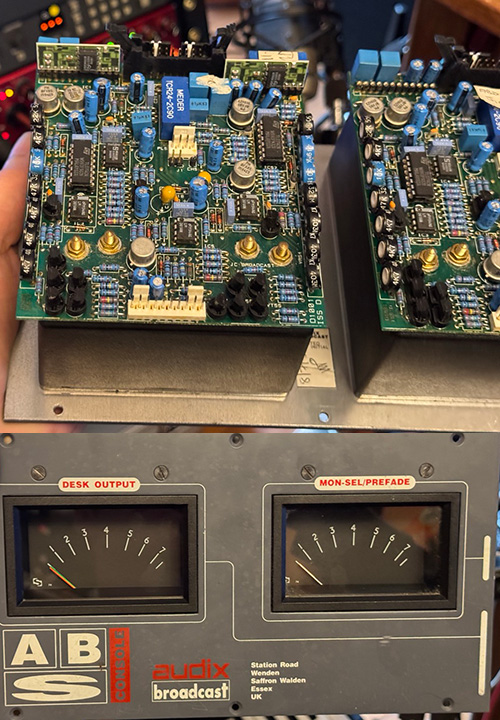
Monday, September 30th, 2024Last month’s Ware was a peak programming meter driver board made by JC Broadcast, taken from an Audix broadcast console. Thanks again to Howie M for contributing the ware!
Howie hypothesized that the four mounting holes would be a dead give-away, in his words:
The meters, typical in the broadcast world, have two needles against a single scale; the 4 holes in this board are both mounting points and contacts for the two coils. The board takes a pair of balanced audio inputs, and drives the pair of needles with tightly controlled (and calibratable) ballistic profiles such that they indicate and hold audio peaks correctly, rather than giving the typical slower VU meter response. The board lets you switch the meters between showing the A and B input levels, or a Sum and Difference reading (which I’m guessing is the purpose of the two Meder relays).
However, it looks like nobody picked up on the mounting holes, and this was a stumper. Personally, I think the closest guess was “two-channel galvo driver” – the panel meters are basically galvanometers, so the physics of the guess was correct, which is good enough for me (and probably about what I would have guessed in the end — something audio-adjacent, obsessively concerned with precision calibrations and/or control loop tuning, but without enough heat sinks to push any significant mass). Congrats, Matt, email me for your prize!
PS: the DIP8’s on the hybrids have a Philips logo, but even with the best shot I have of them on file, I still can’t make out the part number.